everquest blacksmithing guide

EverQuest Blacksmithing Guide: A Comprehensive Leveling Plan

Embark on a journey to master the art of forging! This detailed guide provides a structured path, from initial training through advanced techniques, to maximize your blacksmithing skill in EverQuest.

We’ll cover efficient leveling strategies, material sourcing, pit utilization, and recipe optimization, ensuring a rewarding crafting experience for all aspiring blacksmiths.

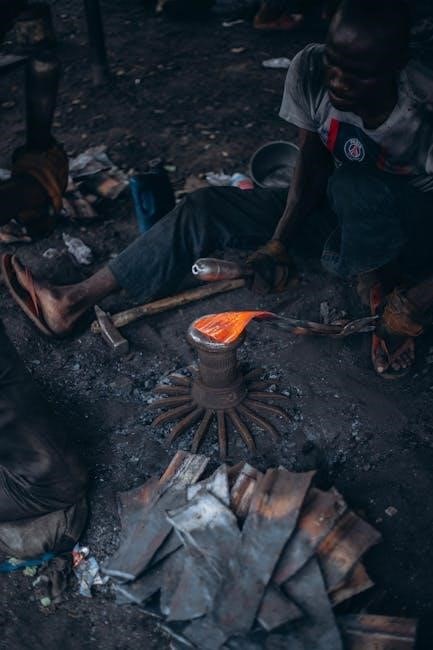
Blacksmithing in EverQuest is a versatile tradeskill, allowing players to create weapons, armor, and useful tools. It’s a rewarding path, though demanding patience and resourcefulness. This guide aims to streamline your progression, offering a clear roadmap from novice to Grandmaster;

Success hinges on understanding trivial ranges, efficient material gathering, and strategic recipe selection. Prepare to invest time and effort, but the benefits – powerful crafted gear and substantial profit – are well worth the dedication!

Understanding Skill Trivial Ranges

Trivial ranges are crucial for efficient skill-ups! A recipe’s trivial is the skill level at which it no longer yields experience. Always craft items within your current skill range for maximum gains. As your skill increases, seek recipes with higher trivial values.

Ignoring trivial ranges leads to wasted resources and stalled progression. Regularly check recipe trivial levels and adapt your crafting choices accordingly to maintain optimal experience acquisition.

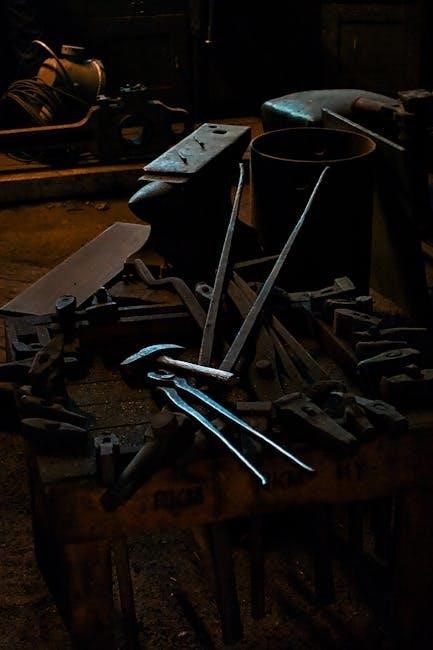
Essential Tools and Resources

Blacksmithing requires specific tools for success! A sharpening stone is vital for early levels, alongside readily available rusty weapons. Later, molds like the lantern casing become essential. Access to ore nodes and component vendors is paramount for material acquisition.

Utilizing blacksmithing pits offers significant benefits, boosting crafting efficiency and potentially reducing failure rates. Consistent resource gathering and smart vendor shopping are key to sustained progress.

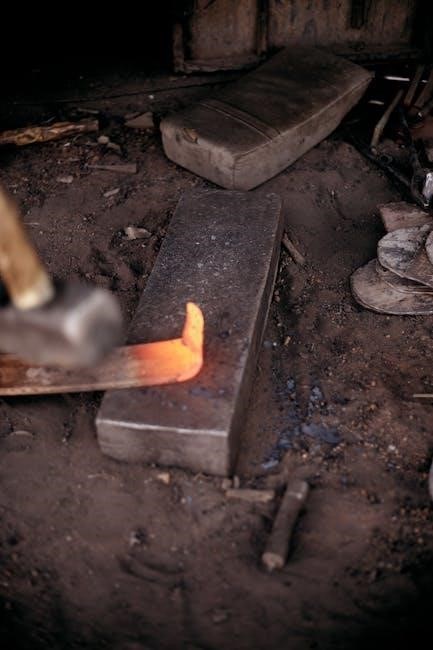
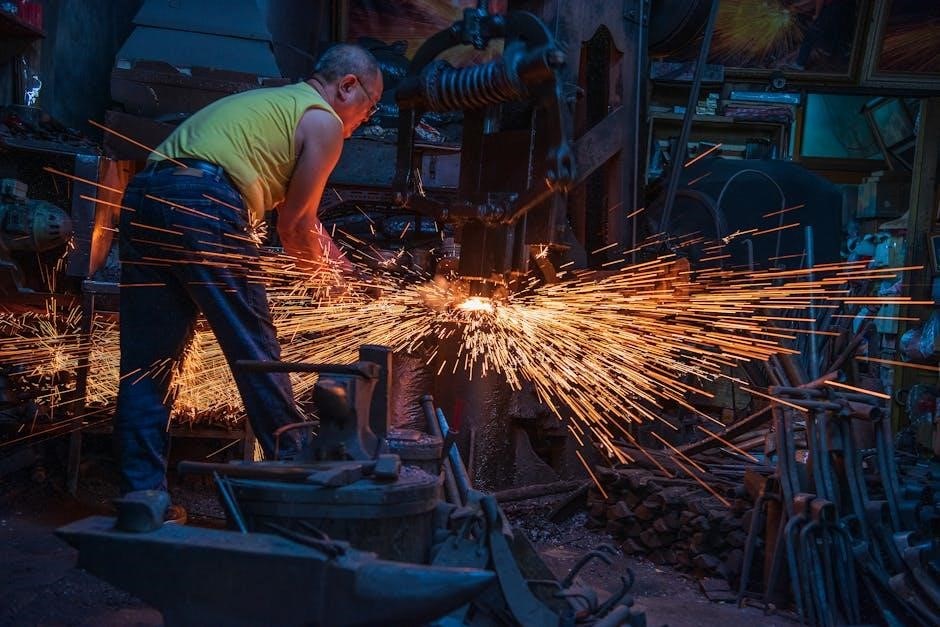
Levels 1-21: Initial Training and Sharpening

Begin your blacksmithing journey by sharpening rusty weapons! This repetitive task, using a sharpening stone and rusty weapon, provides consistent experience gains up to skill level 21. It’s a foundational grind, establishing basic crafting proficiency.

Focus on maximizing experience during this phase, as it sets the pace for future skill-ups. Efficiently sourcing rusty weapons is crucial for uninterrupted training and rapid initial progression.

Sharpening Rusty Weapons – The Early Grind

Prepare for a repetitive, yet essential, starting point! Sharpening rusty weapons with a sharpening stone is the primary method for levels 1-21. Expect a significant time investment, as it’s a straightforward, albeit monotonous, process.

The trivial range begins around skill 18, so continue until you experience diminishing returns. Stockpile rusty weapons beforehand to minimize downtime and maintain a consistent crafting flow.

Maximizing Experience Gain at Low Levels

Focus on consistent crafting to accelerate early skill-ups! While sharpening rusty weapons, prioritize crafting continuously, even with minor skill increases. Avoid breaks, as experience gain diminishes with higher skill levels.

Consider utilizing experience-boosting items if available, and always craft the highest trivial item possible to maximize XP per craft. Efficiency is key during this initial grind!

Levels 21-37: Steel Boning – A Reliable Path

Steel boning offers a stable and profitable leveling experience! This method provides consistent skill gains and a readily available market for crafted items. It’s a dependable choice for progressing beyond initial training.

Focus on volume crafting to maximize efficiency, and remember to maintain a steady supply of materials for uninterrupted production. Steel boning is a cornerstone of early blacksmithing.

Sourcing Materials for Steel Boning

Acquiring the necessary components is crucial for efficient steel boning! Iron ore, readily available in many zones, forms the base material. Combine this with charcoal, produced from wood, and a bit of skill to create steel bars.

Vendors often stock these basics, but mining your own ore offers cost savings and self-sufficiency. Prioritize consistent material gathering to avoid production bottlenecks.

Optimizing Steel Boning Production

Maximize your experience gain by focusing on successful crafts! Steel boning offers a reliable path, but trivial ranges matter. Continuously monitor your skill level and adjust ore choices accordingly to minimize failures.

Batch crafting is highly recommended for efficiency. Utilize a blacksmithing pit for increased skill-ups and reduced crafting time, streamlining the process and boosting your progress.

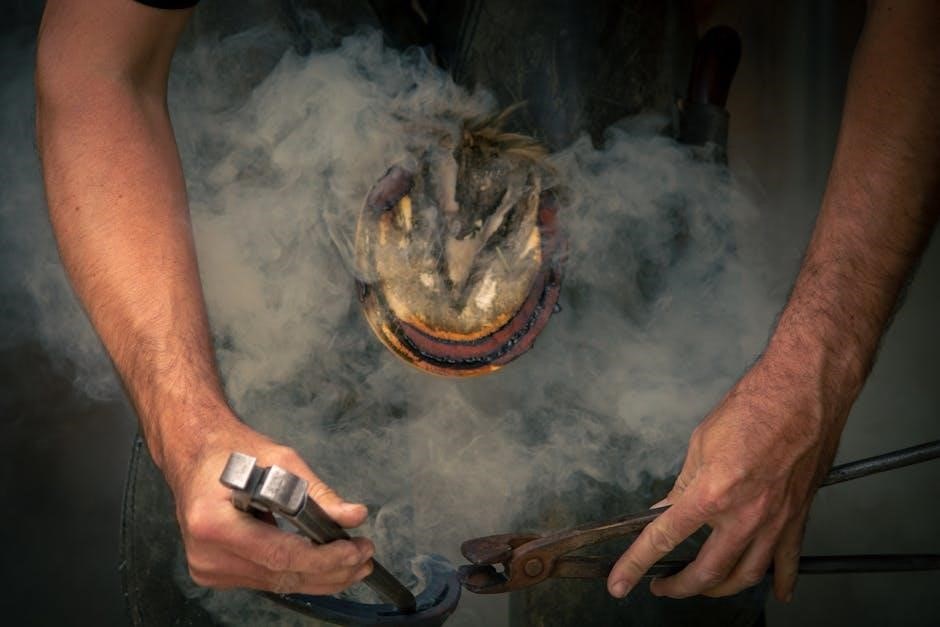
Levels 37-68: Large Lanterns – Increased Efficiency

Transitioning to Large Lanterns unlocks faster leveling! This method requires Bottles, Lantern Casing Molds, Metal Bits, and Water Flasks. Efficient gathering of these components is crucial for sustained production.

Lanterns provide a significant experience boost compared to steel boning. Prioritize acquiring a Lantern Casing Mold, as it’s essential for crafting, and maintain a steady material supply.

Gathering Components for Large Lanterns

Sourcing materials efficiently is key to lantern production! Bottles and Water Flasks are commonly found from vendors or dropped by lower-level creatures. Metal Bits are readily available through scavenging or purchasing from other players.

The Lantern Casing Mold is more challenging to obtain, often requiring quest completion or purchase from specialized merchants. Consistent component gathering ensures uninterrupted crafting sessions.

Lantern Casing Mold Acquisition

Securing the Lantern Casing Mold is crucial for progression! This essential item isn’t always readily available and often requires dedicated effort. Players may find it as a quest reward, typically involving gathering or delivery tasks.

Alternatively, check specialized vendors or the bazaar, though prices can fluctuate. Patience and diligent searching will ultimately yield the mold, unlocking efficient lantern crafting.

Levels 68-122: Banded and Plate Armor Components

This range focuses on crafting banded and, eventually, plate armor pieces. Banded armor provides a reliable experience path, utilizing readily available materials. As your skill increases, transition towards plate components for greater skill gains.

Prioritize recipes with minimal failure rates and consistent experience rewards. Careful material sourcing is key to maximizing efficiency and minimizing costs during this phase of blacksmithing.

Focusing on Banded Armor Production

Banded armor offers a sweet spot for experience gains between levels 68 and 90. Focus on crafting banded sleeves, gorgets, and leggings, as these recipes provide consistent skill-ups with manageable material costs.

Prioritize recipes with lower trivial levels to ensure successful crafts and avoid wasted resources. Efficient production of banded components will smoothly propel your blacksmithing skill forward.

Transitioning to Plate Armor Materials

As your skill surpasses 100, begin incorporating plate armor components into your crafting rotation. This requires sourcing higher-tier ores like refined steel and dark metal, alongside valuable alloys.

Plate recipes offer substantial experience rewards, but demand precise trivial management. Carefully select recipes aligning with your current skill level to minimize failures and maximize progression.

Levels 122-200: Refining Techniques and Material Choices

This range demands strategic ore selection and failure mitigation. Utilize higher-tier ores like chromesteel and mithril, constantly adapting to shifting trivial ranges for optimal skill-ups.

Mastering recipe combinations and understanding diminishing returns are crucial. Prioritize recipes offering the highest experience yield within your skill bracket, minimizing wasted efforts and maximizing gains.

Utilizing Higher-Tier Ores

Transitioning to ores like chromesteel, mithril, and even adamantite is essential. These materials offer increased skill-up potential, but require careful trivial monitoring to avoid wasted crafts.

Regularly check trivial ranges and adjust your ore choice accordingly. Higher-tier ores demand more precise timing, maximizing experience gains while minimizing frustrating failures during this progression.

Managing Failure Rates and Skill Increases

As your skill rises, failure rates will inevitably increase. Accept this as a natural part of the process and adapt your crafting strategy accordingly.

Focus on recipes within your optimal trivial range to maximize skill-ups. Don’t stubbornly persist with crafts that consistently fail; switch to a more appropriate recipe instead.

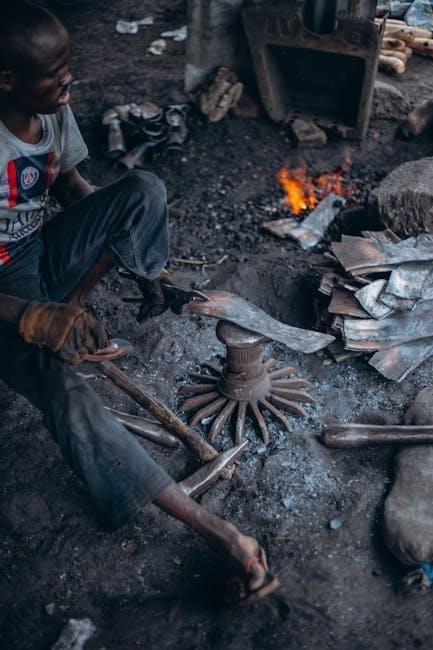
Blacksmithing Pits and Their Benefits

Blacksmithing pits offer significant advantages to dedicated crafters. Utilizing these specialized areas boosts crafting efficiency and provides unique benefits.

The Blacksmithing Pit (00001543), Armorsmithing Pit (00001548), and Metal Crafting Pit (0000154D) each cater to specific forging disciplines, enhancing skill gains and reducing crafting times.

Blacksmithing Pit (00001543)

The standard Blacksmithing Pit, identified by ID 00001543, is a versatile crafting location. It provides a general bonus to blacksmithing skill increases, making it ideal for a broad range of recipes.

This pit is particularly useful during early leveling and for crafting items that don’t specifically benefit from the specialized Armorsmithing or Metal Crafting pits.

Armorsmithing Pit (00001548)

The Armorsmithing Pit (ID 00001548) offers a focused bonus specifically for armor creation. This pit significantly enhances skill gains when crafting banded, plate, and other armor components.

Utilize this pit during levels 68-122 and beyond, when focusing on armor production, to accelerate your progress and minimize failed attempts at higher-tier crafting.

Metal Crafting Pit (0000154D)

The Metal Crafting Pit, identified by ID 0000154D, provides a general bonus to all metalworking endeavors. This includes weapons, tools, and various metal components crucial for blacksmithing progression.

Employ this pit during early levels and when diversifying your crafting, maximizing skill gains across a broader range of blacksmithing recipes and material types.

Disenchanting for Materials

Disenchanting offers a valuable alternative source of crafting components. By breaking down unwanted items, you can obtain materials otherwise requiring extensive gathering or expensive vendor purchases.

Higher quality items and increased item levels generally yield more valuable and rarer materials, enhancing your blacksmithing efficiency and reducing reliance on traditional resource acquisition.

Identifying Valuable Disenchanting Sources

Focus on purple and gold-quality items for optimal returns. Dungeon drops, raid rewards, and quest completions frequently provide these higher-tier pieces suitable for disenchanting.

Prioritize items with unique properties or those from challenging content, as they often contain rarer materials crucial for advanced blacksmithing recipes and specialized crafting endeavors.

Material Quality and Item Level Impact

Higher quality items yield superior materials upon disenchanting. Purple items provide more resources than white or blue, while gold offers the richest returns.

Item level also influences material quantity and type. Higher level items generally grant more valuable components, essential for crafting powerful gear and specialized blacksmithing projects.

Advanced Blacksmithing Recipes

Unlock specialized crafting options beyond basic armor and weapons! Explore recipes for intricate metalwork, decorative items, and unique components.

Recipe acquisition requires diligent searching and quest completion. Researching new formulas expands your crafting repertoire, allowing you to create highly sought-after items and dominate the market.

Exploring Specialized Crafting Options

Delve into niche blacksmithing areas for unique rewards! Consider focusing on crafting specific item types, like ornate lanterns or specialized tools, to cater to particular player needs.

Mastering these options demands dedication and resourcefulness. Specialized crafting often yields higher profits and unlocks exclusive recipes, setting you apart as a skilled artisan.

Recipe Acquisition and Research

Expanding your recipe knowledge is crucial for progression! Seek out recipes through quest rewards, vendor purchases, and diligent exploration of the game world.

Don’t underestimate the power of community resources. Online databases and player guides can reveal hidden recipes and optimal crafting strategies, accelerating your learning curve.

Optimizing Skill-Ups and Experience

Maximize your blacksmithing gains by understanding skill caps and diminishing returns! Focus on recipes within your trivial range for consistent skill-ups.

Strategic recipe selection is key. Prioritize crafts offering the highest experience yield for your current skill level, avoiding wasted efforts on overly trivial or challenging items.

Understanding Skill Cap and Diminishing Returns

As your skill rises, experience gains per craft decrease—this is diminishing returns. The skill cap limits further increases without overcoming this effect.

Crafting within your trivial range is crucial. Recipes too easy yield minimal XP, while those too difficult result in frequent failures and slow progression, hindering optimal leveling.

Strategic Recipe Selection for Maximum XP

Prioritize recipes that are slightly challenging, falling within your current trivial range for consistent skill-ups.

Avoid excessively easy crafts, as they offer minimal experience. Regularly reassess and adjust your recipe choices as your blacksmithing skill increases to maintain optimal XP gains.

Common Blacksmithing Mistakes to Avoid

Neglecting trivial ranges hinders progress; always use ores appropriate for your skill level. Inefficient material sourcing wastes time and resources – plan ahead! Ignoring skill caps leads to diminishing returns, slowing down leveling. Failing to adapt to changing trivial levels stalls advancement.

Ignoring Trivial Ranges

Crafting below your skill is inefficient, yielding minimal experience. Using ores far above your level results in frequent failures and wasted materials. Always check the trivial range before crafting; aim for recipes that are slightly challenging, but not overwhelmingly difficult, for optimal gains.

Inefficient Material Sourcing

Relying solely on vendors is costly and limits your progress. Actively gather ores and components through mining and hunting. Explore various resource locations to find the best deals and availability. Consider utilizing the marketplace strategically, but avoid overpaying for essential materials; plan ahead!

The Role of Quests in Blacksmithing

Blacksmithing-specific quests offer unique rewards, including recipes and valuable materials. Completing general quests can yield components needed for crafting, supplementing your gathering efforts. Prioritize quests that provide ores, metal bits, or other essential blacksmithing resources, accelerating your skill advancement and reducing costs.

Blacksmithing-Specific Quests

Dedicated blacksmithing quests often reward specialized recipes, unlocking advanced crafting options unavailable elsewhere. These quests frequently involve forging specific items for NPCs, demanding skill and resourcefulness. Successfully completing these challenges grants access to powerful gear and enhances your blacksmithing reputation within the game world.

Quests Providing Useful Materials

Many general EverQuest quests offer valuable materials for blacksmithing as rewards, supplementing your gathering efforts. These quests often involve hunting creatures that drop ores, metal scraps, or crafting components. Prioritizing these quests can significantly reduce material costs and accelerate your leveling progress, offering a practical advantage.

Leveling Considerations Beyond 200

Post-200, blacksmithing shifts towards specialization and refinement. Grandmaster challenges emerge, demanding mastery of specific crafting areas. Focusing on a niche – like high-end armor or specialized weapons – becomes crucial. Continuous experimentation with rare materials and advanced recipes unlocks true potential, pushing skill boundaries.

Grandmaster Blacksmithing Challenges

Grandmaster quests demand exceptional skill and rare resources. These challenges often involve crafting unique, high-level items with stringent quality requirements. Expect complex recipes, demanding precise material combinations and a deep understanding of trivial mechanics. Success unlocks prestigious titles and access to exclusive crafting options.

Focusing on Specific Crafting Specializations

Beyond 200, refine your focus! Specialize in areas like weaponsmithing, armorsmithing, or metal crafting to unlock advanced recipes and bonuses; Concentrated effort yields greater rewards, allowing mastery of specific item types. Consider market demand and personal preference when choosing a specialization path for optimal profitability.

Resource Gathering Locations

Efficient material acquisition is key! Explore various zones for ore nodes – iron, steel, and higher tiers. Check vendor locations in cities for metal bits, bottles, and lantern casings. Remember that component availability varies by server and time of day, so scout frequently for optimal gathering success.

Ore Nodes and Mining Spots

Locate rich ore deposits in zones like the Rathe Mountains and Kunark. Iron ore is abundant at lower levels, while steel requires venturing into more dangerous territories. Pay attention to respawn timers and competition from other players. Utilize mining tools to increase yield and efficiency when harvesting valuable ores.

Component Vendor Locations

Seek out essential components from vendors in major cities like Qeynos, Freeport, and PoK. Metal bits and bottles are commonly sold by general goods merchants. Lantern casing molds may require seeking specialized artisans. Regularly check vendor inventories, as stock can fluctuate, impacting your crafting progress significantly.

Understanding Ore Trivial Levels

Ore trivial levels dictate crafting success! Choose ores with trivial ranges slightly below your current skill for consistent skill-ups. As your skill increases, transition to higher-trivial ores to avoid diminishing returns. Monitor changing trivial ranges, as patches can alter ore effectiveness, optimizing your blacksmithing experience.

Choosing the Right Ore for Your Skill Level

Selecting appropriate ores is crucial for efficient leveling! Begin with lower-trivial ores like iron and copper, progressing to steel and then higher tiers. Aim for ores with a trivial around 10-20 below your skill, ensuring consistent skill gains. Adjust your ore choice as your skill increases, maximizing experience.

Adapting to Changing Trivial Ranges

Trivial ranges shift with game updates! Regularly check online resources and community forums for current ore trivial values. Don’t hesitate to switch ores even mid-crafting session if the trivial becomes too low. Prioritize consistent skill-ups over sticking to a single ore type, ensuring continued progress.

Frequently Asked Questions (FAQ)

Facing blacksmithing hurdles? Common issues include failed crafts and unclear trivial ranges. Troubleshooting often involves verifying material trivial levels and utilizing appropriate blacksmithing pits. Players frequently inquire about optimal leveling paths and efficient resource gathering. We address these concerns, providing clear guidance for a smoother crafting journey.

Troubleshooting Common Blacksmithing Issues

Experiencing frequent failures? Verify your ore’s trivial level aligns with your skill. Incorrect pit usage can also hinder success; select the appropriate pit for your crafting task; Persistent issues may stem from insufficient skill or flawed recipe selection. Remember to check material quality and consider skill caps.

Addressing Player Concerns and Queries

Many players struggle with diminishing returns as skill increases. Strategic recipe choices are crucial beyond level 122. Don’t hesitate to experiment with higher-tier ores, but manage failure rates carefully. Community forums offer valuable insights and recipe databases. Remember, patience and persistence are key to mastering blacksmithing!

love and respect workbook pdf free

Love and Respect Workbook: A Comprehensive Plan

Discover a pathway to a thriving marriage! This workbook, based on the popular concepts of love and respect, offers practical exercises.
Find resources and potentially a free PDF version online through sites like Internet Archive and greatebook.club, aiding your journey.

The foundational premise of the Love and Respect concept, popularized by Emerson Eggerichs, centers on understanding the differing core needs within a marriage. Men, fundamentally, crave respect, while women primarily desire love. This isn’t about manipulation, but recognizing inherent psychological differences. When these needs aren’t met, a destructive “Crazy Cycle” emerges, characterized by escalating conflict and emotional distance.

The Love and Respect Workbook is designed to help couples identify where these needs are unmet and develop strategies for fulfilling them. It’s not simply about feeling love or respect, but actively demonstrating it. The workbook provides exercises to unpack communication patterns, pinpoint triggers, and learn how to “spell love” and “spell respect” in ways that resonate with your partner.

Many couples seek a free PDF version of the workbook to begin this journey. While official free versions are limited, resources like the Internet Archive and websites offering ebook downloads (such as greatebook.club) may provide access. However, always exercise caution when downloading from unofficial sources to ensure file safety and authenticity.

The Core Principles of Love and Respect

At the heart of the Love and Respect philosophy lie two unwavering principles: unconditional love and unwavering respect. These aren’t merely sentiments; they are active choices and behaviors. For a wife, love is the oxygen of her soul – she needs to feel cherished, close, understood, and affirmed. For a husband, respect is paramount; he needs to feel admired, appreciated, and trusted by his wife.

The Love and Respect Workbook dives deep into these principles, challenging couples to examine how consistently they demonstrate them. It emphasizes that love without respect breeds resentment, and respect without love feels cold and unfulfilling. The workbook encourages identifying specific actions that communicate each principle, moving beyond vague intentions.

Finding a free PDF of the workbook can be a starting point for exploring these concepts. Websites like Internet Archive and ebook download platforms (greatebook.club) sometimes offer access. However, remember that a workbook is most effective when engaged with intentionally and consistently, and a physical copy may enhance the experience. Understanding these core principles is the first step towards a healthier, more fulfilling marriage.

Understanding the “Love She Most Desires”

Women often experience love through emotional connection and vulnerability. The “love she most desires” isn’t grand gestures, but consistent displays of affection, attentiveness, and understanding. This manifests in five key expressions, often remembered as the acronym “CLOSES”: Closeness (physical and emotional intimacy), Listening (actively hearing her thoughts and feelings), Openness (sharing your own inner world), Sensitivity (understanding her emotional needs), and Encouragement (affirming her dreams and aspirations).

The Love and Respect Workbook provides exercises to help husbands identify how well they are “spelling love” in these ways. It challenges men to move beyond simply feeling love and to actively demonstrate it through specific behaviors. It’s about creating a safe space where she feels truly seen, heard, and cherished.

Resources, including a potential free PDF version available on sites like Internet Archive and greatebook.club, can offer a deeper dive into these concepts. However, genuine understanding requires introspection and a willingness to learn your wife’s unique “love language.”

Understanding the “Respect He Desperately Needs”

Men primarily experience love as respect. This isn’t about dominance, but about feeling valued, appreciated, and trusted by his partner. Disrespect manifests as criticism, contempt, defensiveness, and stonewalling – behaviors that erode a man’s sense of worth. He needs to feel like his wife believes in his abilities, supports his decisions, and values his opinions.

The Love and Respect Workbook emphasizes that respect isn’t automatically given; it’s earned through a wife’s actions and words. It encourages wives to actively look for opportunities to show admiration, appreciation, and deference. This includes avoiding nagging, belittling, or undermining his authority, even in seemingly small ways.

Exploring resources, potentially including a free PDF version found on platforms like Internet Archive and greatebook.club, can provide practical strategies. However, truly understanding his needs requires empathy and a conscious effort to build him up, rather than tear him down. Respect is the foundation of his emotional security.

The Couple’s Communication Cycle

Effective communication is the lifeblood of a healthy marriage, but often couples fall into predictable, and sometimes destructive, patterns. The Love and Respect Workbook highlights how miscommunication frequently stems from unmet needs – a husband craving respect and a wife desiring love; When these needs aren’t addressed, a negative cycle begins to form.

This cycle typically involves a wife requesting something from her husband (often subtly), his perceived lack of respect in responding, her reacting with discontent, and his subsequent withdrawal. This withdrawal is then interpreted as a lack of love, escalating the conflict. Understanding this cycle is the first step towards breaking it.

Resources, including potentially a free PDF version available through sites like Internet Archive and greatebook.club, offer tools to identify and interrupt these patterns. Learning to speak each other’s “love language” and actively listening are crucial components. The workbook encourages intentional dialogue focused on expressing needs respectfully.

Identifying Unhealthy Communication Patterns

Many couples unknowingly engage in communication patterns that erode intimacy and foster resentment. These patterns often involve criticism, defensiveness, stonewalling, and contempt – behaviors that create a hostile environment. The Love and Respect Workbook provides a framework for recognizing these destructive tendencies within your own interactions.

Common unhealthy patterns include nagging, sarcasm, bringing up past grievances, and interrupting. A wife might express dissatisfaction indirectly, hoping her husband will “just know” what she needs, while he may respond with dismissiveness, triggering a cycle of escalating conflict. Recognizing these behaviors is vital for change.

Exploring resources, potentially including a free PDF version found on platforms like Internet Archive and greatebook.club, can offer self-assessment tools and exercises to pinpoint specific problematic interactions. The workbook emphasizes the importance of taking personal responsibility for one’s communication style and actively working towards healthier exchanges.

The “Crazy Cycle” Explained

The “Crazy Cycle” is a core concept in the Love and Respect framework, describing a recurring pattern of conflict that many couples experience. It begins with a wife’s request for love – often expressed indirectly – and a husband’s unintentional withdrawal of respect in response. This triggers escalating frustration and reactivity from both partners.

The cycle typically unfolds as the wife feels unloved and demands more closeness, while the husband feels nagged and withdraws further, perceiving it as disrespect. This leads to arguments, resentment, and a sense of being misunderstood. The Love and Respect Workbook breaks down this cycle into its component parts, helping couples identify their roles within it.

Resources, including potentially a free PDF version available through sites like Internet Archive and greatebook.club, offer detailed diagrams and exercises to illustrate the cycle’s dynamics. Understanding the cycle is the first step towards breaking it and establishing a more positive communication pattern.

Breaking the Crazy Cycle: A Step-by-Step Approach

Escaping the “Crazy Cycle” requires intentional effort and a willingness to change ingrained patterns. The Love and Respect Workbook provides a structured, step-by-step approach, beginning with self-awareness. Husbands must learn to proactively offer respect, even when feeling challenged, while wives need to directly request love in a clear, non-accusatory manner.

The workbook emphasizes the importance of interrupting the cycle before it escalates. This involves recognizing early warning signs – feelings of frustration or withdrawal – and responding with empathy and understanding. Husbands are encouraged to “spell love” (detailed in later sections), and wives to appreciate expressions of respect.

Finding a free PDF version of the workbook (potentially available on platforms like Internet Archive or greatebook.club) can provide convenient access to these exercises. Consistent practice and commitment to these steps are crucial for long-term success in fostering a healthier, more loving relationship.

The Importance of “Spelling Love” to Your Wife

Women often experience love differently than men, and simply feeling love isn’t always enough. “Spelling Love” – actively demonstrating affection in ways your wife understands – is paramount. The Love and Respect Workbook details five key ways to do this: Closeness, Openness, Understanding, Peacemaking, and Affirmation.

These aren’t merely grand gestures, but consistent, everyday actions. Closeness involves physical and emotional intimacy. Openness means sharing your thoughts and feelings. Understanding requires active listening without immediately offering solutions. Peacemaking prioritizes resolving conflict and restoring harmony. Affirmation involves verbalizing appreciation and admiration.

Accessing a free PDF of the workbook (potentially found on sites like Internet Archive or greatebook.club) can provide detailed guidance on implementing these strategies. Remember, spelling love isn’t about what you think she should need, but about consistently meeting her emotional needs, as she expresses them.

Five Ways to Spell Love: Closeness

Closeness, as a core component of “Spelling Love,” extends far beyond physical intimacy. While physical touch is vital, emotional closeness – sharing vulnerabilities, dreams, and fears – is equally crucial. This involves dedicated, uninterrupted time together, free from distractions like phones or work. It’s about creating a safe space where your wife feels truly seen and understood.

Small gestures contribute significantly: holding hands, a spontaneous hug, or simply sitting near each other. Regular date nights, even if at home, demonstrate a commitment to prioritizing your connection. Actively seeking her thoughts and opinions shows you value her inner world.

Resources like the Love and Respect Workbook (potentially available as a free PDF on platforms like Internet Archive or greatebook.club) offer exercises to cultivate closeness. Remember, consistent effort in building both physical and emotional proximity strengthens the bond and reassures her of your affection.

Five Ways to Spell Love: Openness

Openness, in the context of “Spelling Love,” signifies a willingness to share your inner world with your wife. This isn’t merely about disclosing information, but about vulnerability – revealing your thoughts, feelings, and even insecurities. It requires courage, as it means potentially exposing yourself to judgment or misunderstanding.

Practically, openness involves actively listening without interrupting, asking thoughtful questions, and responding honestly. Share your daily experiences, your struggles, and your triumphs. Don’t filter your thoughts; allow her to see the authentic you. This builds trust and deepens emotional intimacy.

The Love and Respect Workbook provides exercises designed to foster this level of communication. You might find a free PDF version available online through resources like Internet Archive or greatebook.club to aid your practice. Remember, consistent openness demonstrates respect for her intelligence and emotional capacity, assuring her of your genuine connection.

Five Ways to Spell Love: Understanding

“Understanding” as a love language isn’t about fixing your wife, but about genuinely seeking to comprehend her perspective. It’s about empathetic listening – truly hearing her feelings without immediately offering solutions or minimizing her experiences. She desires to be known, validated, and accepted for who she is, not who you think she should be;

This requires setting aside your own biases and assumptions, and actively trying to see the world through her eyes. Ask clarifying questions, reflect back what you hear to ensure accuracy, and resist the urge to interrupt or offer unsolicited advice. Focus on validating her emotions, even if you don’t necessarily agree with her viewpoint.

The Love and Respect Workbook offers tools to cultivate this skill. Exploring a free PDF version, potentially found on sites like Internet Archive or greatebook.club, can provide further guidance. Demonstrating understanding communicates deep respect and fosters a secure emotional bond.

Five Ways to Spell Love: Peacemaking

For a wife, “peacemaking” signifies safety and security within the relationship. It’s not about avoiding conflict altogether, but about prioritizing reconciliation and restoring harmony after disagreements. She longs for a partner who actively works to resolve issues rather than escalating them or holding onto resentment.

This involves a willingness to apologize, even when you don’t believe you’re entirely at fault. It means choosing humility over pride and extending grace. Actively seeking common ground and finding solutions that address both of your needs demonstrates a commitment to the relationship’s well-being.

The Love and Respect Workbook provides practical strategies for conflict resolution. Resources, including a potentially free PDF available through platforms like Internet Archive or greatebook.club, can offer valuable exercises. Consistent peacemaking communicates love, respect, and a dedication to a lasting, harmonious partnership.

Five Ways to Spell Love: Affirmation

Affirmation, to a wife, is a verbal expression of her worth and value. It’s about more than just complimenting her appearance; it’s acknowledging her character, her efforts, and her contributions to the relationship. She needs to hear how much she is appreciated and cherished.

Regular, sincere affirmations build her confidence and reinforce her sense of security. These aren’t grand gestures, but consistent, heartfelt statements. Tell her you admire her strength, her kindness, or her intelligence. Acknowledge her hard work and express gratitude for all she does.

The Love and Respect Workbook offers guidance on effectively communicating affirmation. Exploring resources, and potentially finding a free PDF version on sites like Internet Archive or greatebook.club, can provide specific examples and exercises. Consistent affirmation demonstrates genuine love and fosters a deeper emotional connection.

The Husband’s Role in Fostering Respect

A husband’s primary responsibility is to proactively foster respect within the marriage. This isn’t about demanding it, but earning it through consistent actions that demonstrate his integrity, reliability, and thoughtfulness. He needs to be a man of his word, keeping commitments and following through on promises.

Respect is shown through honoring her opinions, valuing her contributions, and actively listening to her concerns. It means avoiding dismissive behavior, criticism, or controlling tendencies. He should support her goals and dreams, and treat her as an equal partner.

The Love and Respect Workbook provides tools to understand and implement these principles. Resources, including a potentially free PDF available on platforms like Internet Archive or greatebook.club, offer practical exercises for husbands. By prioritizing respect, he creates a safe and nurturing environment where love can flourish.

The Wife’s Role in Fostering Love

A wife’s central role is to cultivate an environment where her husband feels deeply loved. This isn’t about passively waiting for affection, but actively “spelling love” through consistent expressions of appreciation, affection, and acceptance. She can demonstrate love by initiating physical touch, offering words of affirmation, and showing genuine interest in his passions.

Creating emotional safety is crucial. This means avoiding nagging, criticism, or attempts to control him. Instead, she should offer encouragement, support his endeavors, and celebrate his successes. A wife can also foster love by being vulnerable and sharing her own feelings openly.

The Love and Respect Workbook offers guidance on these practices. Exploring resources, and potentially finding a free PDF version on sites like Internet Archive or greatebook.club, can provide valuable exercises. By prioritizing love, she strengthens the emotional bond and fosters a deeper connection.

Utilizing the Workbook Exercises

The Love and Respect Workbook isn’t meant for passive reading; it’s designed for active engagement. Each exercise is a stepping stone towards understanding your partner’s needs and improving communication. Dedicate specific, uninterrupted time – perhaps a weekly “date night” – to work through the exercises together.

Be honest and vulnerable in your responses. Avoid defensiveness and focus on truly listening to your spouse’s perspective. The workbook prompts you to identify unhealthy patterns and develop strategies for breaking them. Don’t skip exercises that feel challenging; those are often the most impactful.

Resources are available online, and you might find a free PDF version through platforms like Internet Archive or greatebook.club. However, a physical copy can be beneficial for note-taking. Consistent application of the workbook’s principles is key to lasting change.

Finding a Free PDF Version of the Workbook

Accessing the Love and Respect Workbook doesn’t always require a purchase. Several online platforms offer potential access to a free PDF version. The Internet Archive is a valuable resource, often hosting digitized copies of books, including this workbook. Explore their collection for availability.

Websites like greatebook.club also advertise access to the PDF, though exercise caution when downloading from unfamiliar sources to ensure file safety. Always scan downloaded files with antivirus software; Be aware that the legality of downloading copyrighted material varies.

While a free version can be convenient, consider supporting the author by purchasing the official workbook if possible. This ensures continued creation of valuable relationship resources. Remember to verify the source and quality of any free PDF you find.

Resources and Further Reading

Expand your understanding of love and respect beyond the workbook! Emerson Eggerichs’ original book, Love and Respect, provides the foundational principles. Explore his website for articles, videos, and speaking engagements that delve deeper into the concepts.

Numerous relationship counseling resources are available online and in your community. Consider seeking guidance from a qualified therapist or counselor to apply these principles to your specific situation. Websites dedicated to marriage enrichment offer valuable articles and advice.

While searching for a free PDF of the workbook, remember to prioritize legitimate sources. Be cautious of websites offering downloads that seem too good to be true, as they may contain malware. Supporting the author through official channels ensures continued quality content.

2013 chevy cruze owners manual

Welcome! This manual details the 2013 Chevrolet Cruze, offering guidance on features, operation, maintenance, and safety—a key resource for all owners.

Purpose of the Manual

This 2013 Chevy Cruze Owner’s Manual serves as a comprehensive guide designed to familiarize you with your vehicle’s operation and features. It details everything from understanding dashboard symbols to performing routine maintenance, ensuring a safe and enjoyable driving experience. The manual aims to help you maximize the vehicle’s potential while adhering to Chevrolet’s recommended practices.

It provides crucial information regarding the vehicle’s systems, including electrical diagrams and safety features like the airbag and anti-lock braking systems. Furthermore, it outlines warranty details and offers troubleshooting advice for common issues. Authorized Chevrolet service centers are equipped to provide expert assistance, leveraging training and genuine parts. This manual is your first step towards responsible vehicle ownership and long-term reliability.

Vehicle Identification

Proper vehicle identification is crucial for service, warranty claims, and accurate parts ordering for your 2013 Chevy Cruze. This section details how to locate your vehicle’s unique identifiers. The Vehicle Identification Number (VIN) is a 17-character alphanumeric code, typically found on the driver’s side dashboard near the windshield, and on your vehicle registration and insurance documents.

Understanding the VIN allows Chevrolet and authorized service centers to access specific information about your vehicle’s build and configuration. The manual also explains locating other important identification plates containing information about the engine, transmission, and paint code. Maintaining accurate records of these identifiers ensures efficient service and support throughout your ownership experience.

Understanding Your Vehicle

Explore your Cruze! This section details the dashboard, instrument panel, and key features, helping you become familiar with its controls and systems.

Dashboard Symbols and Indicators

Decoding the Lights: Your 2013 Chevy Cruze’s dashboard utilizes a series of symbols and indicators to communicate vital information about the vehicle’s status. Understanding these lights is crucial for safe and informed driving. Illuminated symbols require immediate attention, potentially indicating a mechanical issue needing prompt service.

Key Indicators: Expect to see lights for engine function, brake system status, airbag deployment, and various fluid levels. Warning lights for low tire pressure, seatbelt reminders, and exterior lighting malfunctions are also common. Refer to the manual for specific color coding – red typically signifies a serious problem, yellow indicates a potential issue, and green or blue generally confirms a system is active.

Regular Checks: Familiarize yourself with the location and meaning of each symbol before driving. Ignoring a warning light could lead to more significant damage or compromise safety.

Instrument Panel Overview

Central Information Hub: The 2013 Chevy Cruze’s instrument panel provides a comprehensive display of essential vehicle data. Centrally located, the speedometer and tachometer clearly indicate speed and engine RPM. A multi-information display (MID) nestled between these gauges presents crucial metrics like fuel level, engine temperature, and trip information.

Key Displays: The MID is customizable, allowing drivers to cycle through various readouts, including average fuel economy, distance to empty, and outside temperature. Warning lights, as discussed previously, are prominently displayed to alert drivers to potential issues. The panel also incorporates indicators for turn signals, high beams, and cruise control activation.

Easy Navigation: Controls for the MID are typically located on the steering wheel, enabling convenient adjustment without diverting attention from the road.

Feature Highlights of the 2013 Cruze

Balanced Performance & Efficiency: The 2013 Chevy Cruze distinguishes itself with a commendable balance of reliability and fuel efficiency. Its 1.4L Turbo engine delivers adequate power while prioritizing economical operation, making it suitable for daily commutes.

Comfort & Convenience: Inside, the Cruze offers a comfortable cabin with standard features like air conditioning and a sound system. Available upgrades included features like Bluetooth connectivity and a USB port for enhanced entertainment and convenience.

Safety First: Safety is a key highlight, featuring standard anti-lock brakes and a comprehensive airbag system. The available stability control system further enhances driver control and safety in challenging conditions, providing peace of mind on every journey.

Operating Your Vehicle

Essential Guidance: This section provides detailed instructions for safely starting, driving, and maximizing fuel efficiency within your 2013 Chevrolet Cruze.

Starting and Stopping the Engine

Starting Your Cruze: Ensure the parking brake is engaged and the transmission is in Park (P) or Neutral (N). Insert the key into the ignition and turn it to the ‘Start’ position, releasing once the engine starts. For vehicles with a keyless ignition system, depress the brake pedal and press the ‘Start/Stop’ button.

Engine Operation: Allow the engine to idle for a short period, especially in cold weather, to ensure proper lubrication. Monitor the instrument panel for any warning lights.

Stopping the Engine: To shut down, gently apply the brakes, shift the transmission into Park (P), and turn the ignition key to the ‘Off’ position, or press the ‘Start/Stop’ button. Remove the key to prevent accidental operation. Always ensure the vehicle is completely stopped before shifting into Park.

Driving Modes and Fuel Efficiency

The 2013 Chevy Cruze is designed for optimal fuel efficiency. Driving habits significantly impact MPG. Avoid aggressive acceleration and hard braking to maximize fuel economy. Maintaining consistent speeds on the highway also helps.

While the Cruze doesn’t feature selectable driving modes like some modern vehicles, its engine and transmission are tuned for balance. Utilizing cruise control on long drives can contribute to better fuel consumption.

Regular maintenance, including tire inflation and fluid checks, is crucial for maintaining peak efficiency. A well-maintained engine operates more effectively, reducing fuel waste. Consider lighter loads and minimizing air conditioning use for further improvements.

Using the Gearshift and Transmission

The 2013 Chevy Cruze primarily features a six-speed automatic transmission, offering smooth and efficient gear changes. The gear selector positions include Park (P), Reverse (R), Neutral (N), Drive (D), and a manual shift mode (M).

To shift gears, firmly press the brake pedal and move the selector to the desired position. For manual control, shift up or down using the selector lever. The transmission automatically prevents shifting into a gear that could damage the vehicle.

Avoid shifting while the vehicle is under heavy acceleration. Proper gear selection optimizes performance and fuel economy. Regularly check transmission fluid levels to ensure smooth operation and longevity.

Maintenance and Care

Protect your investment! This section outlines essential maintenance—fluid checks, tire care, and a recommended schedule—to keep your 2013 Cruze running smoothly.

Recommended Maintenance Schedule

Maintaining peak performance for your 2013 Chevy Cruze requires adherence to a specific maintenance schedule. Every 7,500 miles (or six months, whichever comes first), oil and filter changes are crucial. Inspect tire pressure and tread depth monthly, and rotate tires every 8,000 miles to ensure even wear.

At 30,000 miles, replace the engine air filter and cabin air filter. Inspect brake pads, rotors, and fluid levels. A more comprehensive inspection should occur at 60,000 miles, including coolant replacement, transmission fluid check, and spark plug inspection. Following this schedule, detailed in your owner’s manual, will maximize your Cruze’s longevity and reliability, ensuring safe and efficient operation for years to come. Authorized Chevrolet service centers offer expert maintenance.

Fluid Checks and Replacements

Regular fluid level checks are vital for your 2013 Chevy Cruze’s health. Inspect engine oil weekly, adding as needed to maintain the proper level. Check coolant levels in the reservoir when the engine is cold, and top off with the correct coolant type. Brake fluid should be inspected regularly for contamination and replaced every two years, or as indicated.

Power steering fluid levels should also be monitored. Transmission fluid condition is critical; a flush is recommended every 60,000 miles. Windshield washer fluid should be filled frequently. Using the correct fluids, as specified in your owner’s manual, is essential for optimal performance and preventing damage to your vehicle’s systems.

Tire Information and Maintenance

Proper tire care significantly impacts your 2013 Chevy Cruze’s safety and fuel efficiency. Regularly check tire pressure – including the spare – and inflate to the recommended PSI found on the tire placard (usually located on the driver’s side doorjamb). Inspect tires for wear and damage, such as cuts or bulges;

Rotate tires every 7,500 miles to ensure even wear. Tire tread depth is crucial; replace tires when they reach the wear bars. Use tires of the same size and type on each axle. Adhering to these guidelines will maximize tire life, improve handling, and contribute to a safer driving experience for your Cruze.

Safety Features

Your 2013 Cruze incorporates vital safety systems like airbags, ABS, and stability control, designed to protect you and passengers during driving conditions.

Airbag System

The 2013 Chevy Cruze is equipped with an advanced airbag system designed to provide crucial protection during certain collision events. This system includes front and side airbags for both front occupants, as well as side curtain airbags protecting those in the outboard rear seating positions.

Airbags are supplemental restraints and work in conjunction with seat belts – they are not a replacement for them. Always ensure all occupants are properly restrained. The system is designed to deploy in moderate to severe frontal and side impacts. Sensors detect the severity of the impact and deploy airbags accordingly.

Important Safety Notes: Never place rear-facing child seats in the front passenger seat if the airbag cannot be deactivated. Improperly installed or modified airbags can be dangerous. Refer to the full owner’s manual for detailed information regarding the airbag system and its limitations.

Anti-lock Braking System (ABS)

Your 2013 Chevy Cruze features an Anti-lock Braking System (ABS) designed to help maintain steering control during hard braking situations and reduce stopping distances on most surfaces. ABS prevents wheel lockup, allowing you to steer around obstacles while braking.

When ABS activates, you may feel a pulsing sensation in the brake pedal and hear a clicking noise – this is normal and indicates the system is working correctly. Maintain firm, steady pressure on the brake pedal during ABS activation; do not pump the brakes.

Important Considerations: ABS does not eliminate the need for careful driving. Road conditions and tire condition still significantly impact braking performance. Familiarize yourself with how ABS functions to ensure optimal use in emergency braking scenarios. Consult the owner’s manual for detailed information.

Stability Control System

The 2013 Chevy Cruze is equipped with a Stability Control System (StabiliTrak) designed to help maintain directional control during challenging driving conditions, such as slippery roads or sudden maneuvers. This system selectively applies brakes to individual wheels to help steer the vehicle where you intend to go.

You’ll notice a flashing indicator light on the instrument panel when the system is actively working. It’s crucial to remember that StabiliTrak is a supplement to safe driving practices, not a replacement for them. Avoid aggressive driving and always adjust your speed to road conditions.

Important Note: While effective, StabiliTrak has limitations. It cannot overcome the laws of physics, and factors like tire condition and vehicle load impact its performance. Refer to the owner’s manual for a comprehensive understanding of the system’s capabilities.

Electrical System

Explore the 2013 Cruze’s electrical components, including battery details, jump-starting procedures, fuse box locations, and a general overview of wiring diagrams.

Battery Information and Jump Starting

Your vehicle’s battery is a crucial component of the electrical system, providing power to start the engine and operate electrical accessories. Understanding its specifications and proper maintenance is essential for reliable performance. The 2013 Chevy Cruze utilizes a specific battery type; consult your manual for exact details.

Jump starting a discharged battery requires careful adherence to safety precautions. Always wear eye protection and ensure the vehicles do not touch. Connect the jumper cables in the correct sequence – positive to positive, negative to a grounded metal surface on the disabled vehicle – to avoid sparks and potential damage. Incorrect procedures can harm the electrical systems of both vehicles. Refer to the manual for a detailed, step-by-step guide to safe jump-starting.

Fuse Box Locations and Diagrams

Protecting the electrical circuits in your 2013 Chevy Cruze are fuses, designed to blow and interrupt the flow of electricity in case of an overload. Knowing the location of these fuse boxes is vital for addressing electrical issues. Your Cruze has at least two fuse box locations: typically one inside the passenger compartment, often under the dashboard, and another within the engine compartment.

Detailed fuse diagrams are provided in the owner’s manual, illustrating the specific function of each fuse. Before replacing a blown fuse, identify the circuit it protects. Always use a fuse with the correct amperage rating; using a higher amperage fuse can cause serious damage to the electrical system. The manual’s diagrams are essential for accurate identification and safe fuse replacement.

Wiring Diagrams Overview

Understanding the electrical system of your 2013 Chevy Cruze requires access to comprehensive wiring diagrams. These diagrams illustrate the pathways of electrical circuits, showing how components are interconnected. The owner’s manual, and more detailed repair manuals, contain these crucial schematics. They depict wire colors, connector locations, and component pinouts, essential for diagnosing and repairing electrical faults.

These diagrams cover various systems, including the air conditioning, anti-lock brakes, and the entire engine management system. While complex, they are invaluable for anyone attempting electrical repairs. Proper interpretation requires a basic understanding of electrical principles and symbols. Always disconnect the battery before working on any electrical component, and consult a qualified technician if you are unsure about any procedure.

Troubleshooting

Facing issues? This section provides solutions for common problems, explains warning lights, and guides you through diagnosing potential concerns with your 2013 Cruze.

Common Issues and Solutions

Addressing typical concerns, the 2013 Chevy Cruze sometimes experiences issues with the cooling system, potentially leading to overheating. Regularly check coolant levels and inspect for leaks. Another frequent problem involves the turbocharger, manifesting as reduced engine power; professional diagnosis is crucial. Electrical glitches, like malfunctioning sensors, can trigger warning lights – a scan tool helps pinpoint the source.

Furthermore, some owners report issues with the power windows and door locks. Inspecting fuses and wiring connections is a good starting point. For persistent problems, consult a qualified technician. Remember, attempting complex repairs without proper knowledge can exacerbate the issue. Prioritize safety and seek professional assistance when needed to maintain your Cruze’s reliability.

Warning Lights and Their Meanings

Understanding dashboard illumination is vital for safe operation. A solid “Check Engine” light indicates a potential engine or emissions system issue – schedule a diagnostic check. The “ABS” light signals a problem with the anti-lock braking system, potentially affecting braking performance. A flashing “Tire Pressure” light means low tire pressure; inflate tires promptly.

The “Battery” light warns of charging system problems, while a low “Fuel” light indicates dwindling fuel reserves. An illuminated “Airbag” light suggests a fault in the airbag system, requiring immediate attention. Ignoring warning lights can lead to more significant damage. Consult your owner’s manual for a comprehensive list and appropriate actions for each indicator.

Warranty Information

Chevrolet provides comprehensive coverage for your 2013 Cruze, detailing specific terms, durations, and exclusions—review the details for peace of mind.

Chevrolet Warranty Details

Your 2013 Chevy Cruze is protected by Chevrolet’s commitment to quality, encompassing several warranty provisions. The bumper-to-bumper limited warranty typically covers defects in materials or workmanship for 3 years/36,000 miles, whichever comes first. Powertrain coverage, safeguarding the engine, transmission, and drive systems, extends to 5 years/100,000 miles.

Additionally, corrosion protection is offered for 6 years/100,000 miles. Specific warranty details, including what’s covered and excluded, are outlined in the official warranty booklet provided with your vehicle. It’s crucial to retain this document and adhere to the recommended maintenance schedule to maintain warranty validity. Authorized Chevrolet service centers are equipped to handle warranty claims efficiently.

stonehouse’s anatomy pdf

Stonehouse’s Anatomy PDF: A Comprehensive Guide for Artists

Stonehouse’s Anatomy, a 656-page PDF, is a monumental artistic resource created by Junghyun Seok, offering a deep dive into human form understanding for dedicated artists.

This guide, born from nine years of dedicated work and over 1,500 illustrations, bridges the gap between artistic representation and anatomical accuracy, exceeding basic approaches.

Accessibility through the PDF format allows convenient study, while the book itself represents a significant contribution to the field, moving beyond introductory texts like Loomis.

Stonehouse’s Anatomy emerges as a pivotal resource for artists seeking a profound understanding of the human form, meticulously crafted by Junghyun Seok (Stonehouse). This isn’t merely a superficial guide; it’s a comprehensive, 656-page exploration designed for serious study and application. The book, initially published in Korea in 2017, now benefits from an English translation, broadening its reach to a global artistic community.

Unlike fleeting engagement with introductory concepts, Stonehouse’s Anatomy demands dedication. It’s not for those who briefly explore techniques like the Loomis head and move on. This volume represents a substantial investment in learning, requiring a willingness to dissect, discuss, and truly think about anatomy. The PDF format enhances accessibility, providing a convenient platform for in-depth study and repeated reference. It’s a tool built for those committed to bridging the gap between artistic vision and anatomical precision.

The Author: Junghyun Seok (Stonehouse)

Junghyun Seok, widely known as Stonehouse, is the visionary artist behind this monumental work of anatomical study. His dedication to accurately portraying the human form culminated in Stonehouse’s Anatomy, a project spanning nine years of intensive research and artistic creation. This wasn’t a quick endeavor; it was a deeply considered exploration, resulting in a resource unlike any other currently available to artists.

Seok’s commitment is evident in the sheer volume of illustrations – over 1,500 meticulously rendered images – that populate the 656-page PDF. His expertise isn’t simply theoretical; it’s born from a practical understanding of artistic needs. He recognized a gap in existing resources and set out to fill it, providing artists with a tool that goes beyond superficial understanding, offering a truly comprehensive anatomical foundation.

Key Features of the Book

Stonehouse’s Anatomy distinguishes itself through its sheer depth and comprehensive nature. The 656-page PDF isn’t a superficial overview; it’s a detailed exploration of the human form, meticulously illustrated with over 1,500 drawings. This extensive visual library allows artists to truly grasp the underlying structures.

A key feature is its focus on bridging the gap between artistic representation and anatomical accuracy, going beyond introductory texts. The PDF format itself offers significant advantages – accessibility, convenient study, and digital tools. It’s a resource designed for serious artists willing to invest in a deeper understanding, not just a quick “Loomis head” approach. The book’s nine years of development guarantee a level of refinement and detail rarely seen.

The Scope of Coverage: Human Form Exploration

Stonehouse’s Anatomy doesn’t limit itself to basic muscle groups; it provides a holistic exploration of the human form. The PDF delves into the intricacies of the skeletal system, muscular structures, and their interplay, offering a foundation for realistic and dynamic figure drawing. It extends beyond surface-level understanding, encouraging artists to dissect and analyze the underlying anatomy.

The book’s scope is geared towards those seeking a deeper dive than introductory materials allow. While acknowledging the importance of practice, it emphasizes the value of studying, discussing, and thoughtfully considering anatomical principles. This comprehensive approach, built over nine years and illustrated with 1,500+ images, aims to equip artists with the knowledge to confidently depict the human body in all its complexity.

Detailed Anatomical Systems Covered

Stonehouse’s Anatomy meticulously covers skeletal, muscular, and surface anatomy, alongside detailed facial structures and expressions, all within its extensive 656-page PDF format.

Skeletal System Analysis

Stonehouse’s Anatomy provides an exceptionally detailed analysis of the human skeletal system, going far beyond simplified representations often found in art instruction. The PDF doesn’t merely present bone shapes; it delves into their three-dimensional forms, crucial for artists aiming for realistic depictions.

This comprehensive approach allows artists to understand how bones influence surface anatomy and movement. The book meticulously illustrates bony landmarks, their relationships to muscles, and how these structures contribute to the overall form.

Understanding the skeletal foundation is presented as essential for constructing believable figures, avoiding the flat or distorted results that can occur without a solid anatomical base. The 1,500+ illustrations within the PDF are instrumental in visualizing these complex relationships, offering a depth of understanding rarely found in other resources.

Muscular System Breakdown

Stonehouse’s Anatomy delivers a remarkably thorough breakdown of the human muscular system, presented with an artist’s needs firmly in mind. The PDF doesn’t just catalog muscles; it illustrates their origins, insertions, and, crucially, how they affect surface form during various actions.

The book emphasizes understanding muscle groups not as isolated entities, but as interconnected systems working together to create movement and shape. Detailed illustrations showcase how muscles wrap around the skeletal structure, influencing contours and creating dynamic poses.

This approach is vital for artists seeking to depict realistic and expressive figures. The extensive collection of over 1,500 illustrations within the PDF allows for a deep visual understanding of muscular anatomy, surpassing the limitations of simpler anatomical guides.

Understanding Surface Anatomy

Stonehouse’s Anatomy excels in translating internal anatomical structures into visible surface forms, a critical skill for artists. The PDF meticulously details how muscles, bones, and tendons manifest on the skin’s surface, influencing the contours and landmarks of the human body.

Rather than simply presenting anatomical charts, the book demonstrates how underlying structures create the shapes we perceive when drawing or sculpting. This focus on surface anatomy allows artists to confidently depict realistic figures without needing to memorize every individual muscle.

The 1,500+ illustrations within the 656-page PDF are instrumental in visualizing these relationships, offering a comprehensive guide to understanding how anatomy dictates the external appearance of the human form, going beyond basic anatomical study.

Facial Anatomy and Expressions

Stonehouse’s Anatomy dedicates significant attention to the complexities of the human face, recognizing its crucial role in artistic expression. The PDF doesn’t just illustrate facial bones and muscles; it explores how these structures interact to create a wide range of expressions.

Understanding the underlying anatomy allows artists to move beyond simply copying facial features and instead, accurately depict the subtle shifts in muscle tension that convey emotion. This detailed approach is a key differentiator, offering a deeper understanding than many resources.

The book’s 1,500+ illustrations, contained within the 656-page PDF, provide a visual guide to the nuanced anatomy of the face, enabling artists to create compelling and believable characters with authentic emotional depth.

The PDF Format and its Advantages

The PDF version of Stonehouse’s Anatomy provides easy access, convenient study, and digital tools for artists exploring the 656-page comprehensive guide.

Accessibility and Convenience of the PDF

Stonehouse’s Anatomy in PDF format dramatically enhances the learning experience, offering unparalleled accessibility and convenience for artists of all levels. Unlike traditional physical books, the digital version eliminates geographical barriers, allowing immediate access to this comprehensive 656-page guide from anywhere with an internet connection.

This format facilitates seamless integration into existing digital workflows, enabling artists to study alongside other resources and tools. The PDF allows for easy navigation, quick searches for specific anatomical structures, and the ability to zoom in on the detailed 1,500+ illustrations created by Junghyun Seok. This is particularly beneficial when studying complex muscle groups or intricate skeletal details.

Furthermore, the PDF’s portability means artists can study on various devices – laptops, tablets, or even smartphones – making learning possible during commutes or downtime. This flexibility is a significant advantage for busy artists and students seeking to deepen their understanding of human anatomy;

Digital Study Tools and Features

The Stonehouse’s Anatomy PDF isn’t merely a digital replica of a physical book; it unlocks a suite of powerful study tools unavailable in traditional formats. Digital annotation features allow artists to directly mark up diagrams, add personalized notes, and highlight key anatomical landmarks for focused review. This interactive approach fosters deeper engagement and retention of information.

Furthermore, the PDF supports layering capabilities, enabling artists to isolate specific anatomical systems – skeletal, muscular, or surface anatomy – for concentrated study. This feature is invaluable for understanding the complex interplay between different body structures. The search function allows for rapid location of specific terms or illustrations within the 656-page guide.

Many PDF readers also offer bookmarking options, allowing artists to create a customized study path through the 1,500+ illustrations and detailed explanations provided by Junghyun Seok, maximizing efficiency and learning outcomes.

Navigating the 656-Page Guide

Successfully utilizing the 656-page Stonehouse’s Anatomy PDF requires understanding its organizational structure. The guide is meticulously arranged, progressing from foundational skeletal analysis to detailed muscular breakdowns and nuanced surface anatomy studies. A strategic approach is key; avoid attempting to absorb the entire volume at once.

Begin with the core anatomical systems, focusing on understanding the underlying structures before moving to more complex topics like facial anatomy and expressions. Leverage the PDF’s search function to quickly locate specific areas of interest or revisit previously studied concepts. Utilize bookmarking features to create a personalized learning path.

Remember that the book’s strength lies in its comprehensive detail and 1,500+ illustrations; consistent, focused study, combined with the PDF’s digital tools, will unlock its full potential for artistic growth.

The Book’s Creation and Illustration Process

Stonehouse’s Anatomy is the culmination of nine years of dedicated effort by Junghyun Seok, featuring over 1,500 meticulously crafted illustrations for artists.

Nine Years of Development

Stonehouse’s Anatomy wasn’t a quickly assembled resource; it represents a nine-year commitment from creator Junghyun Seok, demonstrating a profound dedication to anatomical accuracy for artists.

This extended development period allowed for exhaustive research, refinement of concepts, and the creation of a truly comprehensive guide. It wasn’t simply about compiling existing knowledge, but about deeply understanding and visually communicating the complexities of the human form.

Such a lengthy process underscores the author’s intent to deliver a resource that goes beyond superficial understanding, offering artists a robust foundation for their work. The time investment directly translates into the book’s depth and detail, making it a valuable asset for serious students of anatomy and art.

This dedication distinguishes Stonehouse’s Anatomy from more cursory explorations of the subject.

The 1,500+ Illustrations

A defining characteristic of Stonehouse’s Anatomy is its extensive visual component – over 1,500 meticulously crafted illustrations. These aren’t merely decorative; they are integral to understanding the complex anatomical structures presented within the 656-page guide.

Each illustration serves as a detailed visual aid, clarifying the relationships between muscles, bones, and surface forms. The sheer volume of imagery allows for multiple perspectives and a thorough exploration of the human body from various angles.

This commitment to visual learning is crucial for artists, who rely heavily on observation and visual understanding. The illustrations aren’t simply diagrams, but artistic renderings designed to inspire and inform. They represent the culmination of the author’s nine-year development process, showcasing a dedication to clarity and accuracy.

The illustrations elevate the book beyond a text-based resource.

Relevance for Artists and Art Students

Stonehouse’s Anatomy uniquely bridges art and anatomy, offering a deeper understanding than introductory texts, benefiting dedicated artists and students seeking detailed form mastery.

Bridging the Gap Between Art and Anatomy

Stonehouse’s Anatomy isn’t simply a reference book; it’s a dedicated exploration designed to fundamentally connect artistic practice with the underlying structure of the human body. Unlike superficial approaches, or simply “flipping through” for aesthetic appreciation, this PDF encourages genuine learning and dissection of anatomical principles.

The book’s value lies in its depth – it’s not for those who briefly touched upon Loomis’ methods and moved on. It’s for artists committed to truly understanding how forms are constructed, not just replicating their appearance. The 1,500+ illustrations aren’t merely visual aids, but tools for analytical study, prompting discussion and critical thinking about the craft.

This comprehensive guide moves beyond basic knowledge, offering a level of detail that allows artists to confidently translate anatomical understanding into compelling and accurate artwork, fostering a deeper connection between observation, knowledge, and creative expression.

Beyond Loomis: A Deeper Dive

While Andrew Loomis provides a foundational understanding of form, Stonehouse’s Anatomy transcends those principles, offering a significantly more detailed and comprehensive exploration of the human body. This 656-page PDF isn’t intended to replace Loomis, but to build upon it, providing the anatomical knowledge necessary for truly masterful artistic representation.

The book delves into the intricacies of skeletal and muscular systems, surface anatomy, and facial expressions with a level of precision rarely found in introductory texts. It’s a resource for artists who are serious about understanding the ‘why’ behind the forms, not just the ‘how’ to draw them.

Stonehouse’s work represents a commitment to anatomical accuracy, offering a depth of knowledge that empowers artists to move beyond simplified constructions and create work grounded in a profound understanding of the human form;

vtech dect 6.0 user manual

VTech DECT 6.0 User Manual: Comprehensive Guide

Welcome! This guide details the VTech DECT 6.0 phone system, covering setup, features like caller ID, and troubleshooting. Explore manuals for models CS6124 and CL81309.

Digital Enhanced Cordless Telecommunications (DECT) 6.0 represents a significant advancement in cordless phone technology, offering improved clarity, security, and range compared to older standards. This technology operates in the 1.9 GHz frequency band, minimizing interference from other wireless devices like Wi-Fi routers (11b).

VTech leverages DECT 6.0 to deliver reliable performance in its cordless phone systems, such as the DS6221-5 and various other models (0031, 0165, 0397, 0418, 0423). A key benefit is enhanced security, protecting conversations from eavesdropping. The technology also supports wider calling ranges, ensuring connectivity throughout your home or office.

However, it’s important to note that DECT 6.0 certification isn’t universally recognized; it’s currently not certified in Russia or Azerbaijan. Understanding these aspects of DECT 6.0 will help you maximize the benefits of your VTech phone system.

Understanding Your VTech DECT 6.0 Phone System

Your VTech DECT 6.0 system, encompassing models like the DCT2800 series and CL81309, is designed for reliable home or office communication. It typically includes a base unit and one or more handsets. The base unit connects to your phone line and provides power to the handsets. Handsets offer cordless mobility for making and receiving calls.

These systems often feature advanced functionalities like caller ID, phonebooks, and intercom capabilities. Some models, like those intended for hospitality (guestroom telephones), may have specific features tailored for hotel use. Understanding the components and their interactions is crucial for optimal performance.

Refer to the specific user manual (e.g., CS6124) for detailed diagrams and explanations of each part. Familiarize yourself with the key functions and settings to fully utilize your VTech DECT 6.0 phone system’s capabilities.

Package Contents & Initial Setup

Upon opening your VTech DECT 6.0 package, verify all components are present. Typically, this includes the base unit, one or more handsets, a power adapter for the base, handset batteries (often Ni-MH or Li-ion), and a phone line cord. Consult your model’s specific manual (like the DS6221-5) for a complete list.

Initial setup involves connecting the base unit to a working phone jack using the provided cord and plugging in the power adapter. Insert the batteries into the handset(s), following the polarity markings. Allow the handsets to charge fully before initial use – this may take several hours.

Register the handset(s) to the base unit, usually by pressing a button on both devices. Refer to your user manual for precise registration instructions. Ensure the system is away from other DECT 6.0 phones or WiFi devices (11b) to avoid interference during setup.

Phone Features & Functionality

Explore capabilities! VTech DECT 6.0 phones offer features like call waiting, caller ID display, phonebook storage, and convenient handset controls for easy operation.

Handset Overview & Key Functions

Handset Layout: Your VTech DECT 6.0 handset is designed for intuitive use. The keypad facilitates dialing and navigating menus. A clear LCD screen displays caller ID, time, and call information. Dedicated buttons provide quick access to essential functions.

Key Functions Explained: The Talk button initiates and answers calls. The End button terminates calls. The Menu button accesses the phone’s settings and features. Use the Navigation keys (up, down, left, right) to scroll through options. The OK/Select button confirms your choices.

Speakerphone Activation: Activate the speakerphone for hands-free conversations. Volume control adjusts the speakerphone level. The Mute button silences the microphone during a call. The Flash button provides access to call waiting and other service features. Explore the phonebook using dedicated buttons for easy contact retrieval. Remember to consult your specific model’s manual for detailed button mappings.

Base Unit Features & Connections

Base Unit Overview: The VTech DECT 6.0 base unit serves as the central hub for your cordless phone system. It provides a stable connection for handsets and manages call routing. The unit typically features a power adapter port, a telephone line connection, and handset registration buttons.

Essential Connections: Connect the provided power adapter to the base unit and a working electrical outlet. Plug the telephone line cord into the base unit’s telephone line jack and a wall telephone jack. Ensure a secure connection for optimal performance.

Handset Registration: To connect handsets to the base unit, press and hold the registration button on the base. Then, follow the on-screen prompts on the handset to complete the registration process. The base unit supports multiple handsets, depending on the model. Some models support two-line operation. Refer to your model’s specific manual for detailed instructions and troubleshooting tips regarding connections and registration.

Call Handling: Making, Answering & Ending Calls

Making Calls: To initiate a call, lift the handset and dial the desired number using the keypad. You can also select a number from your phonebook; The VTech DECT 6.0 system supports speed dial functionality for frequently called numbers, streamlining the dialing process.

Answering Calls: Incoming calls are indicated by a ringtone and a visual caller ID display (if subscribed to the service). Press the ‘Talk’ or ‘Answer’ button to answer the call. Adjust the ringer volume to your preference using the volume control keys.

Ending Calls: To terminate a call, press the ‘End’ or ‘Redial’ button on the handset. The call will disconnect, and the handset will return to standby mode. Ensure a clear connection during calls for optimal audio quality. Explore features like call waiting and three-way calling for enhanced call management.

Caller ID & Call Display

Caller ID Features: Your VTech DECT 6.0 phone system, when subscribed to Caller ID service, displays the caller’s name and/or number on the handset screen before you answer. This allows you to screen calls and identify incoming callers.

Call Log Access: The system maintains a call log, storing a history of incoming, outgoing, and missed calls. You can access the call log by pressing the ‘Call History’ or similar designated button on the handset. Scroll through the log to review previous calls.

Call Display Settings: Customize the Caller ID display settings to your preferences. Options may include displaying the caller’s name only, number only, or both. Adjust the display duration to control how long the caller information remains visible. Ensure your service subscription is active for optimal functionality.

Phonebook & Contacts Management

Storing Contacts: Your VTech DECT 6.0 phone allows you to store a substantial number of contacts in its phonebook. You can add new contacts directly from the handset, entering the name and phone number using the keypad. Save frequently called numbers for quick access.

Phonebook Navigation: Easily navigate through your phonebook using the up and down arrow keys on the handset. Contacts can be sorted alphabetically for convenient searching. Utilize the search function to quickly locate specific contacts by name or number.

Editing & Deleting Contacts: Modify existing contact information or remove unwanted entries. Select the contact you wish to edit or delete, then follow the on-screen prompts. Regularly update your phonebook to maintain accurate contact details. Back up your phonebook if the feature is available.

Advanced Features & Settings

Explore customization! Adjust voicemail, intercom, and ringer settings. Modify display options and language preferences for a personalized VTech DECT 6.0 experience.

Voicemail Setup & Access

Initial Voicemail Setup: Your VTech DECT 6.0 system likely requires initial voicemail setup. This typically involves recording a personal greeting. Access the voicemail settings through the handset’s menu, often under “Settings” or “Voicemail.” Follow the voice prompts to create a secure password – crucial for remote access and preventing unauthorized message retrieval.

Accessing Voicemail: To check for new messages, press and hold the voicemail access key on your handset. This key is often visually distinguished. The system will prompt you for your password if one has been set. Once authenticated, you can listen to new voicemails, delete messages, or save important ones.

Voicemail Indicators: A flashing voicemail indicator on the base unit or handset signals new messages. Some models offer visual message count displays. Regularly check your voicemail to stay informed. Refer to your specific model’s manual for detailed instructions, as procedures can vary slightly.

Intercom System Operation

Initiating an Intercom Call: The VTech DECT 6.0 system’s intercom feature allows communication between handsets. To initiate a call, press the “Intercom” button on your handset. Then, select the handset you wish to connect with – typically by entering its extension number or choosing from a contact list if programmed.

Answering an Intercom Call: When another handset initiates an intercom call, your handset will ring or display a notification. Press the “Talk” or “Answer” button to accept the call. Communication is then established, allowing for two-way conversation.

Intercom Volume Control: Adjust the intercom volume using the volume control buttons on your handset during a call. Ensure clear audio for both parties. Some models offer dedicated intercom volume settings within the menu. Remember to consult your specific model’s manual for precise instructions and any unique features related to intercom operation.

Conference Calling Instructions

Initiating a Conference Call: With your VTech DECT 6.0 phone, conference calling enables conversations with multiple parties simultaneously. First, establish a call with the initial participant. Once connected, put that call on hold by pressing the “Hold” button. Then, dial the number of the second participant and connect that call.

Adding Participants: After the second call is established, press the “Conference” button. This merges both calls into a single conference call. You may hear a confirmation tone or announcement. All parties can now communicate freely.

Managing the Conference: During the conference, you can adjust the speaker volume. To remove a participant, place them back on hold or disconnect their call. Refer to your specific model’s manual for detailed instructions, as button labels and procedures may vary slightly.

Ringer Volume & Tone Customization

Adjusting Ringer Volume: Your VTech DECT 6.0 phone allows personalized ringer settings. Typically, volume control is accessed through the “Menu” or “Settings” button on the handset. Navigate to the “Audio Settings” or “Ringer Settings” option. Use the navigation keys to increase or decrease the ringer volume to your preferred level. Preview the volume change with a test ring.

Selecting Ringer Tones: Within the ringer settings, you can often choose from a variety of pre-loaded ringer tones. Scroll through the available options and select a tone that suits your preference. Some models offer distinct tones for different caller groups.

Customization Options: Explore options like ringer rise time (how quickly the volume increases) and the ability to disable the ringer entirely for specific contacts or during designated quiet hours. Consult your model’s manual for specific instructions.

Display Settings & Language Options

Adjusting Display Brightness: Your VTech DECT 6.0 phone’s display brightness is customizable via the “Menu” or “Settings” button on the handset. Navigate to “Display Settings” and select “Brightness.” Use the navigation keys to adjust the backlight intensity to a comfortable level, balancing visibility and battery conservation.

Date & Time Configuration: Accurate date and time display are crucial for Caller ID and voicemail features; Access the “Date & Time” settings within the “Display Settings” menu. Input the correct date, time, and time zone. Some models automatically synchronize with network time.

Language Selection: Many VTech DECT 6.0 phones support multiple languages. Within the “Settings” menu, locate the “Language” option. Select your preferred language from the available list. The handset’s interface will then be displayed in the chosen language.

Troubleshooting Common Issues

Facing problems? This section addresses frequent concerns like no dial tone, poor audio, handset registration failures, static, and battery issues for your VTech DECT 6.0.

No Dial Tone Troubleshooting

Experiencing a lack of dial tone? Several factors could be at play. First, verify the base unit is properly connected to a working telephone jack. Ensure the power adapter is securely plugged into both the base unit and a functioning electrical outlet.

Check the handset’s battery charge. A low battery can sometimes mimic a dial tone issue. Try charging the handset for at least 15 minutes and then retesting. Confirm the handset is registered to the base unit; a failed registration prevents dialing. Refer to the “Initial Setup” section for registration instructions.

Test with a known working corded phone connected to the same jack. If the corded phone also lacks a dial tone, the problem lies with your telephone service provider – contact them for assistance. If the corded phone works, the issue is isolated to the VTech system. Finally, rule out any interference from other devices like WiFi routers, as DECT 6.0 can sometimes experience conflicts.

Poor Audio Quality Solutions

Is your call audio sounding muffled, distorted, or faint? Begin by checking the handset’s receiver volume – ensure it’s set to an appropriate level. Also, verify the base unit’s volume control is adjusted correctly. Distance from the base unit can impact audio quality; try moving closer.

Interference from other electronic devices is a common culprit. Temporarily turn off or move nearby devices like microwave ovens, wireless routers (especially those using the 2.4 GHz band, potentially conflicting with DECT 6.0), and other cordless phones. Ensure the antenna on the base unit is fully extended and positioned for optimal signal reception.

A weak cellular signal (if using a cellular adapter) can also degrade audio. If the problem persists, try resetting both the handset and the base unit to their factory default settings (refer to the “Initial Setup” section for instructions). Finally, confirm your telephone service provider isn’t experiencing issues.

Handset Not Registering to Base Unit

Experiencing difficulty connecting your handset to the base unit? First, ensure both units are powered on and within range. A simple reset of the handset often resolves registration issues – remove the battery, wait 30 seconds, and reinsert it. Next, verify the base unit is properly connected to a working power outlet and telephone line.

Initiate the handset registration process manually. Typically, this involves pressing and holding the “Talk” or “Menu” button on the handset for several seconds until it begins searching for the base. Confirm the base unit is in registration mode; some models have a dedicated registration button.

Interference from other devices can disrupt registration. Move the base unit away from potential sources of interference like microwaves or wireless routers. If problems persist, reset the base unit to factory defaults (consult the “Initial Setup” section) and repeat the registration process.

Static or Interference Issues

Encountering static or disruptive interference during calls? Several factors can contribute to this. First, check the distance between the handset and base unit; excessive distance weakens the signal. Relocate the base unit away from potential sources of interference, including microwave ovens, wireless routers (especially those using the 2.4 GHz band – similar to DECT 6.0), and other electronic devices.

Cordless phones operating on the DECT 6.0 standard can sometimes experience interference from other nearby DECT devices. Test by temporarily turning off other cordless phones in the vicinity to see if the issue resolves. Ensure your telephone line is free from physical damage or interference.

Consider the building’s construction materials; thick walls or metal structures can impede signal transmission. If the problem persists, try a different telephone outlet. Finally, resetting both the handset and base unit can sometimes clear up temporary interference issues.

Battery Life & Charging Problems

Experiencing short battery life or charging difficulties with your VTech DECT 6.0 handset? First, ensure the handset is correctly placed in the charger, making solid contact. Verify the power adapter is securely plugged into a working electrical outlet. New batteries typically require 16-24 hours of continuous charging for optimal performance.

Battery life naturally diminishes over time. If the handset holds a significantly shorter charge than usual, consider replacing the battery. Use only VTech-approved replacement batteries to avoid damage or malfunction; Avoid leaving the handset on the charger continuously after it’s fully charged, as this can reduce battery lifespan.

Check for obstructions preventing a full charge. Clean the charging contacts on both the handset and base unit with a soft, dry cloth. If issues persist, try a different power outlet to rule out electrical problems.

Technical Specifications & Safety Information

DECT 6.0 offers secure, reliable communication. This system operates on 1.9 GHz, providing extended range. Always follow safety guidelines for power and device handling.

DECT 6.0 Range & Security

Understanding DECT 6.0’s capabilities is crucial for optimal performance. Digital Enhanced Cordless Telecommunications (DECT) 6.0 technology provides a significantly improved range compared to older 2.4 GHz and 5.8 GHz cordless phones. Typically, VTech DECT 6.0 phones offer a range of up to 500 feet indoors and up to 2,600 feet outdoors, though actual range can vary based on environmental factors like building materials and interference.

Security is a key benefit of DECT 6.0. It utilizes digital encryption, making it much more secure than older analog systems, protecting your conversations from eavesdropping. Unlike some older standards, DECT 6.0 isn’t currently certified in Russia or Azerbaijan, a point to consider for international use. The 1.9 GHz frequency also reduces interference from other wireless devices like Wi-Fi routers operating on the 2.4 GHz band. This contributes to clearer calls and a more stable connection. Regular firmware updates, when available, can further enhance security and performance.

Power Requirements & Environmental Considerations

Ensuring proper power supply and responsible disposal are vital. VTech DECT 6.0 phone systems typically operate on standard AC power (100-240V, 50/60Hz) through a power adapter. The base unit and handsets utilize rechargeable batteries – often Nickel-Metal Hydride (Ni-MH) or Lithium-Ion – for cordless operation. Always use the provided VTech power adapter to avoid damaging the equipment.

Regarding environmental impact, responsible battery disposal is essential. Do not discard batteries with general household waste. Instead, recycle them at designated collection points. VTech, like many manufacturers, is increasingly focused on sustainable practices. Consider the energy consumption of the device and unplug the base unit when not in use for extended periods. Packaging materials should also be recycled whenever possible. Refer to local regulations for proper electronic waste disposal guidelines, contributing to a healthier planet and minimizing environmental harm.

Warranty Information & Support Contacts

VTech provides a warranty against defects in materials and workmanship for a specified period, typically one year from the date of purchase. This warranty covers functional parts but doesn’t include damage from misuse, accidents, or unauthorized repairs. Proof of purchase is required for all warranty claims. Extended warranties may be available for purchase separately.

For technical support and assistance, VTech offers several contact options. Visit the official VTech website for a comprehensive FAQ section, troubleshooting guides, and downloadable user manuals. You can also reach customer support via phone; numbers are listed on the VTech website and in the product documentation. Email support is often available as well. When contacting support, have your model number readily available (e.g., CS6124, CL81309) to expedite the process. Explore online forums and communities for peer-to-peer assistance and shared solutions.