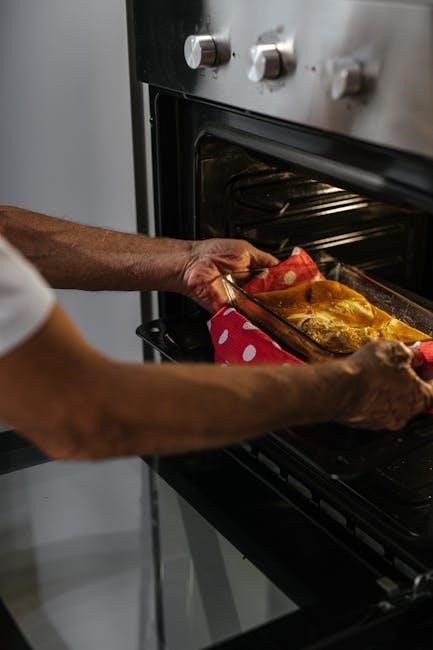
plot diagram template pdf

A plot diagram template PDF is a visual tool used to outline and analyze the structure of a story, helping to organize key elements like exposition, rising action, and climax. It provides a clear framework for understanding and creating narratives, making it an essential resource for educators, writers, and students. This free, downloadable template simplifies the process of breaking down stories into their core components, ensuring a deeper understanding of plot development and storytelling techniques.

Overview of Plot Diagrams

A plot diagram is a visual representation of the structure of a story, breaking it down into its key components. It typically includes elements such as exposition, rising action, climax, falling action, and resolution. This tool is widely used in educational settings to help students and writers understand and analyze the flow of a narrative. By organizing the story into these sections, a plot diagram makes it easier to identify how events unfold and how characters develop. It is particularly useful for teaching storytelling techniques and for creating structured outlines for new stories. The diagram provides a clear and concise way to visualize the progression of a plot, making it an essential resource for both learners and creators of stories.

Importance of Using a Template

Using a plot diagram template PDF is crucial for effective storytelling and analysis. It provides a structured format, ensuring that all key elements of a story are included and organized logically. This consistency helps in identifying the flow of events, making it easier to understand complex narratives. For educators, templates offer a uniform way to teach plot structure, while for writers, they serve as a helpful outline to develop engaging stories. The template’s visual layout enhances clarity, making it simpler to track character development and plot progression. Additionally, it saves time by offering a ready-made framework, allowing users to focus on content rather than design. Overall, a plot diagram template is an invaluable tool for anyone looking to create or analyze stories efficiently and effectively.

Components of a Plot Diagram Template

A plot diagram template typically includes key sections like exposition, rising action, climax, falling action, and resolution. These components help structure and analyze the narrative flow effectively.

Exposition

The exposition is the introductory section of a story, setting the stage by presenting essential background information. It typically introduces the main characters, establishes the setting, and outlines the initial situation or conflict. This section is crucial as it provides readers with the context needed to understand the plot and become invested in the narrative. In a plot diagram template, the exposition is often represented as the first box, allowing users to summarize the key details that lay the foundation for the story. By clearly defining the exposition, writers can ensure a strong start to their narrative, making it easier for audiences to follow the subsequent events and character development. This section is vital for establishing tone and mood, setting the pace for the rest of the story.

Rising Action

The rising action is the series of events that build upon the exposition and propel the story forward, creating suspense and tension. These events are crucial as they develop the characters, reveal their motivations, and lead the narrative toward the climax. In a plot diagram template, the rising action is typically represented as a sequence of steps or boxes, allowing users to outline key incidents that escalate the conflict. This section is essential for maintaining reader engagement, as it deepens the story’s complexity and sets the stage for the turning point. By mapping out the rising action, writers can ensure a logical flow of events, keeping the narrative dynamic and compelling. This part of the story is where the stakes are raised, and the characters’ actions drive the plot toward its peak.

Climax

The climax is the most intense and critical moment in the story, representing the peak of the rising action where the main conflict reaches its resolution. It is the turning point that determines the story’s outcome, often revealing the protagonist’s true character and capabilities. In a plot diagram template, the climax is highlighted as a central element, emphasizing its significance in the narrative structure. This section requires careful planning to ensure it aligns with the preceding events and delivers a satisfying conclusion to the tension built during the rising action. The climax not only resolves the primary conflict but also sets the stage for the falling action and resolution, making it a pivotal part of the story’s progression and impact.

Falling Action

The falling action occurs after the climax and describes the events that unfold as the story moves towards its resolution. It ties up loose ends and resolves secondary conflicts, showing how the characters deal with the aftermath of the climax. In a plot diagram template, the falling action is a distinct section that bridges the gap between the climax and the resolution, ensuring a smooth transition. This part of the story often reveals the consequences of the protagonist’s decisions and actions, providing closure for the audience. The falling action is crucial for reinforcing the story’s themes and preparing the reader for the final outcome, making it an essential component of the narrative structure outlined in the template.

Resolution

The resolution is the final stage of a story, where loose ends are tied, and the narrative reaches its conclusion. It provides closure for the audience, revealing the fate of the protagonist and the outcome of the central conflict. In a plot diagram template, the resolution is often depicted as the last section, summarizing the story’s ending and its emotional or thematic impact. This part of the story reinforces the central message or lesson, leaving the reader with a lasting impression. The resolution is essential for completing the narrative arc, ensuring that the story feels satisfying and complete. It is a crucial element in the plot diagram, helping to organize and visualize the story’s final moments effectively.

Benefits of Using a Plot Diagram Template PDF

A plot diagram template PDF enhances storytelling by offering a clear, structured format that improves organization and saves time for writers and educators alike.

Enhanced Story Structure

A plot diagram template PDF significantly enhances story structure by providing a visual framework to organize key narrative elements. It helps writers and analysts break down stories into their fundamental components, such as exposition, rising action, climax, and resolution. This clear structure ensures that each part of the story flows logically, making it easier to follow and understand. By visually separating elements, the template promotes a deeper analysis of how events unfold and connect. It also allows for the identification of pacing issues or gaps in the narrative, leading to a more cohesive and engaging story. The template’s structured format ensures that the story’s foundation is solid, making it an invaluable tool for both creators and educators aiming to refine storytelling skills.

Improved Organization

A plot diagram template PDF offers improved organization by visually categorizing story elements into clear sections, such as exposition, rising action, climax, and resolution. This structured format ensures that each part of the narrative is logically placed, making it easier to follow and analyze. By breaking down the story into key components, the template helps maintain coherence and flow, preventing elements from becoming disjointed. It also aids in identifying where events should occur to maintain pacing and tension. For educators, this tool simplifies teaching story structure, while writers benefit from a clear visual map of their narrative. The template’s organized design ensures that all aspects of the story are accounted for, fostering a more systematic approach to storytelling and analysis.

How to Use a Plot Diagram Template

To use a plot diagram template PDF, start by downloading and printing the template or accessing it digitally. Identify each section of the template, such as exposition, rising action, climax, falling action, and resolution, and understand their roles in storytelling. Fill in each box with details from the story, ensuring events are placed in chronological order. Discuss the purpose of each section with students or collaborators to enhance understanding. Customize the template as needed to fit specific stories or teaching goals. For educators, use the template to teach story structure, while writers can apply it to outline their narratives effectively. This tool simplifies the analysis and creation of stories, making it an invaluable resource for both learning and writing. Regular use fosters a deeper appreciation of storytelling techniques and plot development.

deep gluteal syndrome exercises pdf

Deep gluteal syndrome involves pain in the buttock area due to sciatic nerve entrapment․ Weak glutes are a key risk factor, making targeted exercises essential for management․

1․1 Understanding the Condition

Deep gluteal syndrome is characterized by pain in the buttock region, often due to the entrapment of the sciatic nerve outside the pelvis․ This condition can arise from muscle imbalances, particularly weak or overactive gluteal muscles․ The gluteal complex plays a crucial role in hip stability and movement, and dysfunction in this area can lead to chronic pain․ Understanding the condition involves recognizing how nerve entrapment and muscle misactivation contribute to symptoms․ Targeted exercises are essential to restore proper muscle function and alleviate pain․ Without addressing these underlying issues, symptoms may persist or worsen, emphasizing the need for a comprehensive approach to management․

1․2 Importance of Targeted Exercises

Targeted exercises are crucial for managing deep gluteal syndrome, as they strengthen the glutes and surrounding muscles, reducing sciatic nerve entrapment․ Weak glutes are a primary risk factor, making exercise essential for both treatment and prevention․ Activities like bridges, lateral walks, and hip thrusts help restore muscle balance and alleviate pain․ These exercises should be performed with proper form to avoid exacerbating symptoms․ Regular practice can improve posture, movement patterns, and overall muscle function․ Consulting a physical therapist ensures exercises are tailored to individual needs, promoting long-term recovery and preventing recurrence․

Definition and Causes of Deep Gluteal Syndrome

Deep gluteal syndrome is characterized by buttock pain due to non-discogenic, extrapelvic sciatic nerve entrapment․ Weak glutes, muscle imbalances, and prolonged sitting are common causes, often leading to underdiagnosis․

2․1 What is Deep Gluteal Syndrome?

Deep gluteal syndrome (DGS) is a condition characterized by buttock pain caused by the entrapment of the sciatic nerve outside the pelvis, not related to spinal discs․ It occurs when the sciatic nerve is compressed by surrounding muscles or structures in the deep gluteal space․ Unlike piriformis syndrome, DGS involves multiple muscles and tissues contributing to nerve entrapment․ Symptoms often include pain in the buttock that may radiate down the leg, mimicking sciatica․ It is frequently associated with muscle imbalances, weak glutes, or prolonged sitting․ Accurate diagnosis is crucial to differentiate it from other conditions like hip impingement or piriformis syndrome․

2․2 Risk Factors and Common Causes

The primary risk factors for deep gluteal syndrome include weak gluteal muscles, which can lead to poor posture and movement patterns․ Activities involving prolonged sitting, repetitive hip movements, or heavy lifting also contribute․ Additionally, muscle imbalances, particularly in the piriformis and surrounding muscles, can compress the sciatic nerve․ Obesity and previous injuries or surgeries in the pelvic or hip region further increase susceptibility․ These factors often result in non-discogenic, extrapelvic entrapment of the sciatic nerve, causing buttock pain and discomfort․ Addressing these underlying causes through targeted exercises and lifestyle adjustments is crucial for effective management․

Symptoms of Deep Gluteal Syndrome

Common symptoms include pain in the buttocks, often radiating to the thigh or leg, worsening with sitting or activity․ Tenderness and difficulty sitting comfortably are typical․

3․1 Common Pain Patterns

Deep gluteal syndrome often presents with pain in the buttock region, which may radiate to the posterior thigh or lower back․ The pain is typically sharp or dull and can worsen with activities like sitting, prolonged standing, or movements involving hip flexion․ Patients may experience discomfort during specific exercises or daily tasks, such as squats or climbing stairs․ In some cases, the pain may extend to the back of the leg, mimicking sciatica, but it is differentiated by its origin in the gluteal muscles rather than a spinal disc issue․ Weakness or tightness in the glutes can exacerbate symptoms, making targeted exercises crucial for relief․

3․2 Distinguishing from Other Conditions

Distinguishing deep gluteal syndrome from other conditions, such as piriformis syndrome or hip-related sciatica, can be challenging․ While both involve sciatic nerve entrapment, DGS is characterized by non-discogenic and extrapelvic nerve compression․ Unlike piriformis syndrome, which primarily involves the piriformis muscle, DGS often includes other gluteal muscles․ It may also mimic symptoms of gluteal tendinopathy or hip bursitis․ A thorough medical evaluation, including physical tests and imaging, is essential to rule out other causes․ Understanding these differences is critical for accurate diagnosis and effective treatment, ensuring exercises and therapies target the correct underlying issues․

Diagnosis and Assessment

Diagnosis involves medical evaluation, MRI, and physical exams to identify sciatic nerve entrapment and rule out other conditions․ Physical therapy plays a key role in assessment․

4;1 Medical Evaluation and Tests

A thorough medical evaluation is crucial for diagnosing deep gluteal syndrome․ Physicians often begin with a detailed patient history and physical exam to assess pain patterns and muscle function․ Imaging tests like MRI or CT scans may be ordered to rule out other causes, such as disc herniation․ The physical exam typically includes palpation of the gluteal region and nerve tension tests․ In some cases, electromyography (EMG) may be used to evaluate nerve function․ A comprehensive assessment helps differentiate deep gluteal syndrome from other conditions like piriformis syndrome or hip-related sciatica, ensuring an accurate diagnosis and appropriate treatment plan․

4․2 Role of Physical Therapy in Diagnosis

Physical therapy plays a crucial role in diagnosing deep gluteal syndrome by assessing movement patterns, muscle strength, and pain triggers․ Therapists use palpation and specific tests to identify sciatic nerve entrapment and gluteal dysfunction․ They evaluate how exercises like bridges or squats provoke symptoms, helping differentiate DGS from other conditions․ A thorough physical therapy assessment informs personalized exercise programs, ensuring targeted strengthening and stretching․ This approach not only aids in diagnosis but also lays the groundwork for effective treatment, emphasizing the importance of tailored interventions for optimal recovery․

Treatment Options for Deep Gluteal Syndrome

Conservative management often includes targeted exercises, physical therapy, and lifestyle adjustments․ In severe cases, medical interventions like injections or surgery may be necessary to relieve symptoms․

5․1 Conservative Management Strategies

Conservative management for deep gluteal syndrome often involves a combination of physical therapy, stretching, and lifestyle modifications․ Strengthening exercises targeting the glutes and surrounding muscles, such as glute bridges and bird dogs, are commonly recommended․ Stretching routines, including piriformis and hip flexor stretches, can help alleviate tension․ Avoiding prolonged sitting and incorporating regular movement is also advised․ Over-the-counter pain relievers may be used to manage symptoms․ A physical therapist can tailor a program to address specific weaknesses and improve posture․ It’s important to avoid exercises that exacerbate pain and to gradually progress routines to prevent overloading the muscles․ Early intervention can significantly improve outcomes․

5․2 When to Seek Professional Help

If symptoms of deep gluteal syndrome persist or worsen despite conservative efforts, it’s crucial to seek professional help․ Consult a healthcare provider or physical therapist if pain interferes with daily activities or sleep․ Persistent numbness, tingling, or weakness in the legs may indicate nerve involvement requiring medical evaluation․ A professional can rule out other conditions, such as hip impingement or disc issues, and provide personalized treatment․ They may recommend advanced therapies or exercises tailored to your specific needs․ Delaying professional advice can lead to chronic pain or prolonged recovery․ Early intervention ensures effective management and prevents complications․

Exercise Program for Deep Gluteal Syndrome

A structured exercise program targeting the glutes and surrounding muscles is crucial․ Bridges, squats, and lateral walks are effective․ Progressing from basic to advanced movements ensures sustained improvement and prevents recurrence․

  • Bridge with leg lift: Strengthens glutes and improves sciatic nerve mobility․
  • Bodyweight squats: Enhances hip and gluteal muscle activation․
  • Lateral band walks: Targets gluteus medius for stability․

Consulting a physical therapist ensures exercises are tailored to individual needs, promoting safe and effective recovery․

6․1 Beginner-Friendly Exercises

Beginner-friendly exercises for deep gluteal syndrome focus on strengthening the glutes and improving mobility without aggravating symptoms․ Bridging is an excellent starting point, as it isolates the glute muscles and promotes activation․ Bird dogs and clamshell exercises are also effective, targeting stability and proper muscle engagement․ Gentle stretching, such as piriformis stretches, can relieve tension without overloading the area․ These exercises should be performed with proper form to avoid further irritation․ Progress slowly, ensuring each movement is pain-free and controlled․ Consistency is key to building strength and reducing discomfort over time․ Always consult a professional to tailor exercises to your specific needs․

6․2 Intermediate and Advanced Exercises

For individuals who have progressed beyond basic exercises, intermediate and advanced routines can further strengthen the glutes and surrounding muscles․ Exercises like bridge with leg lift and lateral hip and gluteal movements are effective․ Advanced programs may include step-ups, single-leg deadlifts, and resistance band exercises to target deeper tissues․ It’s crucial to maintain proper form, engaging the glutes and avoiding compensation from other muscle groups․ These exercises help improve strength, stability, and flexibility, reducing the risk of recurrence․ Always consult a physical therapist to tailor exercises to your specific needs and progress safely․

Preventing Recurrence

Preventing deep gluteal syndrome recurrence involves consistent glute strengthening exercises and maintaining proper posture․ Regular exercise routines and correct movement patterns help avoid future episodes․

7․1 Strengthening the Glutes and Surrounding Muscles

Strengthening the glutes and surrounding muscles is crucial for preventing the recurrence of deep gluteal syndrome․ Weak glutes are a primary risk factor, so targeting these muscles through specific exercises can improve stability and reduce strain on the sciatic nerve․ Exercises like side-lying leg lifts, donkey kicks, and step-ups are effective for building strength․ Additionally, incorporating core-strengthening activities helps maintain proper posture and movement patterns, reducing the likelihood of nerve entrapment․ Consistency is key, as gradual muscle development provides long-term support․ Working with a physical therapist can ensure exercises are performed correctly, avoiding imbalances that might worsen symptoms․ A well-rounded strength program is essential for sustained recovery and prevention․

7․2 Maintaining Proper Posture and Movement Patterns

Maintaining proper posture and movement patterns is vital for preventing deep gluteal syndrome recurrence․ Poor posture can exacerbate sciatic nerve irritation, while improper movement patterns may strain the glutes and surrounding tissues․ Avoiding activities that involve bending the knee over the toe during squats or lunges can reduce pressure on the sciatic nerve․ Incorporating exercises that promote proper pelvic alignment, such as bridging with leg lifts and side-lying leg lifts, can help maintain optimal posture․ Additionally, practicing mindful movement during daily activities ensures that the glutes and hips function efficiently․ A physical therapist can provide personalized guidance to correct posture and movement habits, further reducing the risk of future episodes․

Deep gluteal syndrome management focuses on targeted exercises and proper posture to alleviate symptoms and prevent recurrence․ Regular physical therapy and mindful movement promote long-term recovery and well-being․

8․1 Summary of Key Takeaways

8․2 Encouragement for Long-Term Recovery

Recovering from deep gluteal syndrome requires patience and consistency․ Celebrate small victories, like increased strength or reduced pain, to stay motivated․ Remember, progress may be slow, but each effort brings you closer to long-term relief․ Embrace the journey, and don’t hesitate to seek support from healthcare professionals when needed․ With dedication to exercises and proper care, full recovery is achievable․ Stay committed, and you’ll regain comfort and confidence in your daily activities․

the book of the wars of the lord pdf

The Book of the Wars of the Lord is an ancient text referenced in Numbers 21:14, containing poetic accounts of God’s victories. Available as a PDF, it explores divine triumphs and theological themes, offering insights into Israel’s history and faith.

Biblical References and Context

The Book of the Wars of the Lord is referenced in Numbers 21:14, where it is cited to validate the border between Amorites and Moabites. It is described as an anthology of poetic accounts celebrating God’s victories over Israel’s enemies, emphasizing divine intervention in historical events.

Numbers 21:14 and Its Significance

Numbers 21:14 references the Book of the Wars of the Lord, citing it to validate the border between the Amorites and Moabites as the Arnon stream. This verse highlights the book’s role as a historical or poetic source, likely containing accounts of divine victories. The mention of the Book of the Wars of the Lord in this context underscores its importance as a theological and historical text, emphasizing God’s active engagement in Israel’s history. The fragmented geographical note from the book, as quoted in Numbers 21:14, remains obscure but crucial for understanding ancient Israel’s territorial boundaries. Medieval commentator Moses Nahmanides suggested that the poetic victory song in Numbers 21:27-30 might also originate from this book, further linking it to Israel’s triumphs. This reference demonstrates the book’s influence on biblical narrative and its role in preserving Israel’s divine history, making it a significant yet enigmatic text in biblical studies.

Content and Structure of the Book

The Book of the Wars of the Lord contains 27 chapters exploring God as a warrior and peacemaker. It is an anthology of poems describing divine victories, offering theological insights into God’s role in Israel’s history.

Chapters and Themes

The Book of the Wars of the Lord is divided into 27 chapters, each exploring distinct aspects of God’s role as a warrior and leader. Themes include divine sovereignty, deliverance, and judgment, with titles like “The Warrior,” “The Warrior King,” and “The Peacemaker.” These chapters collectively present a theological narrative of God’s active engagement in Israel’s history. The book is structured as an anthology of poetic fragments, recalling victories over enemies and geographical conquests. Specific chapters delve into battles, territorial expansions, and the establishment of Israel’s identity. While the text is fragmented, its themes emphasize God’s covenant faithfulness and power. The structure suggests a chronological or thematic organization, blending historical and spiritual reflections. This arrangement allows readers to grasp the theological significance of God’s wars in shaping Israel’s destiny. The chapters and themes work together to present a vivid, albeit incomplete, portrait of divine action in ancient Israel’s life.

Historical and Geographical Notes

The Book of the Wars of the Lord includes geographical details crucial to understanding Israel’s movements. It references the Arnon stream as a border between Amorites and Moabites, highlighting territorial boundaries. The text also notes Israel’s encampments and journeys, providing a spatial context for divine actions. Poetic fragments describe the conquest of regions, reflecting historical events. Scholars link these notes to broader biblical narratives, such as the wilderness wanderings. The book’s geographical focus underscores the importance of land in Israel’s identity. While fragmented, these details offer insights into ancient Near Eastern topography and Israel’s interactions with neighboring peoples. The historical context suggests the book was compiled from earlier sources, preserving memories of pivotal events. These notes bridge history and theology, illustrating God’s involvement in shaping Israel’s territorial heritage. The geographical and historical elements are vital for reconstructing the setting of Israel’s formative experiences.

The Book as a Lost Work

The Book of the Wars of the Lord, referenced in Numbers 21:14, is a lost text. Once containing poems of divine victories, it has vanished, leaving only fragments and biblical mentions.

Reasons for Its Disappearance

The Book of the Wars of the Lord vanished due to a combination of factors. It was likely excluded from the canonical Bible, as it wasn’t deemed essential for inclusion. Additionally, ancient texts often succumbed to destruction from wars, natural disasters, or deterioration. The lack of widespread copying and preservation, coupled with its limited citation in the Bible, further contributed to its loss. Intentional exclusion by religious leaders and the passage of time also played significant roles in its disappearance, leaving only fragmented references behind.

Scholarly Interpretations and Debates

Scholars debate the nature of the Book of the Wars of the Lord, with some viewing it as an anthology of poems celebrating divine victories. Its theological significance and historical context remain subjects of exploration, as it is now a lost work referenced only in the Bible.

Views on Its Theological Importance

The Book of the Wars of the Lord is viewed by many scholars as a significant theological text, emphasizing God’s active role in Israel’s history. It highlights divine victories and interventions, showcasing God as a warrior and protector. The book’s poetic nature underscores the spiritual and symbolic importance of these events, reinforcing faith in God’s sovereignty. Medieval commentators like Moses Nahmanides suggested that parts of the book, such as the victory poem in Numbers 21:27-30, reflect deeper theological themes. The text is seen as a celebration of God’s power and justice, making it a vital resource for understanding ancient Israelite theology; Despite its loss, the book’s referenced passages continue to inspire theological reflection and study.

The Book of the Wars of the Lord in Modern Times

The Book of the Wars of the Lord is now widely available as a PDF and through online resources, making its contents accessible for modern study and theological exploration.

Availability as a PDF and Online Resources

The Book of the Wars of the Lord is readily accessible in digital formats, particularly as a PDF. Websites like vdoc.pub and other online repositories offer free downloads, making it easy for readers to explore its contents. Many platforms provide this text in both PDF and TXT formats, ensuring compatibility with various devices. Additionally, some sites allow users to view the document directly online without needing to download it. These resources are especially valuable for scholars and enthusiasts interested in ancient biblical texts. The availability of the book in digital form has significantly enhanced its reach, enabling a broader audience to study its theological and historical significance. Furthermore, online discussions and analyses of the text can be found across various forums and academic databases, fostering deeper understanding and engagement with its themes.

The Book of the Wars of the Lord, though a lost text, holds profound significance in biblical history and theology. Its mention in Numbers 21:14 highlights its role in chronicling divine victories and Israel’s journey; Available as a PDF, it remains a vital resource for scholars and enthusiasts, offering insights into ancient poetic traditions and theological themes. The availability of digital versions ensures its accessibility, fostering deeper study and reflection. This text not only provides a glimpse into Israel’s past but also underscores the enduring relevance of faith and divine providence. As a historical and spiritual document, the Book of the Wars of the Lord continues to inspire exploration and dialogue, bridging the gap between ancient traditions and modern understanding.

norcold refrigerator manual

Welcome to the comprehensive guide for Norcold refrigerator manuals. These manuals provide essential information for proper installation, operation, and maintenance of your Norcold refrigerator. They include safety precautions, technical specifications, and troubleshooting tips to ensure optimal performance and longevity of your appliance. Whether you’re a new user or an experienced owner, these manuals are your go-to resource for all Norcold refrigerator-related needs.

1.1 Overview of Norcold Refrigerator Models

Norcold offers a variety of refrigerator models designed for different needs, including the popular 1200XX, 120x, and 121X-XX series. These models cater to RV and marine applications, providing reliable cooling solutions. Each model features unique specifications, such as energy-saving modes, gas absorption technology, and advanced temperature control systems. The manuals provide detailed information on each model’s capabilities and installation requirements.

1.2 Importance of Reading the Manual

Reading the Norcold refrigerator manual is crucial for safe and efficient operation; It provides essential safety guidelines, installation requirements, and maintenance tips. Understanding the manual helps troubleshoot common issues, optimize energy use, and extend appliance life. It also outlines warranty details and proper usage to avoid damage. Always refer to the manual before operating or servicing your Norcold refrigerator to ensure optimal performance and longevity.

Safety Precautions and Warnings

Always follow safety guidelines to prevent hazards. Use only Norcold-approved ventilation systems and avoid unapproved modifications. Adhere to installation and operation instructions to ensure safe and proper function.

2.1 General Safety Guidelines

Adhere to safety guidelines to ensure safe operation. Place the refrigerator on a sturdy floor and avoid direct sunlight. Follow electrical connection instructions to prevent hazards. Always read the manual carefully before first use to avoid accidents and appliance damage. Proper installation and ventilation are crucial for safe and efficient performance.

2.2 Specific Safety Instructions for Installation and Use

Follow specific safety instructions during installation and operation. Use only Norcold-approved ventilation systems for proper airflow. Ensure the refrigerator is placed on a strong, level surface and avoid direct sunlight exposure. Always connect to a three-prong outlet to prevent electrical hazards. Allow the appliance to cool for eight hours before loading food. Never operate the refrigerator in extreme temperatures or unventilated spaces to maintain efficiency and safety.

Installation and Ventilation Requirements

Proper installation and ventilation are crucial for safe and efficient operation. Use Norcold-approved ventilation systems and ensure the appliance is installed on a level, stable surface away from direct sunlight to prevent overheating and maintain performance.

3.1 Proper Ventilation for Safe Operation

Proper ventilation is essential for safe and efficient operation of your Norcold refrigerator. Use only Norcold-approved ventilation systems to ensure correct airflow and prevent overheating. Maintain adequate clearance around vents and avoid direct sunlight exposure. Improper ventilation can lead to reduced performance, safety hazards, or equipment damage. Always follow the manufacturer’s guidelines for ventilation installation and maintenance to ensure optimal functionality and longevity of your appliance.

3.2 Step-by-Step Installation Guide

Begin by placing the refrigerator on a sturdy, level surface, ensuring it is within the recommended tilt range. Connect the power source and install Norcold-approved ventilation components. Secure all connections and test the unit to confirm proper operation. Follow the manufacturer’s instructions for precise alignment and installation to ensure safety and efficiency. Proper installation is crucial for optimal performance and longevity.

Operating Instructions

Start by plugging in the refrigerator and selecting your preferred mode. Adjust temperature settings according to your needs and monitor performance regularly. Ensure proper door sealing and avoid overloading to maintain efficiency. Refer to the control panel guide for detailed instructions on operation and mode selection.

4.1 Understanding the Control Panel

The control panel is the central interface for managing your Norcold refrigerator. It features temperature adjustment buttons, mode selection options, and indicator lights. Familiarize yourself with the layout to easily switch between cooling modes, monitor temperatures, and check system status. Refer to the manual for detailed explanations of each button and light to ensure proper operation and troubleshooting.

4.2 Setting the Temperature and Modes

To optimize performance, use the control panel to set your desired temperature and select operating modes. Choose between gas or electric operation based on your power source. Adjust the temperature using the designated buttons, ensuring it stays within the recommended range for food safety. The manual provides detailed guidance for mode selection and temperature adjustment to meet your specific needs.

Maintenance and Troubleshooting

Regular maintenance ensures optimal performance and extends the lifespan of your Norcold refrigerator. Clean condenser coils, inspect door seals, and check the cooling unit for leaks. Troubleshooting common issues like temperature fluctuations or poor cooling involves checking power supply, ventilation, and gas connections. Refer to the manual for detailed diagnostic steps.

5;1 Regular Maintenance Tasks

Performing regular maintenance ensures your Norcold refrigerator operates efficiently. Clean the condenser coils every 3-6 months to prevent dust buildup. Inspect door seals for tightness and replace if worn. Check for gas leaks in propane models and ensure proper ventilation. Regularly defrost non-frost-free models and monitor temperature settings. Refer to the manual for detailed maintenance schedules and procedures.

5.2 Common Issues and Solutions

Common issues with Norcold refrigerators include cooling failures, temperature fluctuations, and error codes. Check for proper gas supply in propane models and ensure ventilation is unobstructed. For electronic issues, reset the unit or refer to the manual. Addressing these problems promptly prevents further damage. Always follow the troubleshooting guide in your manual for specific solutions to maintain optimal performance and extend appliance life.

Extended Service Protection (ESP) Plan

The ESP Plan offers four extra years of protection against cooling unit failure, automatic replacement, and prepaid freight. Available for $40, it ensures long-term security and hassle-free repairs, providing peace of mind for Norcold refrigerator owners.

6.1 Benefits of the ESP Plan

The ESP Plan provides extended protection for four additional years, covering cooling unit failures and offering automatic replacements. It includes prepaid freight and free labor, ensuring hassle-free repairs. This plan offers financial security and peace of mind, protecting your investment and reducing unexpected repair costs for Norcold refrigerator owners.

6.2 How to Purchase and Activate the ESP Plan

To purchase the ESP Plan, contact Norcold directly or visit their official website. Ensure you have proof of original purchase. Activate the plan by submitting the required documents and paying the $40 fee. Once approved, your extended protection begins, covering repairs and replacements for four additional years beyond the standard warranty period.

Energy-Saving Features

Norcold refrigerators offer energy-saving modes to minimize power consumption while maintaining performance. Features like smart sensors and adaptive cooling ensure efficient operation, reducing energy use without compromising functionality.

7.1 Energy-Saving Modes

Norcold refrigerators feature energy-saving modes designed to reduce power consumption while maintaining performance. The energy-saving mode automatically adjusts cooling levels to minimize energy use when the refrigerator is not in active demand. This eco-friendly feature ensures optimal efficiency, especially in gas mode, helping to extend propane supply and lower overall energy costs without compromising cooling performance or reliability.

7.2 Tips for Optimizing Energy Efficiency

To maximize energy efficiency, ensure proper ventilation by cleaning vents regularly and maintaining a well-ventilated space. Keep the refrigerator away from direct sunlight and heat sources. Check door seals for tightness and avoid overloading the fridge. Set the temperature to a mid-range level and avoid frequent door openings. Regular maintenance, like cleaning condenser coils, also enhances efficiency.

Temperature Control and Management

The Norcold refrigerator features advanced temperature control systems to maintain optimal cooling. Proper temperature management ensures consistent performance and energy efficiency, keeping your contents fresh and safe.

8.1 Understanding the Temperature Control System

The Norcold refrigerator’s temperature control system ensures consistent cooling by automatically managing internal temperatures. It uses sensors to monitor conditions and adjust settings for optimal performance. This system is designed to maintain freshness and safety while optimizing energy efficiency. Understanding how to use this feature correctly will help you get the most out of your appliance.

8.2 Adjusting Settings for Optimal Performance

Adjusting the temperature settings on your Norcold refrigerator ensures efficient cooling and energy use. Use the control panel to select modes like Economy or Boost for specific needs. Set temperatures between 33°F and 41°F for the refrigerator and -10°F to 5°F for the freezer. Monitor performance and adjust settings based on usage patterns and external temperatures for consistent results.

Warranty Information

The Norcold refrigerator warranty covers parts and labor for a specified period, ensuring protection against manufacturing defects. Proper registration and adherence to guidelines are required for validity.

9.1 Coverage and Duration

The Norcold refrigerator warranty typically covers parts and labor for a specified period, protecting against manufacturing defects. The standard warranty duration varies by model, with options to extend coverage through the ESP Plan. This plan offers four additional years of protection, including cooling unit replacement, pre-paid freight, and labor costs. Proper registration and adherence to guidelines are essential for warranty validity.

9.2 Filing a Warranty Claim

To file a warranty claim, review the manual for eligibility criteria and contact an authorized Norcold dealer. Provide proof of purchase and a detailed description of the issue. Claims must adhere to the warranty terms, and repairs must be performed by certified technicians. The ESP Plan offers extended protection, ensuring faster resolution and covering additional costs for parts and labor.

Technical Specifications and Diagrams

This section provides detailed technical specifications, including dimensions, power requirements, and capacities. Diagrams illustrate components like the cooling unit and electrical systems, aiding advanced users in repairs and maintenance.

10.1 Key Technical Details

Norcold refrigerators feature advanced absorption cooling systems, designed for efficient operation in RVs. Technical details include dimensions, power requirements, and capacities. Models like the 1200XX and 121X-XX offer propane-based cooling, ensuring reliability off-grid. Energy-saving modes and precise temperature controls are highlighted, along with compatibility with RV installations. These specifications ensure optimal performance and longevity, catering to various RV setups and user needs.

10.2 Schematic Diagrams for Advanced Users

The manual includes detailed schematic diagrams for advanced users, illustrating the refrigerator’s internal components and their interconnections. These diagrams aid in understanding the cooling system, electrical circuits, and gas flow. They are particularly useful for troubleshooting, repairs, and custom installations. By following these diagrams, users can identify parts, diagnose issues, and perform complex maintenance tasks safely and effectively.

Repair and Replacement Parts

This section provides detailed information on identifying and ordering genuine Norcold parts, ensuring compatibility and safety. It also outlines DIY repair steps for common issues, helping users maintain their refrigerators effectively.

11.1 Identifying and Ordering Parts

The Norcold refrigerator manual includes a detailed parts list, making it easy to identify components by model number. Users can download PDF manuals or visit the Norcold website to find specific parts. Ordering genuine Norcold parts ensures compatibility and safety. Contact authorized dealers or use the online portal to purchase replacement components. Always refer to the manual for accurate part numbers and ordering instructions.

11.2 DIY Repair Steps

Norcold refrigerator manuals provide detailed DIY repair steps for common issues. Start by diagnosing the problem using the troubleshooting guide. Always disconnect power before attempting repairs. Use genuine Norcold parts for replacements to ensure safety and compatibility. Follow step-by-step instructions in the manual for tasks like replacing the cooling unit or seals. If unsure, consult a professional to avoid further damage.

Proper installation, operation, and maintenance ensure your Norcold refrigerator’s longevity. Refer to the manual for troubleshooting and warranty details. Regular checks and the ESP plan enhance performance and protection.

12.1 Summary of Key Points

This manual provides essential guidance for Norcold refrigerator installation, operation, and maintenance. It covers safety precautions, energy-saving features, and troubleshooting tips. The ESP plan offers extended protection, while proper temperature control ensures efficiency. Regular maintenance and adherence to technical specifications are crucial for longevity. Use this guide to optimize performance, address common issues, and extend the life of your Norcold refrigerator.

12.2 Final Tips for Long-Term Use

Ensure proper ventilation around your Norcold refrigerator to maintain efficient cooling and safety. Regularly inspect and clean vents to prevent blockages. Keep the interior organized to improve airflow and accessibility. Avoid overloading, as this can strain the cooling system. Always store perishables at appropriate temperatures to preserve freshness. For optimal performance, refer to the manual for detailed care and maintenance instructions.

ideal atlantic boiler user manual

The Ideal Atlantic Boiler is a high-efficiency combination boiler designed for central heating and hot water. It offers reliable performance, energy savings, and compact design.

1.1 Overview of the Ideal Atlantic Boiler Series

The Ideal Atlantic Boiler series offers a range of high-efficiency combination boilers designed for both central heating and domestic hot water. Available in 24kW, 30kW, and 35kW models, these boilers are known for their compact design, user-friendly controls, and reliable performance. They are engineered to maximize energy savings while providing consistent heating and hot water delivery, making them a popular choice for modern homes.

1.2 Importance of the User Manual

The user manual is essential for understanding the operation, installation, and maintenance of the Ideal Atlantic Boiler. It provides detailed instructions and safety precautions to ensure optimal performance and longevity; Regularly reviewing the manual helps users troubleshoot issues, adjust settings, and maintain compliance with industry standards. Always refer to the official PDF guide for accurate and up-to-date information.

Safety Precautions and Warnings

Always follow the safety guidelines in the manual to prevent hazards. Adhere to precautions for proper installation, operation, and maintenance to ensure safe and efficient boiler performance.

2.1 General Safety Guidelines

Always ensure the boiler is installed by a Gas Safe registered engineer. Follow the manufacturer’s instructions precisely. Use only approved materials for installation. Keep the boiler area clean and well-ventilated. Avoid tampering with internal components. Regularly inspect the system for leaks or damage. Ensure all electrical connections are secure and meet safety standards. Adhere to the recommended maintenance schedule to prevent malfunctions. Never operate the boiler if it is damaged or malfunctioning. Always turn off the power before servicing.

2.2 Emergency Shutdown Procedures

In case of an emergency, immediately turn off the boiler’s power supply and isolate the gas supply. Ensure the area is well-ventilated. Do not attempt to repair the boiler yourself. Contact a Gas Safe registered engineer or Ideal Boilers customer support. Follow the shutdown procedure outlined in the PDF manual. Keep emergency contact numbers handy. Regular maintenance can prevent such situations. Always refer to the user manual for specific instructions.

Installation and Servicing Instructions

Ensure installation by a Gas Safe certified technician, adhering to the PDF manual. Regular servicing maintains efficiency and safety, as outlined in the user guide.

3.1 Pre-Installation Requirements

Before installing the Ideal Atlantic Boiler, ensure compliance with Gas Safe regulations and industry standards. Verify the location meets ventilation and space requirements. Check electrical connections and water supply. Ensure all components are included in the package. Refer to the PDF manual for specific guidelines to ensure a safe and efficient setup. Proper preparation prevents potential issues during operation.

3.2 Step-by-Step Installation Guide

Carefully unpack and inspect the Ideal Atlantic Boiler for damage. Mount the boiler on a suitable wall, ensuring level placement. Connect water and gas supplies securely. Install the flue system according to the PDF manual instructions. Wire the electrical connections, following safety guidelines. Test all connections for leaks and proper function. Power on the boiler and run a test cycle to ensure everything operates smoothly. Always follow the manufacturer’s instructions for a safe and correct installation.

3.3 Servicing and Maintenance Schedule

Regular servicing is essential for optimal performance and longevity of the Ideal Atlantic Boiler. Schedule annual maintenance with a Gas Safe registered engineer. Check the flue and combustion chamber for blockages. Inspect and clean the heat exchanger as needed. Replace seals and gaskets if signs of wear are evident. Ensure all electrical connections are secure and functioning properly. Refer to the PDF manual for detailed maintenance instructions and recommendations.

Operating the Ideal Atlantic Boiler

The boiler operates efficiently with a user-friendly control panel for temperature and mode adjustments. Ensure proper setup and understand ignition and shutdown procedures for safe operation.

4.1 Understanding the Boiler Controls

The Ideal Atlantic Boiler features a user-friendly control panel with clear displays and intuitive buttons. The controls allow easy adjustment of temperature settings, mode selection, and timer programming. Additionally, the boiler includes full sequence automatic ignition for efficient operation. Familiarizing yourself with these controls ensures optimal performance and energy efficiency. Always refer to the user manual for detailed guidance on utilizing the controls effectively.

4.2 How to Activate and Deactivate the Boiler

To activate the Ideal Atlantic Boiler, press and hold the power button on the control panel until the display lights up and the system initiates. For deactivation, press and hold the same button until the display turns off, ensuring the boiler shuts down safely. These steps are designed to provide easy operation while maintaining energy efficiency and system integrity. Always follow the sequence carefully to avoid unnecessary wear.

4.3 Adjusting Temperature Settings

To adjust the temperature settings on your Ideal Atlantic Boiler, use the control panel’s digital display. Press the + or ⏤ buttons to increase or decrease the desired temperature. Ensure adjustments are made in small increments to avoid sudden changes. The boiler’s default settings are optimized for efficiency, but you can customize them based on your preferences. Always refer to the manual for specific guidance to maintain optimal performance and safety.

Troubleshooting Common Issues

This section helps identify and resolve common problems with your Ideal Atlantic Boiler, such as error codes or operational issues, ensuring efficient and safe functioning.

5.1 Identifying Fault Codes

Fault codes on the Ideal Atlantic Boiler indicate specific issues, such as ignition failures or pressure problems. Refer to the manual for a detailed list of codes and their meanings. Codes like “L1” or “F1” are displayed on the control panel to help diagnose malfunctions. Always consult the user manual or contact customer support for accurate troubleshooting. Regular maintenance can prevent many of these issues, ensuring efficient boiler operation.

5.2 Resolving Common Operational Problems

Common issues like ignition failures or low water pressure can be resolved by checking gas supply, ensuring proper water pressure, and cleaning filters. If error codes appear, refer to the manual for specific solutions. Resetting the boiler or consulting a Gas Safe registered engineer may be necessary for persistent problems. Always follow manufacturer guidelines to avoid further complications and ensure safe operation. Regular maintenance helps prevent these issues.

Technical Specifications

The Ideal Atlantic Boiler is available in outputs of 24kW, 30kW, and 35kW, offering high efficiency and reliable performance for central heating and hot water systems.

6.1 Output Capacities (24kW, 30kW, 35kW)

The Ideal Atlantic Boiler is available in three output capacities: 24kW, 30kW, and 35kW, catering to different home sizes and heating demands. The 24kW model is ideal for small to medium-sized homes, while the 30kW and 35kW models are better suited for larger properties or higher hot water requirements. Each model ensures efficient performance, with an energy efficiency rating that meets modern standards, providing reliable heating and hot water solutions.

6.2 Energy Efficiency Ratings

The Ideal Atlantic Boiler boasts impressive energy efficiency ratings, ensuring optimal performance while minimizing energy consumption. With an A-rated efficiency level, it meets ErP (Energy-related Products) directives, reducing carbon emissions and lowering utility bills. Its advanced design and smart controls contribute to high efficiency, making it an eco-friendly choice for homeowners seeking reliable and cost-effective heating solutions.

Compliance and Certifications

The Ideal Atlantic Boiler meets stringent industry standards and holds certifications for safety and environmental performance, ensuring compliance with regulatory requirements and promoting sustainable heating solutions.

7;1 Relevant Industry Standards

The Ideal Atlantic Boiler adheres to key industry standards, including those set by Gas Safe and Benchmark Scheme, ensuring optimal safety and efficiency. These standards guarantee compliance with European directives and UK regulations, offering users peace of mind and reliability. The boiler’s design and performance are rigorously tested to meet these criteria, making it a trusted choice for heating solutions.

7.2 Environmental and Safety Certifications

The Ideal Atlantic Boiler holds certifications like ErP (Energy-related Products) and is designed to meet strict environmental standards. It ensures reduced carbon emissions and energy efficiency, aligning with eco-friendly practices. Safety features meet UK and EU regulations, providing secure operation and peace of mind for users. These certifications underscore the boiler’s commitment to both environmental responsibility and user safety.

User Support and Resources

Ideal Boilers provides comprehensive support, including downloadable PDF manuals, customer service contact, and online resources for troubleshooting and maintenance, ensuring optimal boiler performance and user satisfaction.

8.1 Accessing the Full PDF Manual

The full PDF manual for the Ideal Atlantic Boiler is available for download on the official Ideal Boilers website or through their customer support portal. Users can easily access installation guides, troubleshooting tips, and detailed specifications. This resource ensures that all information needed for optimal boiler operation and maintenance is readily available. Regular updates are provided to keep users informed.

8.2 Contact Information for Customer Support

For assistance with the Ideal Atlantic Boiler, customers can contact Ideal Heating’s customer support team. The support hotline is available at 0800 408 5500. Additionally, users can visit the official Ideal Boilers website for contact forms, email addresses, and live chat options. The support team is ready to address any queries, from technical issues to maintenance scheduling, ensuring prompt and reliable service.

The Ideal Atlantic Boiler offers a reliable and efficient heating solution. Regular maintenance and adherence to the user manual ensure optimal performance and longevity of the system.

9.1 Final Tips for Optimal Boiler Performance

For the Ideal Atlantic Boiler, ensure regular servicing by certified professionals to maintain efficiency. Always follow the user manual guidelines for temperature adjustments and maintenance. Check for leaks and corrosion regularly. Bleed radiators annually to remove airlocks. Keep the boiler area clean and well-ventilated. Adhere to the recommended output capacities of 24kW, 30kW, or 35kW. This ensures optimal performance and extends the boiler’s lifespan.

9.2 Importance of Regular Maintenance

Regular maintenance is crucial for the longevity and efficiency of the Ideal Atlantic Boiler. Schedule annual servicing by Gas Safe registered engineers to ensure compliance with safety standards. Check and replace seals and components as needed. Clean the heat exchanger and condensate trap regularly. Address any fault codes promptly to prevent major issues. This routine upkeep ensures reliable operation, energy efficiency, and extends the boiler’s lifespan.