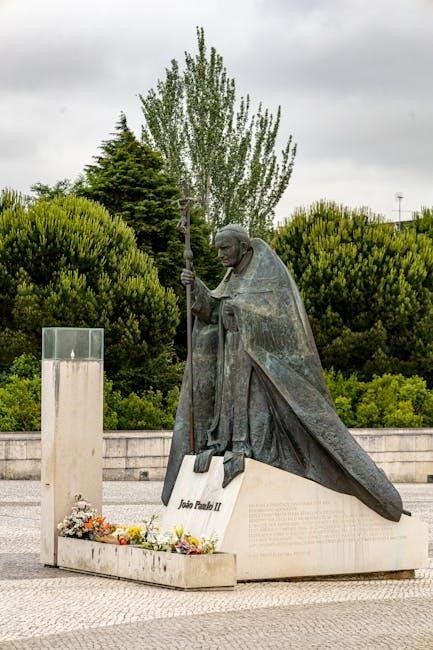
The Glorious Mysteries, the final set in the Rosary, reflect on Jesus’ triumph and Mary’s glory, offering profound spiritual insights and joy through prayer and meditation.

The Five Glorious Mysteries
The Glorious Mysteries include the Resurrection, Ascension, Descent of the Holy Spirit, Assumption of Mary, and her Coronation, celebrating divine triumph and eternal glory through prayer.
The Resurrection of Jesus
The Resurrection of Jesus is the cornerstone of the Glorious Mysteries, celebrating His triumph over death. This miracle, recounted in John 20:1-29, marks the fulfillment of divine prophecy and the ultimate expression of God’s love. On the third day, Jesus arose from the tomb, revealing His power over sin and death. The empty tomb and encounters with the risen Christ, such as Mary Magdalene’s experience, signify eternal life and hope for humanity. This mystery invites believers to reflect on the victory of life over death and the promise of resurrection for all. It is a powerful reminder of faith, renewal, and the eternal glory of Jesus Christ, central to Christian belief and the foundation of the Glorious Mysteries.
The Ascension of Jesus into Heaven
The Ascension of Jesus into Heaven is the second Glorious Mystery, marking the culmination of His earthly mission. As described in Acts 1:1-11, Jesus ascended bodily into heaven, witnessed by His disciples, symbolizing His glorification and divine authority. This event signifies the end of His physical presence on earth and the beginning of His eternal reign at the right hand of the Father. The disciples, filled with joy and hope, were instructed to await the Holy Spirit, preparing them for their mission to spread His teachings. The Ascension reminds believers of the promise of eternal life and the hope of one day being united with Christ in heaven. It is a celebration of divine triumph and the eternal glory of Jesus, reinforcing faith and trust in God’s plan.

The Descent of the Holy Spirit

The Descent of the Holy Spirit, the third Glorious Mystery, occurred on Pentecost as recorded in Acts 2:1-47. This event marked the fulfillment of Jesus’ promise to send the Holy Spirit to His disciples, empowering them to spread His teachings. The Spirit descended in the form of tongues of fire, filling the disciples with courage, wisdom, and the ability to speak in various languages. This miracle united people from diverse backgrounds, symbolizing the universal mission of the Church. The Holy Spirit’s arrival transformed the disciples into bold witnesses of Christ, initiating the spread of Christianity. This mystery reminds believers of the ongoing presence and power of the Holy Spirit, who continues to guide and renew the Church, fostering unity and missionary zeal among the faithful. It is a celebration of divine empowerment and the birth of the Church.
The Assumption of the Virgin Mary
The Assumption of the Virgin Mary, the fourth Glorious Mystery, commemorates Mary’s heavenly glorification at the end of her earthly life. According to tradition and Revelation 12:1-17, Mary was assumed body and soul into heaven, where she was crowned Queen of Heaven and Earth. This mystery highlights Mary’s sinless life and her divine motherhood, serving as a testament to God’s love and promise of eternal life. The Assumption is a source of hope and inspiration for believers, reflecting the ultimate destiny of all Christians—eternal union with God. It also underscores the dignity of the human body and its future resurrection, as promised by Christ. This mystery invites the faithful to contemplate Mary’s role as a spiritual mother and intercessor, while trusting in the hope of their own resurrection and heavenly glorification.
The Coronation of the Virgin Mary

The Coronation of the Virgin Mary, the fifth Glorious Mystery, celebrates Mary’s exaltation as Queen of Heaven. Rooted in Psalm 45:11-15, this mystery portrays Mary being crowned by her Son, Jesus, in a divine act of honor. It symbolizes her ultimate glorification and her role as intercessor for humanity. The Coronation emphasizes Mary’s perfect union with God and her eternal reign alongside Christ. This mystery invites believers to seek Mary’s intercession and to strive for a deeper union with God. It also reflects the Church’s devotion to Mary as a model of faith and holiness, inspiring the faithful to live virtuous lives and to trust in her maternal care. The Coronation is a powerful reminder of the eternal life and glory promised to all who follow Christ.

How to Pray the Glorious Mysteries
Begin with the Sign of the Cross, recite the Apostles’ Creed, and pray an Our Father. Reflect on each mystery, praying a Hail Mary for each bead, and conclude with the Hail Holy Queen.
Steps for Praying the Rosary
Begin by making the Sign of the Cross and reciting the Apostles’ Creed. Pray the Our Father, followed by three Hail Marys for faith, hope, and charity. Reflect on the first Glorious Mystery, praying one Our Father and ten Hail Marys. Conclude each decade with the Hail Holy Queen. Repeat this process for all five Glorious Mysteries. End with the Sign of the Cross and optional closing prayers. This structured approach fosters devotion and mindfulness, allowing deeper meditation on the divine events celebrated in the Glorious Mysteries.
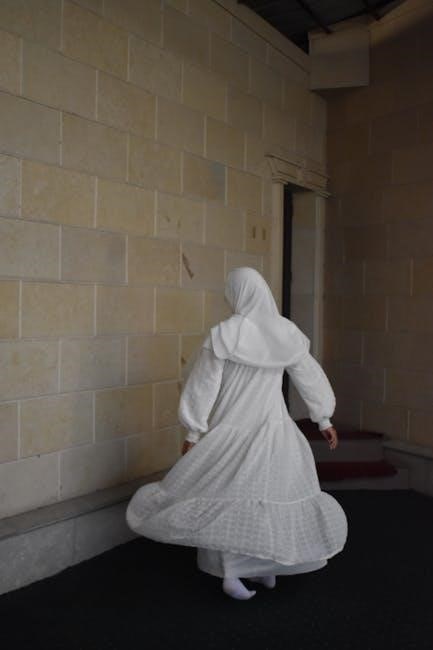
Praying with Family or Community
Gathering with family or community to pray the Glorious Mysteries fosters unity and strengthens faith. Begin by creating a sacred atmosphere, perhaps with candles or icons. Share intentions silently or aloud before starting. Take turns leading the decades, allowing each person to engage deeply. For children, explain the mysteries simply to help them understand. Older members can share reflections or insights. Conclude with a moment of silence or a final prayer, encouraging discussion or sharing of thoughts. This communal practice not only deepens personal devotion but also builds bonds and shared spiritual growth. Resources like PDF guides or coloring pages can aid younger participants in following along. Praying together becomes a meaningful tradition, fostering a sense of belonging and collective worship.

The Biblical Significance of Each Mystery
The Glorious Mysteries are deeply rooted in Scripture, reflecting pivotal events in Jesus’ life and Mary’s exaltation, such as the Resurrection, Ascension, and Pentecost, offering profound theological insights.
The Resurrection (John 20:1-29)
The Resurrection of Jesus, as recounted in John 20:1-29, is the cornerstone of Christian faith and the first Glorious Mystery. It begins with Mary Magdalene discovering the empty tomb, symbolizing Jesus’ triumph over death. The narrative highlights the disciples’ disbelief, followed by Jesus’ appearances, which confirm His divine power. This event is central to the Rosary, as it reflects the ultimate victory of life over death, bringing hope and joy to believers. Meditating on this mystery helps prayerful reflection on Christ’s redemptive sacrifice and His promise of eternal life, fostering a deeper understanding of God’s love and the resurrection’s transformative power in our lives.
The Ascension (Acts 1:1-11)
The Ascension of Jesus into Heaven, detailed in Acts 1:1-11, marks the second Glorious Mystery. After His Resurrection, Jesus appeared to His disciples over 40 days, providing final instructions before ascending to the Father. The apostles watched as He rose into the sky, vanishing into a cloud. Angels then appeared, promising Jesus’ return in glory. This event signifies the completion of Jesus’ earthly mission and His glorification at the right hand of God. It also symbolizes the disciples’ transition from following Jesus physically to spreading His teachings through the Holy Spirit. Meditating on the Ascension reinforces trust in God’s plan and the promise of eternal life, inspiring believers to live with hope and joyful anticipation of Christ’s return.
The Descent of the Holy Spirit (Acts 2:1-47)
The Descent of the Holy Spirit, the third Glorious Mystery, occurred on Pentecost, as described in Acts 2:1-47. The disciples, gathered in the Upper Room, experienced a miraculous outpouring of the Holy Spirit, symbolized by tongues of fire and a mighty wind. This event transformed them from fearful followers into bold witnesses, empowering them to preach the Gospel to people from diverse nations. The miracle of speaking in various languages allowed the disciples to communicate with everyone present, demonstrating the universal mission of the Church. This mystery highlights the Holy Spirit’s role in animating the Church and equipping believers to fulfill Christ’s mission. Reflecting on this mystery inspires believers to seek the Holy Spirit’s guidance and courage in their lives, fostering unity and evangelization. It remains a cornerstone of Christian faith, celebrating the birth of the Church and its ongoing mission.
The Assumption of Mary (Revelation 12:1-17)
The Assumption of Mary, the fourth Glorious Mystery, commemorates Mary’s bodily taking up into heaven. Rooted in Revelation 12:1-17, it symbolizes her victory over sin and death. Tradition holds that Mary, at the end of her earthly life, was assumed into heaven, body and soul, to share in her Son’s glory. This mystery underscores Mary’s unique role as the Mother of God and her perfect union with Christ. It also signifies hope for believers in their own resurrection and eternal life. The Assumption is celebrated as a triumph of faith and a testament to God’s divine plan for humanity. Reflecting on this mystery deepens devotion to Mary and fosters hope in the promise of eternal life, reminding believers of their ultimate destiny in heaven. It is a powerful symbol of trust in God’s providence and love.
The Coronation of Mary (Psalm 45:11-15)
The Coronation of Mary, the fifth Glorious Mystery, celebrates her heavenly queenship. Rooted in Psalm 45:11-15, it portrays Mary being crowned queen of heaven by her Son, Jesus. This mystery reflects the culmination of her earthly life and assumption into heaven, where she is exalted as the Mother of the King. The coronation symbolizes Mary’s perfect humility and obedience, highlighting her role as intercessor and advocate for humanity. It also serves as a reminder of the ultimate glorification awaiting believers in heaven. Meditating on this mystery fosters devotion to Mary’s maternal care and inspires hope in her intercession. It is a joyous reflection on the union of Mary and Christ, emphasizing the triumph of grace and the eternal reign of God. The Coronation of Mary is a powerful symbol of divine love and redemption.

Spiritual Benefits of Meditating on the Glorious Mysteries
Meditating on the Glorious Mysteries deepens faith, fosters hope, and brings joy and peace. It strengthens devotion to Christ and Mary, inspiring trust in divine providence and grace.
Deepening Faith and Hope
Meditating on the Glorious Mysteries strengthens faith by reflecting on Christ’s triumph and Mary’s glory, renewing trust in God’s plan. The Resurrection and Ascension remind us of eternal life, fostering hope. These mysteries inspire believers to embrace divine promises, trusting in God’s providence. By contemplating the Descent of the Holy Spirit, we find courage to live as witnesses of faith. The Assumption and Coronation of Mary highlight her role as a model of hope and intercession. Praying the Glorious Mysteries nurtures a deeper connection to Christ and Mary, reinforcing faith and hope in daily life. This meditation guides believers to trust in God’s plan and seek strength in His divine love and mercy, transforming their spiritual journey.
Experiencing Joy and Peace
The Glorious Mysteries offer a profound source of joy and peace, as they reflect on the triumph of Christ and the glory of Mary. Meditating on the Resurrection brings hope and renewal, while the Ascension reminds us of Christ’s eternal presence. The Descent of the Holy Spirit fills hearts with comfort and divine guidance. The Assumption and Coronation of Mary inspire joy in her heavenly glory, showing the ultimate fulfillment of God’s plan. Praying these mysteries fosters inner peace by connecting us to divine love and mercy. The Rosary’s rhythmic prayers create a calming atmosphere, helping believers let go of worldly anxieties. Through the Glorious Mysteries, we find solace in the knowledge of eternal life and the joy of being united with God. This meditation becomes a powerful tool for experiencing peace amidst life’s challenges.
Seeking Mary’s Intercession
Meditating on the Glorious Mysteries invites believers to seek Mary’s powerful intercession. As the Queen of Heaven, Mary’s Coronation symbolizes her role as a mediator between God and humanity. Her Assumption into heaven highlights her unique union with Christ, making her a compassionate advocate for our needs. Praying the Rosary, especially the Glorious Mysteries, fosters a deep devotion to Mary, encouraging us to turn to her for guidance and protection. Through her intercession, we seek strength in faith, hope, and love. The mysteries remind us of Mary’s triumph and her desire to lead all souls to her Son. By honoring her glory, we open our hearts to her maternal care and find comfort in her presence during life’s challenges. Seeking Mary’s intercession through the Rosary is a timeless practice of Catholic spirituality.

Resources for Learning the Glorious Mysteries
Discover PDF guides, prayer booklets, and coloring pages for religious education. Online videos and tutorials offer step-by-step instructions, making it easy to deepen your understanding and devotion to the Glorious Mysteries.
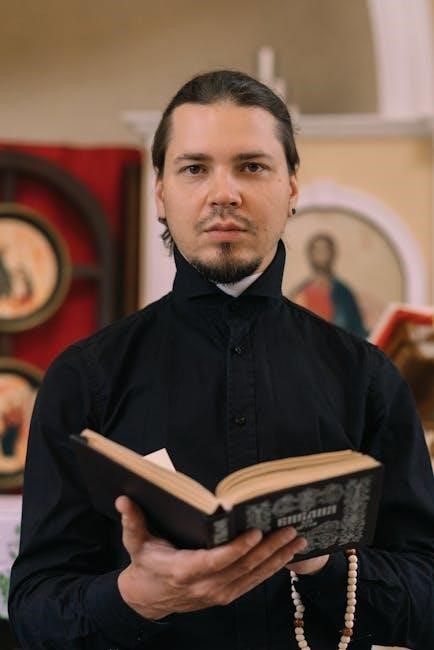
PDF Guides and Prayer Booklets
PDF guides and prayer booklets are excellent resources for learning the Glorious Mysteries. They provide detailed meditations, prayers, and reflections, helping to enrich your Rosary devotion. These materials often include biblical references, making it easier to connect with the spiritual significance of each mystery. Many booklets are designed for personal or family use, offering a structured approach to prayer. They are ideal for those seeking to deepen their faith and understand the Glorious Mysteries more profoundly. Additionally, these resources are widely available online, making them accessible to anyone looking to enhance their spiritual journey through the Rosary.
Coloring Pages for Religious Education
Coloring pages are a delightful way to engage children and adults alike in learning the Glorious Mysteries of the Rosary. These visually appealing resources often depict scenes from the Resurrection, Ascension, Descent of the Holy Spirit, Assumption, and Coronation of Mary. They are perfect for religious education, as they help visualize the mysteries while fostering creativity and focus. Many PDF guides include these coloring pages, making them easy to print and use in classrooms or at home. They are especially popular during key religious months like May and October, when devotion to Mary is emphasized. Coloring pages not only make learning fun but also help deepen understanding of the biblical stories behind each mystery, making them a valuable tool for spiritual growth and education.
Online Videos and Tutorials
Online videos and tutorials are excellent resources for learning the Glorious Mysteries of the Rosary. They provide visual and interactive explanations, making it easier to understand and meditate on each mystery. Many tutorials include step-by-step guides on how to pray the Rosary, while others offer in-depth reflections on the biblical significance of the Resurrection, Ascension, Descent of the Holy Spirit, Assumption, and Coronation of Mary. Platforms like YouTube and Catholic websites host a variety of these resources, catering to different learning styles. Some videos even incorporate beautiful imagery and soothing music to enhance the meditative experience. These tutorials are particularly helpful for those new to the Rosary or seeking a deeper connection to the mysteries. They are accessible anytime, making them a convenient way to enrich your spiritual practice and grow closer to the divine.
The Glorious Mysteries of the Rosary offer a profound journey through Christ’s triumph and Mary’s glory, inspiring hope, joy, and deeper faith in God’s eternal plan.
Final Reflections and Encouragement
The Glorious Mysteries invite us to reflect on the triumph of Christ and the exaltation of Mary, embodying hope, joy, and eternal life. Through these mysteries, we find inspiration to deepen our faith and trust in God’s plan. Meditating on the Resurrection, Ascension, and the Descent of the Holy Spirit reminds us of Christ’s divine power and the gift of the Spirit. The Assumption and Coronation of Mary highlight her perfect union with God, encouraging us to seek her intercession. These mysteries call us to embrace the promise of eternal glory and to live with hearts open to the Holy Spirit. Let us pray the Rosary with devotion, allowing the Glorious Mysteries to transform our lives and draw us closer to Christ and His Mother.