bundaberg tilt train timetable pdf

The Bundaberg Tilt Train Timetable PDF provides essential scheduling details for the high-speed rail service connecting Brisbane to Bundaberg‚ offering passengers efficient travel planning and convenience.

1.1 Overview of the Tilt Train Service

The Bundaberg Tilt Train Service is a high-speed rail service connecting Brisbane to Bundaberg‚ offering a convenient and efficient travel option. Known for its advanced tilting technology‚ the train reduces travel time while providing modern amenities. Operating multiple times weekly‚ it caters to both tourists and commuters‚ ensuring a comfortable journey with stops at key stations. Passengers can enjoy onboard facilities designed for comfort and productivity.

1.2 Importance of the Timetable for Passengers

The Bundaberg Tilt Train Timetable is crucial for passengers to plan their journeys efficiently. It provides detailed departure and arrival times‚ helping travelers schedule their trips accurately. With this information‚ passengers can avoid missed connections and ensure smooth travel. Regular updates in the timetable also keep passengers informed about any service changes‚ making it an indispensable resource for both planning and adjusting travel plans seamlessly.

How to Access the Latest Bundaberg Tilt Train Timetable PDF

Passengers can easily access the latest Bundaberg Tilt Train Timetable PDF through Queensland Rail’s official website or mobile app‚ ensuring they have up-to-date scheduling information.

2.1 Official Sources for Download

The Bundaberg Tilt Train Timetable PDF is available for download from Queensland Rail’s official website. Passengers can visit the Queensland Rail Travel section and navigate to the “Timetables” page. Additionally‚ the Queensland Rail mobile app offers a convenient way to access and download the latest PDF schedules. Ensure to use official sources for accurate and up-to-date information to plan your journey seamlessly.

2.2 Steps to Download the PDF

Visit the Queensland Rail website and navigate to the “Timetables” section. Select the Bundaberg Tilt Train from the list of available services. Click on the “Download Timetable” button‚ which will redirect you to a PDF file. Save the file to your device for offline access. Ensure to check for the latest version‚ as timetables are subject to updates. This process ensures you have the most current scheduling information.

Key Features of the Bundaberg Tilt Train Timetable

The Bundaberg Tilt Train Timetable PDF offers comprehensive details on departure times‚ service frequency‚ major stops‚ and real-time updates for efficient travel planning.

3.1 Frequency of Services

The Bundaberg Tilt Train operates multiple weekly services‚ including Monday‚ Tuesday‚ Thursday‚ Friday‚ and Saturday. The frequency ensures regular departures‚ accommodating both daily commuters and tourists. Trains run with consistent intervals‚ allowing passengers to plan seamlessly. Additional services during peak times enhance accessibility. The timetable is designed to meet growing demand‚ offering reliable and efficient travel options between Brisbane and Bundaberg.

3.2 Major Stations and Stops

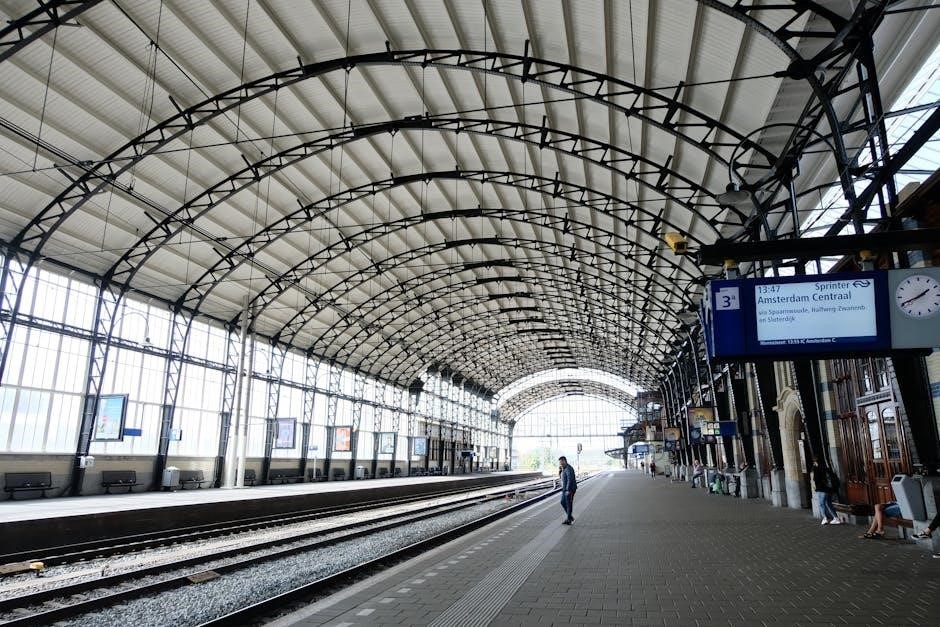
The Bundaberg Tilt Train route includes major stations such as Brisbane Roma Street‚ Caboolture‚ Landsborough‚ Nambour‚ and Bundaberg. These stations provide convenient access for passengers traveling between South East Queensland and regional areas. Specific departure times for key stations include Roma Street at 11:00 AM‚ Caboolture at 11:45 AM‚ and Bundaberg arrivals at 2:40 PM. RailBus connections are also available at select stops for further transit options.

Understanding the Tilt Train Route

The Bundaberg Tilt Train route connects Brisbane to Bundaberg‚ serving major stations like Roma Street‚ Caboolture‚ Landsborough‚ Nambour‚ and Bundaberg‚ providing high-speed service for urban and regional travelers via Queensland Rail.

4.1 Brisbane to Bundaberg Route Details

The Tilt Train travels from Brisbane’s Roma Street Station to Bundaberg‚ offering a high-speed service with stops at key stations like Caboolture‚ Landsborough‚ Nambour‚ and Bundaberg. The journey provides scenic views of Queensland’s coastline and hinterland. The service operates multiple times weekly‚ with a total travel time of approximately 4.5 hours. Some stops are reservation-only‚ ensuring efficient travel for passengers heading to Bundaberg and surrounding regions.

4.2 Connecting Routes and Interchanges

The Tilt Train service connects seamlessly with other transport networks at major stations like Caboolture‚ Nambour‚ and Maryborough. Passengers can transfer to RailBus services for further travel to destinations such as Gympie‚ Hervey Bay‚ and Gladstone. These interchanges provide convenient options for reaching coastal and regional areas beyond Bundaberg‚ ensuring a comprehensive travel network for passengers across Queensland.

Fares and Ticketing Information

The Bundaberg Tilt Train Timetable PDF includes fare details‚ ticket options‚ and booking instructions‚ ensuring passengers can plan their travel budget and purchase tickets conveniently online.

5.1 Types of Tickets Available

The Bundaberg Tilt Train Timetable PDF outlines various ticket options‚ including one-way‚ return‚ and concession fares. Passengers can choose from economy and business class seats‚ with discounts available for seniors‚ students‚ and children. Flexible and saver tickets are also offered‚ catering to different traveler needs and budgets. The PDF provides clear fare structures‚ ensuring passengers can select the most suitable option for their journey.

5.2 How to Book Tickets Online

To book tickets online‚ visit the official Queensland Rail website and navigate to the booking section. Select your travel dates‚ origin‚ and destination from the Bundaberg Tilt Train Timetable. Choose your preferred class and review the fare details. Enter passenger information and proceed to payment using a credit card or PayPal. Confirm your booking to receive an e-ticket via email‚ ensuring a smooth and convenient travel experience.

Service Amenities and Onboard Facilities

The Bundaberg Tilt Train offers Wi-Fi‚ food and beverage services‚ comfortable seating‚ and clean restrooms‚ ensuring a pleasant and convenient travel experience for all passengers.

6.1 Seating and Comfort Options

The Bundaberg Tilt Train offers spacious and ergonomic seating with ample legroom‚ ensuring passenger comfort. Seats are arranged in pairs or singles‚ with reclining options available. Overhead racks provide convenient luggage storage. Priority seating is reserved for passengers with special needs‚ while Quiet Carriages offer a peaceful environment. The train also features adjustable headrests and fold-down trays for meals or laptops‚ enhancing the overall travel experience.

6.2 Food and Beverage Services

The Bundaberg Tilt Train provides onboard food and beverage services‚ including snacks and light meals. Passengers can pre-book meals or purchase items from the onboard menu. A range of refreshments‚ such as tea‚ coffee‚ and soft drinks‚ are available for added convenience. The service caters to diverse dietary needs‚ ensuring a comfortable and enjoyable journey for all travelers.

Special Considerations for Travel

Passengers should check for service alerts and disruptions before travel‚ as schedules may change due to maintenance or special events‚ ensuring a smooth journey.

7.1 Holiday and Weekend Schedules

Holiday and weekend schedules for the Bundaberg Tilt Train may differ from regular timetables‚ with reduced or additional services during peak travel periods. Passengers should check the latest PDF for specific dates‚ as public holidays or special events can alter service frequencies. Planning ahead is crucial to ensure smooth travel‚ especially during busy times.

7.2 Service Alerts and Disruptions

Service alerts and disruptions‚ such as delays or cancellations‚ are updated regularly in the Bundaberg Tilt Train Timetable PDF. Passengers are advised to check the latest version before travel for any changes due to maintenance or unforeseen events. Real-time updates ensure travelers stay informed‚ helping them adjust plans accordingly for a smoother journey.

Tips for First-Time Passengers

First-time passengers should review the Bundaberg Tilt Train Timetable PDF to plan their journey‚ understand boarding procedures‚ and familiarize themselves with onboard amenities for a smooth experience.

8.1 Planning Your Journey

Planning your journey with the Bundaberg Tilt Train Timetable PDF ensures a seamless experience. Review departure and arrival times‚ select the most convenient service‚ and book tickets in advance. Check for any service alerts or disruptions to avoid delays. Familiarize yourself with the route map and major stations to plan connections or stopovers. This preparation helps maximize comfort and efficiency during your travel.

8.2 Essential Items to Carry

Ensure a smooth journey by carrying essential items like your ticket (digital or printed)‚ valid ID‚ cash/cards‚ snacks‚ water‚ entertainment devices‚ and chargers. Pack light‚ include a travel pillow for comfort‚ and note emergency contact details. Check onboard facilities beforehand to avoid overpacking. Organize items securely and keep important documents easily accessible for a stress-free travel experience.

Future Updates and Improvements

The Bundaberg Tilt Train Timetable PDF will feature planned updates‚ service improvements‚ enhanced schedules‚ and digital enhancements‚ ensuring a better travel experience for all passengers;

9.1 Upcoming Changes in the Timetable

From September 2024‚ the Bundaberg Tilt Train Timetable PDF will be reinstated to its full schedule following maintenance. Updates include adjusted departure times‚ additional stops‚ and enhanced service frequency. Passengers can expect improved connectivity between Brisbane and Bundaberg‚ with extended routes to Rockhampton. These changes aim to optimize travel efficiency and align with growing demand for reliable rail services in the region.

9.2 Enhancements in Service Quality

Enhancements in service quality for the Bundaberg Tilt Train include improved on-board amenities‚ such as Wi-Fi and meal services‚ ensuring a more comfortable journey. Cleanliness and punctuality are prioritized‚ with staff training focused on enhancing passenger experiences. These upgrades aim to provide a seamless and enjoyable travel experience‚ aligning with modern passenger expectations and improving overall satisfaction levels for all commuters utilizing the service.

advance puppy food feeding guide

Proper puppy feeding is crucial for healthy growth and development. Puppies require nutrient-rich meals tailored to their age, breed, and size to thrive. A balanced diet ensures optimal energy levels and prevents health issues, making informed feeding decisions vital for your puppy’s well-being.

The Importance of Proper Nutrition for Puppies

Proper nutrition is vital for puppies, as it directly impacts their growth, development, and long-term health. A well-balanced diet ensures puppies receive essential nutrients, supporting energy levels, immune function, and organ development. Without adequate nutrition, puppies may face stunted growth, weakened immunity, and increased risk of health issues. High-quality puppy food is formulated to meet their specific needs, providing the right balance of proteins, fats, carbohydrates, vitamins, and minerals. Feeding a nutritionally complete diet helps prevent deficiencies and promotes overall well-being, setting the foundation for a healthy, active life.

Nutritional Needs of Puppies

Puppies require a balanced mix of proteins, fats, carbohydrates, vitamins, and minerals to support rapid growth and energy needs. Their diet must be nutrient-dense to ensure proper development and health.

Protein Requirements for Growth and Development

Protein is essential for puppies’ growth, muscle development, and overall health. High-quality protein sources like chicken, beef, or fish provide amino acids crucial for tissue repair and energy. Puppies require higher protein levels than adult dogs, typically around 22% on a dry matter basis, to support rapid growth. Adequate protein intake ensures proper development of organs and muscles. Insufficient protein can lead to growth issues, while excessive amounts may cause imbalances. Always consult a veterinarian to determine the optimal protein content for your puppy’s specific needs and breed requirements.

Carbohydrates and Energy Needs

Carbohydrates are a vital energy source for puppies, supporting their rapid growth and high activity levels. Whole grains, such as brown rice and oats, along with vegetables, provide sustained energy and fiber. Puppies require a balanced intake of carbs to fuel their development and daily activities. While carbs are essential, over-reliance on them can lead to imbalances. Ensuring a mix of complex and simple carbs, alongside proteins and fats, helps meet their energy needs without compromising overall nutrition. This balanced approach supports optimal health and vitality during critical growth phases.

Fats and Their Role in Puppy Health

Fats are a critical component of a puppy’s diet, providing essential energy and supporting overall health. They aid in the absorption of fat-soluble vitamins (A, D, E, and K) and promote healthy skin and coat condition. Sources like chicken fat or fish oil are rich in omega fatty acids, which are vital for brain development and reducing inflammation. A balanced intake of fats ensures puppies maintain energy levels and develop properly. Excessive fat, however, can lead to weight issues, so moderation is key to supporting growth without compromising health.

Vitamins and Minerals for Optimal Health

Vitamins and minerals are vital for a puppy’s optimal health, supporting immune function, bone development, and overall growth. Fat-soluble vitamins like A, D, E, and K require dietary fats for absorption, while water-soluble vitamins like B and C play roles in energy metabolism. Minerals such as calcium and phosphorus are essential for strong bones and teeth, while others like zinc support skin health. Antioxidants, including vitamin E, protect against oxidative stress. A balanced mix of these nutrients ensures proper development and prevents deficiencies, promoting long-term health and well-being.

Feeding Options for Puppies

Puppies have various feeding options, including wet, dry, raw, and homemade diets. Each option offers unique benefits and should meet nutritional standards for optimal growth and health.

Wet vs. Dry Food: Pros and Cons

Wet food offers high moisture content, aiding digestion and hydration, while dry food is cost-effective and supports dental health. Wet food can help with weight management due to lower carbohydrate content, but may spoil faster. Dry food is convenient for storage and feeding, promoting chewing, which reduces plaque. Both options provide essential nutrients when formulated correctly. Choosing between them depends on your puppy’s needs, preferences, and lifestyle. Always ensure the food is nutrient-rich and suitable for their life stage to support healthy growth and development.

Raw Diets and Their Benefits

Raw diets are increasingly popular for puppies, offering high protein content and fewer carbohydrates, aiding in weight management and energy levels. These diets mimic natural eating habits, promoting better digestion and reducing obesity risks. Raw foods can improve skin health and reduce allergies in some puppies. They often include essential nutrients like vitamins and minerals that support immune function and growth. Ensuring the diet is balanced and free from harmful bacteria is crucial for maintaining health; Proper planning is necessary to avoid nutritional deficiencies and ensure optimal growth and development.

Homemade Diets and Safety Considerations

Homemade diets allow customization to meet a puppy’s specific needs but require careful planning to ensure nutritional balance. Many homemade diets lack essential nutrients, such as calcium, which is vital for bone growth. Overfeeding or underfeeding can lead to health issues, and improper food handling increases the risk of bacterial contamination. Consulting a veterinarian is crucial to create a balanced diet tailored to the puppy’s age, breed, and size. Regular monitoring of the puppy’s health and growth ensures the diet remains effective and safe.

Feeding Schedule Based on Age

Puppies require age-specific feeding schedules to meet their high nutritional needs. Newborns need frequent, small meals, while older puppies gradually transition to fewer, larger portions as they mature.

Feeding Newborn Puppies (0-8 Weeks)

Newborn puppies rely on their mother’s milk for essential nutrients and antibodies. If separated, a high-quality puppy milk replacer is necessary. Feed every 3-4 hours, monitoring weight gain. Transition to mushy puppy food at 4 weeks. Ensure a nutrient-rich diet to support rapid growth and development. Consult a vet for tailored advice to prevent undernutrition or overfeeding during this critical period.

Feeding Puppies from 8 Weeks to 6 Months

From 8 weeks to 6 months, puppies need a high-energy, nutrient-rich diet to support rapid growth; Feed 3-4 times daily, transitioning to puppy-specific food. Ensure meals are balanced, with adequate protein, carbohydrates, and fats. Avoid overfeeding to prevent obesity. Monitor growth and adjust portions as needed. Gradually reduce feeding frequency to twice daily by 6 months. Always consult a vet for personalized advice to ensure your puppy thrives during this critical growth phase.

Feeding Puppies from 6 Months to 1 Year

Between 6 months and 1 year, puppies continue to grow, but at a slower pace. Feed twice daily with a balanced diet rich in protein, vitamins, and minerals. Transition to adult food gradually to prevent digestive issues. Monitor weight to avoid overfeeding, as obesity risks increase. Ensure meals are nutrient-dense to support muscle and bone development. Consult a vet to tailor feeding plans based on breed and size. Proper nutrition during this phase sets the foundation for a healthy adult life.

Common Mistakes to Avoid

Neglecting essential nutrients and inconsistent feeding schedules can harm a puppy’s health. Overfeeding and improper diet transitions are also common errors that should be avoided carefully.

Overfeeding and Obesity Risks

Overfeeding puppies can lead to obesity, which increases the risk of health issues like diabetes, joint problems, and heart disease. Recognizing signs of overfeeding, such as rapid weight gain and digestive upset, is crucial. Portion sizes should align with the puppy’s age, size, and activity level to prevent excessive calorie intake. Feeding high-calorie treats or table scraps can exacerbate the problem. Monitoring food intake and avoiding overindulgence helps maintain a healthy weight. Consult a veterinarian to ensure meals are balanced and appropriate, preventing long-term health complications.

Neglecting Essential Nutrients

Neglecting essential nutrients in a puppy’s diet can lead to deficiencies, stunted growth, and long-term health issues. Puppies require a balanced mix of proteins, fats, carbohydrates, vitamins, and minerals to support rapid development. skipper important nutrients like calcium or vitamin D can weaken bones and teeth. Homemade diets often lack these nutrients if not properly formulated. High-quality commercial puppy foods are designed to meet these needs, reducing the risk of deficiencies. Always ensure meals are complete and balanced to support overall health and development. Consult a veterinarian to confirm nutritional adequacy.

Inconsistent Feeding Schedules

Inconsistent feeding schedules can disrupt a puppy’s digestive system and overall health. Puppies thrive on routine, as their growing bodies require a steady supply of nutrients. Irregular feeding times can lead to overeating, undereating, or digestive upset. Establishing a consistent schedule helps regulate metabolism, energy levels, and bowel movements. It also supports training, as puppies learn to anticipate meal times. Sticking to a regular feeding plan ensures your puppy receives the nutrients needed for growth and development. Always follow a veterinarian-recommended schedule tailored to your puppy’s age, breed, and size for optimal health outcomes.

Transitioning to Adult Dog Food

Transitioning to adult dog food typically occurs around 12 months of age. Gradually introduce adult food to prevent digestive upset and ensure a smooth adjustment for your puppy.

When to Start the Transition

Puppies typically transition to adult dog food between 12 to 18 months of age, depending on their breed and size. Small breeds may transition earlier, around 9-12 months, while large breeds may take up to 18-24 months. It’s important to gradually switch to prevent digestive upset. Start by mixing a small portion of adult food with their puppy food and increase the ratio over 7-10 days. Consulting a vet ensures a smooth transition tailored to your puppy’s needs, avoiding nutritional imbalances and promoting lifelong health.

How to Gradually Introduce Adult Food

Start by mixing a small portion of adult food with your puppy’s current diet, ensuring a smooth transition. Begin with a 25% adult food to 75% puppy food ratio, gradually increasing the adult food proportion over 7-10 days. Monitor your puppy’s digestion and energy levels, adjusting the pace if needed. Avoid sudden changes to prevent digestive upset. Once fully transitioned, maintain a high-quality adult diet tailored to their breed and size. Always consult a vet for personalized advice to ensure a seamless and healthy transition.

Proper puppy feeding is vital for healthy growth and development. A balanced diet, gradual transitions, and vet guidance ensure your puppy thrives into a strong, healthy adult dog.

Summarizing the Key Points

Proper puppy feeding requires a balanced diet tailored to age, size, and breed. High-quality protein, carbs, and fats are essential for growth and energy. Vitamins and minerals ensure optimal health, while avoiding overfeeding prevents obesity. Feeding schedules should be consistent, with portion sizes adjusted as puppies grow. Wet, dry, or raw diets can be suitable if nutritionally complete. Homemade diets need careful planning to avoid nutrient deficiencies. Gradual transitions to adult food at maturity support long-term health. Always consult a vet for personalized advice to ensure your puppy thrives.

sunbeam bread maker instruction manual

Welcome to the Sunbeam Bread Maker Instruction Manual! This guide provides comprehensive instructions for safe and effective use of your bread maker, ensuring delicious results every time․ From initial setup to advanced features, this manual covers everything you need to know․

Overview of the Sunbeam Bread Maker

The Sunbeam Bread Maker is a versatile and user-friendly appliance designed to simplify bread making at home․ It features advanced settings, including automatic fruit and nut dispensers, delay start timers, and preset options for various bread types․ With its robust construction and intuitive control panel, this bread maker ensures consistent results․ Whether you’re a novice or an experienced baker, it offers endless possibilities to create delicious homemade bread effortlessly․ Its compact design and easy-to-follow instructions make it a must-have for every kitchen․

Importance of Reading the Instruction Manual

Reading the Sunbeam Bread Maker instruction manual is crucial for optimal performance and safety․ It provides essential guidelines for initial setup, operation, and maintenance․ Understanding the manual ensures you use the appliance correctly, preventing accidents and extending its lifespan․ It also unlocks features like custom recipes and advanced settings, helping you achieve perfect results every time․ By following the manual, you can troubleshoot common issues and enjoy a seamless baking experience with your Sunbeam Bread Maker․

Key Components of the Sunbeam Bread Maker

The Sunbeam Bread Maker features a control panel for easy operation, a non-stick baking pan, and a durable kneading blade for mixing dough․ Additional components include an automatic fruit and nut dispenser, enhancing baking versatility and convenience for users․

Understanding the Control Panel

The control panel is the command center of your Sunbeam Bread Maker, featuring intuitive buttons for menu settings, delay start, and customization options․ The LCD display shows cycle progress and settings, while indicator lights signal active functions․ Use the buttons to select from various cycles, adjust crust color, and set the delay timer․ Properly understanding the control panel ensures easy navigation and precise control over your bread-making process, helping you achieve perfect results every time․ Always refer to the manual for detailed button functions and operation guidance․

The Baking Pan and Kneading Blade

The baking pan and kneading blade are essential components of your Sunbeam Bread Maker․ The non-stick pan ensures even baking, while the blade mixes and kneads dough efficiently․ Before first use, clean the pan and blade with a damp cloth․ Always ensure they are securely locked in place to prevent movement during operation․ Regular cleaning is crucial to maintain performance and prevent residue buildup․ Refer to the manual for specific care instructions to prolong their longevity and effectiveness․ Proper maintenance ensures consistent bread quality and durability of these key parts․

Additional Features like Automatic Fruit and Nut Dispenser

Your Sunbeam Bread Maker comes with an Automatic Fruit and Nut Dispenser, enhancing your bread-making experience․ This feature allows ingredients like nuts, seeds, or dried fruits to be added automatically during the mixing phase․ Simply load the dispenser, and the machine will release the ingredients at the right time for even distribution․ This feature is perfect for creating specialty breads․ Ensure the dispenser is clean and dry after use to maintain optimal performance․ Regularly check for any blockages to ensure smooth operation․ This innovative feature makes experimenting with recipes effortless and fun, allowing you to create a variety of delicious breads with minimal effort․ Always refer to the manual for specific instructions on using this feature effectively․ Proper care will ensure it continues to function seamlessly, adding versatility to your bread-making process․ By utilizing this feature, you can achieve professional-quality results at home․ Cleaning the dispenser after each use prevents residue buildup, ensuring longevity․ This feature is a standout addition, making your Sunbeam Bread Maker a versatile tool for both classic and gourmet bread creations․

Initial Setup and Preparation

Unpack your Sunbeam Bread Maker carefully, ensuring all components are included․ Clean the appliance thoroughly before first use․ Plug it into a properly wired outlet, following safety guidelines․ Always read the manual to understand setup procedures and essential precautions for optimal performance and longevity of your bread maker․

Unpacking and Cleaning the Bread Maker

When unpacking your Sunbeam Bread Maker, carefully remove all components from the box, including the baking pan, kneading blade, and any accessories․ Inspect each part for damage․ Before first use, wash the baking pan and kneading blade with warm, soapy water․ Dry thoroughly to prevent rust․ Wipe the exterior with a damp cloth․ Ensure all foreign matter is removed from the pan to maintain hygiene and functionality․ This step is crucial for optimal performance and longevity․ Follow these steps to prepare your bread maker for its first use, ensuring it operates effectively and delivers perfect results․ Proper cleaning and maintenance will enhance your baking experience․ Always refer to the manual for specific care instructions to keep your appliance in excellent condition․ Regular cleaning prevents residue buildup, ensuring your Sunbeam Bread Maker continues to perform reliably․ By following these simple steps, you can enjoy fresh, homemade bread with ease․ Cleaning is an essential part of setup, so take the time to do it right․ Your bread maker will thank you with consistent, delicious batches of bread․ This initial preparation sets the stage for years of successful baking․ Make it a habit to clean thoroughly after each use to maintain your appliance’s efficiency․ A well-maintained bread maker is a key to achieving professional-quality bread at home․ Start your baking journey on the right foot by unpacking and cleaning your Sunbeam Bread Maker with care․ This will ensure it functions properly and lasts for a long time․ Cleaning is a simple yet vital step in the setup process․ Don’t skip it—your bread maker’s performance depends on it․ After unpacking, take a few minutes to clean each part, paying special attention to the baking pan and kneading blade․ This will ensure your first loaf is perfect; Proper cleaning also prevents any residual odors or tastes from affecting your bread․ It’s a small effort that makes a big difference in the quality of your baked goods․ Keep your Sunbeam Bread Maker in pristine condition by adhering to these cleaning guidelines․ This will ensure it remains a reliable companion in your culinary adventures․ Cleaning is not just about hygiene; it’s about maintaining the integrity of your appliance․ Take pride in your Sunbeam Bread Maker by keeping it clean and well-maintained․ This will allow you to enjoy baking for years to come․ Remember, a clean bread maker is a happy bread maker․ Start your baking journey with a spotless appliance, and you’ll be rewarded with delicious, homemade bread every time․ Cleaning is the first step towards baking perfection․ Don’t overlook it—your Sunbeam Bread Maker deserves the best care․ With proper cleaning and maintenance, you’ll unlock the full potential of your appliance․ Make cleaning a priority to ensure your bread maker continues to deliver outstanding results․ This simple step is the foundation of a successful baking experience․ Clean your Sunbeam Bread Maker thoroughly before its first use, and it will serve you well for many loaves to come; Cleaning is an investment in your baking future, ensuring every batch of bread turns out perfectly․ Take the time to clean your bread maker, and it will reward you with consistent, high-quality results․ Your Sunbeam Bread Maker is a valuable kitchen companion, and proper cleaning will keep it performing at its best․ Don’t hesitate to spend a few extra minutes ensuring it’s spotless—it’s worth the effort․ A clean bread maker is essential for achieving the best baking outcomes․ Make cleaning a habit, and your Sunbeam Bread Maker will remain a trusted ally in the kitchen․ Cleaning is not just a chore; it’s a crucial step in maintaining your appliance’s performance․ Keep your Sunbeam Bread Maker clean, and it will continue to make delicious bread for years to come․ This initial cleaning sets the tone for a long and happy relationship with your bread maker․ Take it seriously, and you’ll be baking like a pro in no time․ A clean bread maker is a happy bread maker, so don’t skip this important step․ Your Sunbeam appliance is designed to make your life easier, but it needs your care to function optimally․ Cleaning is a simple way to ensure it remains in top condition․ By taking the time to clean your Sunbeam Bread Maker, you’re ensuring it will continue to produce fresh, homemade bread with ease․ This initial step is the key to a successful baking experience․ Don’t overlook it—your bread maker’s performance depends on it․ Cleaning is the first step towards a lifelong baking companion․ Take it seriously, and your Sunbeam Bread Maker will reward you with perfect loaves every time․ A clean appliance is a happy appliance, so make cleaning a priority․ Your Sunbeam Bread Maker is ready to help you create delicious bread, but it needs your care to perform at its best․ Cleaning is a simple yet essential part of the process․ By keeping your bread maker clean, you’re ensuring it will continue to serve you well for many years․ This is the foundation of a successful baking experience with your Sunbeam appliance․ Don’t neglect it—your bread maker’s performance will thank you․ Cleaning is the first step towards a perfect loaf, so take it seriously․ Your Sunbeam Bread Maker is designed to make baking easy, but it requires your attention to detail․ Cleaning is one such detail that makes all the difference․ Keep your bread maker clean, and it will reward you with consistent, delicious results․ This is the key to unlocking the full potential of your Sunbeam appliance․ Cleaning may seem like a small task, but it plays a big role in the overall performance of your bread maker․ Make it a habit, and you’ll enjoy baking with your Sunbeam for years to come․ A clean bread maker is not just a matter of hygiene; it’s about ensuring every loaf turns out perfectly․ Take the time to clean your Sunbeam, and it will continue to be your trusted baking companion․ Cleaning is an investment in your baking future, ensuring your bread maker remains efficient and effective․ Don’t skip this crucial step—your Sunbeam deserves the best care․ With proper cleaning, your bread maker will continue to deliver outstanding results, making every batch of bread a success․ Cleaning is the first step towards a perfect baking experience, so don’t overlook it․ Your Sunbeam Bread Maker is ready to help you create delicious bread, but it needs your care to function at its best․ Take the time to clean it thoroughly, and it will reward you with perfect loaves every time․ A clean bread maker is a happy bread maker, so make cleaning a priority․ Your Sunbeam appliance is designed to make baking easier, but it requires regular maintenance to perform optimally․ Cleaning is a simple yet vital part of that maintenance․ By keeping your bread maker clean, you’re ensuring it will continue to serve you well for many years․ This is the foundation of a successful baking experience with your Sunbeam․ Don’t neglect it—your bread maker’s performance will thank you․ Cleaning is the first step towards a perfect loaf, so take it seriously․ Your Sunbeam Bread Maker is designed to make baking easy, but it requires your attention to detail․ Cleaning is one such detail that makes all the difference․ Keep your bread maker clean, and it will reward you with consistent, delicious results․ This is the key to unlocking the full potential of your Sunbeam appliance․ Cleaning may seem like a small task, but it plays a big role in the overall performance of your bread maker․ Make it a habit, and you’ll enjoy baking with your Sunbeam for years to come․ A clean bread maker is not just a matter of hygiene; it’s about ensuring every loaf turns out perfectly․ Take the time to clean your Sunbeam, and it will continue to be your trusted baking companion․ Cleaning is an investment in your baking future, ensuring your bread maker remains efficient and effective․ Don’t skip this crucial step—your Sunbeam deserves the best care․ With proper cleaning, your bread maker will continue to deliver outstanding results, making every batch of bread a success․ Cleaning is the first step towards a perfect baking experience, so don’t overlook it․ Your Sunbeam Bread Maker is ready to help you create delicious bread, but it needs your care to function at its best․ Take the time to clean it thoroughly, and it will reward you with perfect loaves every time․ A clean bread maker is a happy bread maker, so make cleaning a priority․ Your Sunbeam appliance is designed to make baking easier, but it requires regular maintenance to perform optimally․ Cleaning is a simple yet vital part of that maintenance․ By keeping your bread maker clean, you’re ensuring it will continue to serve you well for many years․ This is the foundation of a successful baking experience with your Sunbeam․ Don’t neglect it—your bread maker’s performance will thank you․ Cleaning is the first step towards a perfect loaf, so take it seriously․ Your Sunbeam Bread Maker is designed to make baking easy, but it requires your attention to detail․ Cleaning is one such detail that makes all the difference․ Keep your bread maker clean, and it will reward you with consistent, delicious results․ This is the key to unlocking the full potential of your Sunbeam appliance․ Cleaning may seem like a small task, but it plays a big role in the overall performance of your bread maker․ Make it a habit, and you’ll enjoy baking with your Sunbeam for years to come․ A clean bread maker is not just a matter of hygiene; it’s about ensuring every loaf turns out perfectly․ Take the time to clean your Sunbeam, and it will continue to be your trusted baking companion․ Cleaning is an investment in your baking future, ensuring your bread maker remains efficient and effective․ Don’t skip this crucial step—your Sunbeam deserves the best care․ With proper cleaning, your bread maker will continue to deliver outstanding results, making every batch of bread a success․ Cleaning is the first step towards a perfect baking experience, so don’t overlook it․ Your Sunbeam Bread Maker is ready to help you create delicious bread, but it needs your care to function at its best․ Take the time to clean it thoroughly

Plugging in the Appliance and Safety Precautions

Before using your Sunbeam Bread Maker, plug it into a properly wired, grounded electrical outlet․ Avoid modifying the plug or using damaged cords to prevent hazards․ Ensure the appliance is placed on a stable, heat-resistant surface away from water sources․ Never submerge the bread maker in water or expose it to excessive moisture․ Keep children away while in operation, and avoid leaving it unattended during use․ Always follow safety guidelines to ensure safe and reliable performance․ Proper precautions will protect both you and your appliance, ensuring years of trouble-free baking․ Maintain a safe environment while using your Sunbeam Bread Maker to enjoy a seamless and enjoyable baking experience․ This step is crucial for your safety and the longevity of your appliance․ Always prioritize caution when working with electrical appliances․ By following these guidelines, you can safely operate your Sunbeam Bread Maker and achieve perfect results every time․ Safety should never be overlooked, as it is essential for a positive and hazard-free baking experience․ Your Sunbeam Bread Maker is designed for safe operation, but proper precautions are necessary to maintain this safety․ Make sure to review all safety tips before first use to ensure a secure and enjoyable baking process․ This will help prevent accidents and ensure your appliance functions optimally․ Always keep safety in mind when using your Sunbeam Bread Maker, as it is a key part of responsible appliance ownership․ By adhering to these precautions, you can confidently use your bread maker without worrying about potential hazards․ Proper usage and safety go hand in hand, ensuring both your well-being and the longevity of your appliance․ Take the time to review these guidelines carefully to create a safe baking environment․ Your safety and the performance of your Sunbeam Bread Maker depend on it․ Always prioritize caution when working with electrical appliances like your Sunbeam Bread Maker․ This will ensure a safe and enjoyable baking experience for years to come․ By following these safety precautions, you can protect yourself and your appliance while achieving delicious results․ Safety is a shared responsibility between you and your appliance, so take it seriously․ Your Sunbeam Bread Maker is a valuable tool, and proper safety measures will help it serve you well․ Don’t compromise on safety—your well-being and the performance of your bread maker are worth it․ Always follow the recommended safety guidelines to ensure a hazard-free experience with your Sunbeam Bread Maker․ This will allow you to bake with confidence and enjoy the benefits of homemade bread without any worries․ Safety precautions are in place to protect you and your appliance, so make sure to follow them diligently․ Your Sunbeam Bread Maker is designed for safe operation, but your awareness and caution are essential for maintaining this safety․ Take the necessary steps to create a safe environment for baking, and your Sunbeam Bread Maker will reward you with perfect results․ Never underestimate the importance of safety when using your appliance, as it is a critical factor in preventing accidents and ensuring optimal performance․ By prioritizing safety, you can enjoy a positive and rewarding experience with your Sunbeam Bread Maker․ Always be mindful of potential hazards and take steps to mitigate them, ensuring a safe and enjoyable baking process․ Your Sunbeam Bread Maker is a reliable companion in the kitchen, but it requires your attention to safety details to function safely․ Make safety a priority, and your bread maker will continue to serve you faithfully for many years․ Proper safety precautions are essential for protecting both you and your appliance, ensuring a long and successful baking journey․ Don’t overlook these important guidelines—your safety and satisfaction depend on it․ By following the safety precautions outlined in this manual, you can use your Sunbeam Bread Maker with confidence and peace of mind․ Safety is not just a suggestion; it’s a necessity for enjoying your appliance to the fullest․ Always remember to plug in your Sunbeam Bread Maker correctly and follow all safety tips to ensure a secure and enjoyable baking experience․ Your safety and the performance of your appliance are directly linked, so take the time to review and follow these important guidelines․ This will help you avoid potential hazards and ensure your Sunbeam Bread Maker operates reliably for years to come․ Never compromise on safety when using your Sunbeam Bread Maker, as it is essential for a positive and accident-free experience․ By adhering to these precautions, you can enjoy baking with confidence and precision․ Your Sunbeam Bread Maker is a valuable tool, and proper safety measures will help you get the most out of it while staying safe․ Always prioritize safety when using your appliance, as it is a critical factor in preventing accidents and ensuring optimal performance․ By following these guidelines, you can create a safe and enjoyable environment for baking with your Sunbeam Bread Maker․ Safety should always be your top priority when working with electrical appliances like your Sunbeam Bread Maker․ This will ensure a secure and rewarding experience as you explore the world of homemade bread․ Always take the time to review and follow the safety precautions outlined in this manual to protect yourself and your appliance․ Your Sunbeam Bread Maker is designed for safe operation, but your attention to safety details is essential for maintaining this safety․ Make sure to follow all guidelines carefully to enjoy a hazard-free experience with your Sunbeam Bread Maker․ Safety is a shared responsibility, and by taking the necessary precautions, you can ensure a safe and enjoyable baking journey with your Sunbeam Bread Maker․ Always remember to plug in your appliance correctly and follow all safety tips to protect yourself and your Sunbeam Bread Maker․ This will ensure a positive and accident-free experience, allowing you to enjoy the benefits of homemade bread without any concerns․ By prioritizing safety, you can fully utilize the features of your Sunbeam Bread Maker while maintaining a secure environment․ Your safety and satisfaction are paramount, so never overlook the importance of proper precautions when using your appliance․ Always follow the safety guidelines provided in this manual to ensure a safe and enjoyable experience with your Sunbeam Bread Maker․ This will help you avoid potential hazards and ensure your appliance operates reliably for years to come․ By taking safety seriously, you can enjoy a positive and rewarding experience with your Sunbeam Bread Maker, creating delicious bread with confidence and peace of mind․ Your Sunbeam Bread Maker is a reliable kitchen companion, but it requires your attention to safety details to function safely and effectively․ Make safety a priority, and your bread maker will continue to serve you faithfully, providing you with fresh, homemade bread for many years․ Proper safety precautions are essential for protecting both you and your appliance, ensuring a long and successful baking journey․ Don’t overlook these important guidelines—your safety and satisfaction depend on it․ By following the safety precautions outlined in this manual, you can use your Sunbeam Bread Maker with confidence and peace of mind; Safety is not just a suggestion; it’s a necessity for enjoying your appliance to the fullest․ Always remember to plug in your Sunbeam Bread Maker correctly and follow all safety tips to ensure a secure and enjoyable baking experience․ Your safety and the performance of your appliance are directly linked, so take the time to review and follow these important guidelines․ This will help you avoid potential hazards and ensure your Sunbeam Bread Maker operates reliably for years to come․ Never compromise on safety when using your Sunbeam Bread Maker, as it is essential for a positive and accident-free experience․ By adhering to these precautions, you can enjoy baking with confidence and precision․ Your Sunbeam Bread Maker is a valuable tool, and proper safety measures will help you get the most out of it while staying safe․ Always prioritize safety when using your appliance, as it is a critical factor in preventing accidents and ensuring optimal performance․ By following these guidelines, you can create a safe and enjoyable environment for baking with your Sunbeam Bread Maker․ Safety should always be your top priority when working with electrical appliances like your Sunbeam Bread Maker․ This will ensure a secure and rewarding experience as you explore the world of homemade bread․ Always take the time to review and follow the safety precautions outlined in this manual to protect yourself and your appliance․ Your Sunbeam Bread Maker is designed for safe operation, but your attention to safety details is essential for maintaining this safety․ Make sure to follow all guidelines carefully to enjoy a hazard-free experience with your Sunbeam Bread Maker․ Safety is a shared responsibility, and by taking the necessary precautions,

the lion the witch and the wardrobe pdf

C.S. Lewis’s The Lion, the Witch and the Wardrobe is a timeless children’s fantasy novel, first published in 1950, introducing readers to the magical land of Narnia.

1.1 Overview of the Book

The Lion, the Witch and the Wardrobe is a timeless children’s fantasy novel by C.S. Lewis, published in 1950. It introduces readers to the magical land of Narnia, where four siblings—Peter, Susan, Edmund, and Lucy—discover a wardrobe that transports them to an enchanted world ruled by the evil White Witch. The story explores themes of courage, sacrifice, and redemption as the children, aided by the majestic lion Aslan, battle the Witch to restore peace to Narnia. Rich in symbolism and adventure, the book is the first in The Chronicles of Narnia series, captivating readers with its vivid imagery and moral depth.

1.2 The Author: C.S. Lewis

C.S. Lewis, a renowned British author, philosopher, and theologian, crafted The Lion, the Witch and the Wardrobe as part of his celebrated Chronicles of Narnia series. Born in 1898, Lewis was a professor at Oxford and Cambridge universities, blending intellectual rigor with imaginative storytelling. His works often explore themes of faith, morality, and the struggle between good and evil, resonating with readers of all ages. Lewis’s legacy endures through his literary contributions, making The Lion, the Witch and the Wardrobe a beloved classic in children’s literature and beyond.

1.3 Historical Context and Background

The Lion, the Witch and the Wardrobe was written during World War II, a time of global turmoil. C.S. Lewis drew inspiration from the evacuations of children to the countryside, reflecting the era’s uncertainty. The story also resonates with themes of hope and redemption, offering escape through its magical world. Published in 1950, it became the first book in The Chronicles of Narnia series, blending Christian allegory with fantasy. The historical backdrop of war and hardship influenced its narrative, making it a timeless tale of courage and transformation for readers of all ages.

Plot Summary of “The Lion, the Witch and the Wardrobe”

Four siblings discover Narnia through a wardrobe, encountering the evil White Witch, the heroic lion Aslan, and a world frozen in eternal winter, leading to a climactic battle between good and evil;

2.1 The Discovery of Narnia

During World War II, the Pevensie siblings—Peter, Susan, Edmund, and Lucy—are evacuated to the countryside. While exploring the large, old house of Professor Kirke, Lucy stumbles upon a mysterious wardrobe. Curious, she steps inside and finds herself in a snowy forest, entering the enchanted land of Narnia. There, she meets Mr. Tumnus, a friendly faun, who introduces her to the reality of Narnia’s eternal winter under the White Witch’s rule. This discovery marks the beginning of the siblings’ adventures in Narnia, setting the stage for their encounters with Aslan and the battle between good and evil.

2.2 The Battle Between Good and Evil

The White Witch, with her icy grip on Narnia, represents pure evil, casting a spell of eternal winter without Christmas. Aslan, the mighty lion, embodies good, leading the resistance against her tyranny. The Pevensie siblings, drawn into this conflict, become central figures in the battle. Edmund’s betrayal and subsequent redemption highlight the moral stakes, while Aslan’s sacrifice and resurrection symbolize the ultimate triumph of good over evil. The climactic battle showcases courage, loyalty, and the enduring power of righteousness, culminating in the defeat of the White Witch and the restoration of peace to Narnia.

2.3 The Sacrifice and Resurrection of Aslan

Aslan, the symbolic representation of goodness and sacrifice, willingly offers his life to save Edmund, who had betrayed the group to the White Witch. Bound to the Stone Table, Aslan is slain by the Witch, fulfilling the ancient prophecy. However, through the power of the Deep Magic, Aslan is resurrected, returning stronger and more powerful. This act of sacrifice and rebirth not only redeems Edmund but also galvanizes the forces of good in Narnia, leading to the eventual defeat of the White Witch and the restoration of peace to the land.

2.4 The Coronation of the Pevensie Children

Following the defeat of the White Witch, the Pevensie children are crowned as kings and queens of Narnia. Peter, the High King, rules with wisdom, while Susan, Lucy, and Edmund govern their respective territories. This coronation symbolizes their growth into courageous and noble leaders. The event marks the beginning of Narnia’s Golden Age, a period of peace and prosperity under their reign. Aslan’s prophecy is fulfilled, and the children’s bravery is celebrated, solidifying their legacy as heroes of Narnia.

Main Characters in the Story

The Pevensie siblings—Peter, Susan, Edmund, and Lucy—drive the narrative alongside Aslan, the wise lion, and the White Witch, who embodies evil in Narnia.

3.1 The Pevensie Children: Peter, Susan, Edmund, and Lucy

The Pevensie siblings—Peter, Susan, Edmund, and Lucy—are central to the story, each embodying unique traits. Peter, the eldest, initially struggles with leadership but matures into a brave king. Susan, practical and cautious, often acts as the voice of reason, while Lucy, the youngest, is marked by her innocence and faith. Edmund, tempted by the White Witch’s promises, betrays his siblings but later redeems himself through courage and loyalty. Together, they navigate Narnia’s magical world, growing individually and collectively as they confront challenges and ultimate triumph.

3.2 Aslan the Lion and the White Witch

Aslan, the wise and powerful lion, symbolizes goodness and redemption, while the White Witch embodies evil and tyranny. Aslan’s sacrifice and resurrection are pivotal, showcasing his divine nature. The White Witch, with her icy grip on Narnia, represents oppression and fear. Their conflict is a battle between light and darkness, freedom and enslavement. Aslan’s leadership and the Witch’s cruelty drive the story’s moral and emotional core, illustrating the triumph of sacrifice over tyranny and the enduring power of love and forgiveness in the face of evil.

3.3 Supporting Characters: Mr. Tumnus, the Beavers, and Others

Mr. Tumnus, a kind-hearted faun, befriends Lucy and introduces her to Narnia’s magic. The Beavers, wise and loyal, guide the Pevensies, providing crucial information about Aslan and the White Witch. Other supporting characters, like Schrödinger, add depth to the story. These characters play vital roles in the narrative, offering guidance, hope, and assistance to the Pevensies. Their contributions enrich the story, highlighting themes of friendship, trust, and sacrifice. Together, they help shape the journey of the main characters and the fate of Narnia, making the world of Narnia even more vibrant and meaningful.

Themes and Symbolism in the Book

The Lion, the Witch and the Wardrobe explores themes of courage, sacrifice, and redemption, symbolized by Aslan’s journey and the White Witch’s tyranny, reflecting moral struggles.

4.1 Courage and Sacrifice

Courage and sacrifice are central themes in The Lion, the Witch and the Wardrobe. Aslan’s ultimate sacrifice, giving his life to save Edmund, embodies selfless courage and redemption. The Pevensie children also demonstrate bravery: Lucy’s faith in the unseen, Peter’s leadership in battle, and Edmund’s redemption through risking his life to destroy the White Witch’s wand. These acts highlight the moral strength required to confront evil and the transformative power of sacrifice. The story inspires readers to face challenges with courage and understand the profound impact of selfless acts. Aslan’s resurrection further symbolizes the triumph of courage over tyranny.

4.2 Redemption and Forgiveness

Redemption and forgiveness are pivotal themes in The Lion, the Witch and the Wardrobe; Edmund’s betrayal of his siblings and subsequent redemption through bravery in battle showcase personal growth and forgiveness. Aslan’s sacrifice symbolizes divine forgiveness, offering redemption to Edmund and hope to Narnia. The White Witch’s refusal to forgive underscores the destructive nature of unforgiveness. These elements highlight the transformative power of forgiveness and the possibility of redemption, even in the face of great wrongdoing. The story emphasizes that forgiveness is essential for healing and restoring relationships, both among humans and in the divine realm. Aslan’s grace exemplifies this beautifully.

4.3 The Struggle Between Good and Evil

The struggle between good and evil is a central theme in The Lion, the Witch and the Wardrobe. Aslan, the noble lion, embodies goodness, while the White Witch represents tyranny and evil. Their conflict symbolizes the universal battle between light and darkness. The story highlights the triumph of good over evil through Aslan’s resurrection and the defeat of the White Witch. The Pevensie children’s journey reflects moral choices, with Edmund’s betrayal and redemption illustrating the internal struggle between right and wrong. This theme underscores the idea that true victory comes through sacrifice and steadfast commitment to justice and righteousness.

Stage and Screen Adaptations

The Lion, the Witch and the Wardrobe has been adapted into successful stage plays and films, including the 2005 movie, bringing the magical story to life for new audiences.

5.1 The Lion, the Witch and the Wardrobe Stage Play

The stage adaptation of The Lion, the Witch and the Wardrobe has captivated audiences worldwide with its enchanting portrayal of Narnia. Productions like the West End adaptation and tours in Edinburgh’s Festival Theatre bring the story to life through vivid costumes, puppetry, and imaginative sets. Directors such as Ann-Marie Pereth and Chris Klinger have infused the play with music and whimsy, creating a magical experience. The play stays true to C.S. Lewis’s vision, blending themes of courage and redemption. Its success lies in its ability to transport audiences into the heart of Narnia, making it a timeless theatrical delight.

5.2 Film Adaptations and Their Reception

The Lion, the Witch and the Wardrobe has been adapted into several films, with the 2005 version being the most notable. Directed by Andrew Adamson, it grossed over $745 million worldwide, praised for its visual effects and faithfulness to the book. The film captures the magical journey of the Pevensie children, showcasing themes of courage and sacrifice. Audiences and critics lauded the adaptation, with many commending the portrayal of Aslan and the White Witch. The film’s success highlights the enduring appeal of C.S. Lewis’s story, making it a beloved cinematic experience.

  • The 2005 film adaptation is a visual masterpiece.
  • It stays true to the original story while adding cinematic flair.
  • The movie received widespread acclaim for its themes and character development.

The Book’s Impact and Legacy

The Lion, the Witch and the Wardrobe has become a cultural icon, inspiring countless adaptations and influencing fantasy literature. Its timeless themes resonate across generations.

6.1 Cultural Significance and Influence

The Lion, the Witch and the Wardrobe has profoundly shaped popular culture, inspiring films, stage plays, and sparking imaginations worldwide. Its themes of courage, sacrifice, and redemption resonate deeply, making it a beloved classic. The novel’s influence extends beyond literature, impacting art, music, and even theology. Its ability to transcend age boundaries has cemented its place as a cornerstone of fantasy literature, continuing to inspire new adaptations and interpretations. The story remains a timeless tale of hope and transformation, leaving an indelible mark on global culture.

6.2 The Book’s Place in the Chronicles of Narnia Series

The Lion, the Witch and the Wardrobe is the first published and most iconic book in C.S. Lewis’s Chronicles of Narnia series. It serves as an introduction to the magical land of Narnia, its creatures, and central themes of good vs. evil. The story establishes key characters like Aslan and the Pevensie children, setting the foundation for the series. While it is the second book in chronological order, its publication first made it a gateway for readers into Narnia. Its success paved the way for the remaining six books, solidifying its crucial role in the series.

Availability and Downloads

The Lion, the Witch and the Wardrobe PDF is widely available for download, offering readers digital access to this beloved tale in the Chronicles of Narnia series.

7.1 The Lion, the Witch and the Wardrobe PDF Downloads

The Lion, the Witch and the Wardrobe PDF is widely available for download, offering readers a convenient way to access this classic tale digitally. The PDF format ensures the story’s magical illustrations and text are preserved, allowing fans to enjoy C.S. Lewis’s masterpiece on various devices. Many websites provide free or paid downloads, though it’s important to ensure legality and respect copyright. Purchasing official copies supports authors and publishers. This digital version is ideal for those seeking a portable and easily accessible way to experience the enchanting world of Narnia.

7.2 Legal and Ethical Considerations for Digital Copies

Downloading The Lion, the Witch and the Wardrobe PDF requires adherence to copyright laws to ensure ethical access. While free downloads are tempting, they often violate copyright protections, potentially harming authors and publishers. Purchasing official digital copies supports creators and upholds legal standards. Always verify the legitimacy of the source to avoid illegal downloads. Ethical consumption promotes a fair system for writers and publishers, ensuring future literary works continue to thrive. Respect for intellectual property fosters a culture of honesty and appreciation for the creative efforts behind beloved stories like The Lion, the Witch and the Wardrobe.

junior tennis racquet size guide

Choosing the right junior tennis racquet size is crucial for proper technique‚ comfort‚ and performance. This guide helps parents and coaches select the ideal racquet for young players.

Understanding the Importance of Proper Racquet Size for Junior Players

Proper racquet size is essential for junior players to develop correct technique‚ generate power‚ and maintain control. A racquet that is too long or too short can hinder performance and lead to discomfort or injury. Junior players require racquets tailored to their age‚ height‚ and skill level to ensure optimal swing mechanics and stroke development. Using a correctly sized racquet helps build confidence and improves overall gameplay‚ making it a critical factor in a young player’s progress and enjoyment of the sport.

Overview of Key Factors in Selecting a Junior Tennis Racquet

When selecting a junior tennis racquet‚ key factors include age‚ height‚ and grip size. Racquet length typically ranges from 17 to 26 inches‚ corresponding to the player’s height and age group. Proper sizing ensures optimal performance‚ comfort‚ and technique development. Weight and balance are also important‚ with lighter racquets aiding stroke development. Personal preference plays a role‚ but proper sizing remains critical for young players to maximize their potential and enjoy the game effectively.

Age as a Guiding Factor in Choosing Racquet Size

Age is a key factor in selecting a junior racquet‚ with specific length recommendations for different age groups‚ ensuring proper fit and development for young players.

Recommended Racquet Lengths for Different Age Groups

For children aged 4-5 years‚ a 21-inch racquet is ideal‚ while 6-8 year olds typically use a 23-inch racquet. Older juniors‚ aged 9-10‚ often transition to a 25-inch racquet.
These lengths are designed to match developmental stages‚ ensuring proper swing mechanics and control. The right size helps young players develop technique and enjoy the game more effectively.

How Age Correlates with Racquet Length and Player Height

Age is a key factor in determining racquet length‚ as it often correlates with a child’s height and developmental stage. For example‚ children aged 4-5 years typically use a 21-inch racquet‚ while those aged 6-8 years graduate to a 23-inch racquet. By ages 9-10‚ juniors often transition to a 25-inch racquet. Racquet length aligns with height ranges‚ ensuring the equipment suits the player’s physical growth and ability. Monitoring both age and height helps in selecting the appropriate racquet size for optimal performance and comfort.

Height as a Primary Determinant of Racquet Size

Height is a reliable indicator for selecting racquet size‚ as it directly relates to a player’s reach and control. Racquets are tailored to height ranges‚ ensuring optimal fit and performance for junior players.

Height Ranges and Corresponding Racquet Lengths

For junior players‚ racquet length is closely tied to height. Children up to 100cm tall typically use 19-inch racquets‚ while those between 100-115cm prefer 21-inch racquets. Players measuring 115-135cm benefit from 23-inch racquets‚ and taller juniors (135-150cm) often transition to 25-inch racquets. This correlation ensures proper reach‚ swing‚ and control‚ helping young athletes develop their skills effectively.

Why Height is More Reliable Than Age for Sizing

Height is a more reliable measure than age for sizing junior tennis racquets because it accounts for individual growth rates and physical development. Children of the same age can vary significantly in height‚ and using height ensures the racquet length is appropriate for their reach and swing. For example‚ a child between 100-115cm tall uses a 21-inch racquet‚ while those 135-150cm tall need a 25-inch racquet. This approach helps in selecting a racquet that fits comfortably‚ promoting proper technique and performance.

Grip Size Considerations for Junior Players

Grip size is crucial for comfort and control. Junior players typically use grip sizes 1‚ 2‚ or 3‚ while adults prefer 2‚ 3‚ or 4. Proper sizing prevents discomfort and injury‚ ensuring a secure hold and optimal performance.

Standard Grip Sizes for Children and Adolescents

Junior players typically use grip sizes 1‚ 2‚ or 3‚ while adults prefer 2‚ 3‚ or 4. For children‚ grip size is determined by hand size and comfort. Measuring the space between the fingers and heel of the hand ensures proper fit. A correct grip size prevents injury and enhances control. Most juniors transition from smaller grips as their hands grow. Proper sizing is essential for optimal performance and comfort during play.

Importance of Proper Grip Size for Comfort and Performance

Proper grip size is essential for a junior player’s comfort and performance. A grip that’s too small can cause discomfort‚ while one that’s too large may reduce control. Correct sizing ensures a secure hold‚ allowing for better stroke production and reduced risk of injury. It also enhances precision and power‚ enabling players to perform at their best. Selecting the right grip size is vital for long-term enjoyment and success in tennis.

Junior Racquet Size Chart

A junior racquet size chart correlates age‚ height‚ and racquet length‚ providing a clear guide for selecting the appropriate racquet size based on a player’s developmental stage.

Age‚ Height‚ and Racquet Length Correlations

Age‚ height‚ and racquet length are closely linked in selecting the right junior tennis racquet. For children aged 4-5 years‚ a 21-inch racquet suits heights of 100-115 cm. Ages 6-8 years correspond to 23-inch racquets for heights of 115-135 cm. Older juniors aged 9-10 years typically use 25-inch racquets for heights of 135-150 cm. This correlation ensures proper technique development and comfort‚ adapting to the child’s growth and skill level.

Examples of Racquet Sizes for Specific Age Groups

For children aged 4-5 years‚ a 21-inch racquet is recommended‚ suitable for heights of 100-115 cm. Ages 6-8 years typically use a 23-inch racquet‚ designed for heights of 115-135 cm. Older juniors aged 9-10 years often transition to a 25-inch racquet‚ ideal for heights of 135-150 cm. These examples provide a clear starting point for selecting the appropriate racquet size based on age and height‚ ensuring optimal performance and comfort for young players.

  • 4-5 years: 21-inch racquet (100-115 cm height)
  • 6-8 years: 23-inch racquet (115-135 cm height)
  • 9-10 years: 25-inch racquet (135-150 cm height)

This guidance helps tailor racquet selection to a child’s developmental stage‚ promoting proper technique and enjoyment of the game.

Special Considerations for Younger Players

Younger players aged 4-5 years require smaller racquets‚ typically 21 inches‚ with smaller grips for better control and comfort‚ ensuring proper swing development and technique.

  • Age 4-5: 21-inch racquet‚ smaller grip size
  • Lightweight frames for easier handling
  • Designed for developing basic stroke mechanics

Racquet Sizes for Children Aged 4-5 Years

Children aged 4-5 years typically use junior tennis racquets measuring 21 inches in length. This size is ideal for their height and skill level‚ providing better control and swing mechanics. The racquets are designed with shorter handles and lighter frames to accommodate smaller hands and developing strength. Grip sizes for this age group are smaller‚ usually between 0-1‚ ensuring a comfortable hold. Parents should consider the child’s height‚ with most 4-5 year olds falling into the 101-112 cm range‚ aligning with the 21-inch racquet recommendation.

  • Recommended racquet length: 21 inches
  • Grip size: 0-1 for smaller hands
  • Lightweight frames for easier handling
  • Height range: 101-112 cm

Transitioning from Smaller to Larger Racquets

As children grow‚ transitioning to larger racquets is essential for maintaining proper technique and performance. Junior players typically progress from 21-inch racquets (4-6 years) to 23-inch (6-8 years) and eventually 25-inch (8-10 years). This gradual increase aligns with height and strength development‚ ensuring the racquet remains manageable. Parents should monitor their child’s growth and skill level to determine the optimal time for an upgrade‚ avoiding oversized racquets that may hinder control and stroke development.

  • Progress from 21-inch to 23-inch as height and strength increase
  • Final transition to 25-inch racquets for older juniors
  • Monitor growth and skill development for timely adjustments

Advanced Junior Players and Full-Size Racquets

Advanced juniors typically transition to full-size racquets (27 inches) around 12-13 years old‚ offering increased power and control for skilled players ready for adult frames.

When to Transition to a Full-Size Racquet

Transitioning to a full-size racquet typically occurs when a junior player reaches around 12-13 years old‚ with a height of approximately 150cm or taller. This milestone is determined by the player’s strength‚ technique‚ and ability to handle the larger racquet comfortably. Coaches often recommend the switch when the child demonstrates consistent control and power with their current racquet. Moving too early can hinder performance and comfort‚ so it’s essential to assess readiness based on skill level and physical development.

Factors Influencing the Decision to Move to a Larger Racquet

The decision to move to a larger racquet is influenced by several factors‚ primarily the player’s age‚ height‚ and skill level. Typically‚ players transition around 12-13 years old or when they reach about 150cm in height. However‚ physical strength‚ technique mastery‚ and comfort with the current racquet also play significant roles. Coaches often assess whether the player can maintain control and generate power effectively. Personal growth spurts and individual development rates should be considered to ensure the transition is both timely and beneficial for the player’s progress.

How to Choose the Right Racquet for Your Child

Assess your child’s height‚ age‚ and skill level to determine the appropriate racquet size. Ensure proper fit and comfort‚ and consider testing different options before purchasing.

Practical Tips for Fitting and Testing Racquets

When fitting a junior racquet‚ ensure the child can comfortably hold it in their playing hand. Measure hand size to determine the correct grip. Let the child swing the racquet to assess balance and weight. Test the racquet on-court to evaluate maneuverability and control. Encourage the child to play with the racquet for a few minutes to get a feel for it. Consult a coach or fitter for personalized recommendations. Proper fit ensures optimal performance and reduces injury risk.

Role of Personal Preference in Racquet Selection

Personal preference plays a significant role in selecting a junior tennis racquet. While size charts provide guidelines‚ the child’s comfort and feel for the racquet are equally important. Some players may prefer a slightly lighter or heavier racquet‚ depending on their swing style and strength. Allowing the child to test different racquets can help identify their preference‚ ensuring they feel confident and comfortable on the court. This balance between objective sizing and subjective feel is key to optimizing performance and enjoyment. Involving the child in the decision-making process fosters a sense of ownership and enthusiasm for the sport.

Selecting the right junior racquet ensures proper technique and enjoyment. Consider age‚ height‚ and personal preference when choosing. Consult experts and test racquets for the best fit.

Summarizing the Key Points for Selecting the Right Junior Racquet

Choosing the right junior racquet involves considering age‚ height‚ and personal preference. Racquet length ranges from 17 to 25 inches‚ with height being a more reliable guide than age. Proper grip size ensures comfort and performance. Transitioning to larger racquets occurs as the child grows. Testing and fitting are crucial for the best fit. This guide provides a clear framework to help parents and coaches make informed decisions‚ ensuring young players develop proper technique and enjoy the game.

Additional Resources for Further Guidance

For more detailed guidance‚ consult resources like the USTA or ITF websites‚ which offer interactive size guides and expert recommendations. Manufacturer websites‚ such as Wilson or Head‚ provide size charts and fitting tips. Video tutorials on YouTube demonstrate how to measure for the best fit. Local tennis shops often host workshops or offer expert consultations. These resources ensure you make an informed decision tailored to your child’s needs‚ enhancing their tennis experience with the right equipment.

love to dream clothing guide

Welcome to the Love to Dream Clothing Guide‚ your ultimate resource for dressing your baby comfortably and safely for sleep․ Discover how to layer‚ choose fabrics‚ and use TOG ratings to ensure your little one sleeps soundly year-round․

Overview of the Love to Dream Brand

Love to Dream is a world-leading‚ parent-endorsed brand specializing in innovative baby sleep solutions․ Renowned for its self-soothing swaddles and sleepwear‚ the brand empowers families to achieve better sleep․ With a focus on safety‚ comfort‚ and practicality‚ Love to Dream offers a range of products designed for every season and developmental stage․ Their award-winning designs‚ like the Swaddle UP‚ have gained global recognition for improving sleep quality․ Trusted by parents worldwide‚ the brand continues to innovate‚ ensuring your baby’s comfort and your peace of mind․

Importance of Proper Clothing for Baby Sleep

Proper clothing is essential for safe and comfortable baby sleep․ It helps regulate body temperature‚ preventing overheating or overcooling‚ which can disrupt sleep and pose safety risks․ Dressing according to room temperature ensures your baby stays cozy and secure‚ promoting better rest․ Love to Dream’s guide offers tailored recommendations‚ considering factors like TOG ratings and seasonal changes‚ to help you make informed choices․ By dressing your baby appropriately‚ you create a conducive sleep environment that supports their growth and well-being․

Understanding Room Temperature and Clothing Layers

Room temperature directly impacts your baby’s comfort․ Dressing in layers helps regulate their body heat‚ ensuring a safe and cozy sleep environment․ Love to Dream’s guide simplifies this process․

How Room Temperature Affects Baby Clothing Choices

Room temperature plays a crucial role in selecting your baby’s sleepwear․ Warmer rooms require lighter layers‚ while cooler spaces need more insulation․ The Love to Dream guide recommends adjusting clothing based on the season and using TOG ratings for accuracy․ For example‚ in summer‚ a lightweight onesie under a swaddle suffices‚ while winter may require a thermal layer beneath․ Always dress your baby according to the room temperature‚ ensuring comfort and safety․ This approach helps prevent overheating or overcooling‚ promoting better sleep quality․

Using the Love to Dream Clothing Guide for Layering

The Love to Dream Clothing Guide offers a simple layering system to ensure your baby’s comfort․ Start with a base layer like a lightweight onesie‚ add a mid-layer such as a sleepsuit for cooler months‚ and finish with a swaddle or sleep sack․ The guide provides TOG-rated options‚ helping you choose the right combination based on room temperature․ This method ensures your baby stays comfortable‚ preventing overheating or overcooling‚ and promotes restful sleep throughout the year․

TOG Ratings and Baby Sleepwear

TOG ratings measure the warmth of sleepwear‚ helping you choose the right garments for your baby based on room temperature․ Love to Dream uses TOG-rated products to ensure safety and comfort․

What Are TOG Ratings?

TOG (Thermal Overall Grade) ratings measure the warmth of sleepwear‚ indicating how much heat a garment retains․ They range from 0․5 to 4․0‚ with higher ratings for warmer fabrics․ Love to Dream uses TOG ratings to guide parents in selecting appropriate sleepwear for their baby based on room temperature‚ ensuring comfort and safety․ This system helps prevent overheating‚ promoting a safe and restful sleep environment for babies․

How to Use TOG Ratings with Love to Dream Products

TOG ratings help you choose the right warmth for your baby’s sleepwear․ Use Love to Dream’s guide to match TOG levels with room temperature․ For cooler rooms‚ opt for higher TOG-rated sleepwear‚ while lower ratings suit warmer spaces․ Layer clothing according to the season‚ starting with a base layer and adding more as needed․ Refer to Love to Dream’s table for specific recommendations‚ ensuring your baby stays comfortable and safe․ This system makes dressing your baby easy and stress-free‚ promoting better sleep․

Dressing for Different Seasons

Dress your baby according to seasonal changes using lightweight fabrics for summer and layered clothing for winter․ Adjust layers based on room temperature for optimal comfort and safety․

Summer: Lightweight Clothing for Warm Weather

For summer‚ opt for lightweight‚ breathable fabrics to keep your baby cool․ A singlet and nappy beneath the Love to Dream swaddle or sleep sack are ideal․ Choose moisture-wicking materials that allow airflow‚ preventing overheating․ Consider a lightweight jumpsuit for added comfort without extra warmth․ Always check room temperature and adjust layers accordingly․ The Love to Dream guide offers handy recommendations to ensure your baby stays comfortable and safe during warm weather․ Prioritize natural fibers like cotton for optimal breathability and comfort․

Winter: Layering for Cooler Months

During cooler months‚ layering is key to keeping your baby comfortable; Start with a lightweight singlet and add a breathable jumpsuit for warmth․ Use the Love to Dream guide to determine the right layers based on room temperature․ Opt for fabrics like merino wool or cotton for their insulating and breathable properties․ Avoid over-bundling to prevent overheating․ Ensure your baby’s sleepwear is snug but not tight‚ promoting safe and cozy sleep․ Adjust layers as needed to maintain a stable body temperature throughout the night․

The Swaddle UP Method

Benefits of the Swaddle UP for Baby Sleep

The Swaddle UP method offers numerous benefits for baby sleep‚ promoting self-soothing and improving sleep quality․ Its snug fit calms the startle reflex‚ helping babies sleep longer․ The design allows for comfortable movement‚ reducing restrictions․ It also aids in regulating body temperature‚ ensuring safety and comfort․ Many parents report better sleep patterns and less fussiness․ The Swaddle UP is especially praised for its ability to transition smoothly from swaddling to independent sleeping․ It’s a game-changer for peaceful nights and happy mornings․

How to Dress Your Baby for the Swaddle UP

Dressing your baby for the Swaddle UP involves considering room temperature and season․ In warmer weather‚ opt for a lightweight singlet and diaper underneath․ For cooler months‚ layer with a breathable onesie or lightweight jumpsuit․ Ensure fabrics are natural and moisture-wicking to prevent overheating․ Avoid over-layering‚ as the Swaddle UP is designed to regulate temperature․ Use the Love to Dream Clothing Guide to match your baby’s outfit with the TOG rating of their sleepwear‚ ensuring comfort and safety for restful sleep․

Choosing the Right Sleepwear Fabrics

Opt for breathable‚ natural fabrics like cotton or bamboo for comfort and temperature regulation․ Moisture-wicking materials prevent overheating‚ ensuring safe and restful sleep for your baby․

Best Fabrics for Breathability and Comfort

For optimal breathability and comfort‚ choose natural fabrics like cotton‚ bamboo‚ or merino wool․ These materials regulate temperature‚ wick moisture‚ and prevent overheating․ Cotton is soft and gentle on skin‚ while bamboo offers antibacterial properties․ Merino wool is ideal for cooler months‚ providing warmth without trapping heat․ Love to Dream products often blend these fabrics to ensure comfort and safety․ Always opt for lightweight‚ breathable textiles to promote healthy sleep and prevent discomfort․

How Fabric Choice Impacts Sleep Quality

Fabric choice significantly affects sleep quality by influencing comfort and temperature regulation․ Breathable‚ natural fabrics like cotton and bamboo prevent overheating‚ while moisture-wicking materials reduce discomfort․ Soft‚ non-irritating textures promote relaxation‚ ensuring uninterrupted sleep․ Love to Dream emphasizes high-quality‚ skin-friendly fabrics that align with your baby’s needs‚ ensuring a restful and comfortable sleep environment․ The right fabric can enhance sleep duration and quality‚ making it a crucial consideration for your baby’s sleepwear․

Troubleshooting Common Issues

Identify overheating or overcooling by monitoring your baby’s comfort․ Adjust layers according to room temperature and refer to the Love to Dream guide for solutions․

Overheating or Overcooling: How to Adjust

Monitor your baby for signs of overheating‚ such as sweating or flushed skin‚ and overcooling‚ like shivering or cool hands and feet․ Adjust clothing layers based on room temperature․ In summer‚ opt for lightweight fabrics and fewer layers․ In winter‚ add breathable layers without overdoing it․ Refer to the Love to Dream guide for layering recommendations and use TOG ratings to ensure your baby’s sleepwear matches the room’s temperature‚ promoting safe and comfortable sleep․

Signs Your Baby Is Too Hot or Too Cold

Check for signs your baby is too hot‚ such as sweating‚ flushed skin‚ or restless sleep․ If too cold‚ they may shiver or have cool hands and feet․ Monitor room temperature and adjust layers accordingly․ Use the Love to Dream guide to ensure proper clothing for the season․ Avoid overheating‚ as it can increase the risk of discomfort or distress․ Aim for a balanced comfort level to promote safe and restful sleep for your baby․

Safety Tips for Baby Sleepwear

Ensure sleepwear is breathable‚ free from loose threads‚ and fits properly․ Avoid overheating and choose flame-resistant fabrics․ Follow the Love to Dream guide for safe layering․

General Safety Guidelines for Sleep Clothing

Ensure sleepwear is made from breathable‚ natural fabrics to prevent overheating․ Avoid loose threads or small attachments that could pose choking hazards․ Opt for snug fits to reduce the risk of fabric riding up․ Flame-resistant materials are essential for safety․ Never use blankets or loose bedding‚ which can increase suffocation risks․ Choose sleep sacks or swaddles with safety certifications․ Always dress your baby according to room temperature‚ and monitor for signs of overheating‚ such as sweating or flushed skin․

Love to Dream Specific Safety Features

Love to Dream prioritizes baby safety with innovative designs․ Their sleepwear features adjustable arm openings for a secure fit‚ reducing the risk of overheating․ The Swaddle UP design allows natural arm movement‚ promoting self-soothing while preventing the startle reflex․ All fabrics are hypoallergenic and free from harmful chemicals‚ ensuring skin safety․ The products are designed with snug fits to avoid loose fabric‚ aligning with safe sleep guidelines․ Additionally‚ they provide clear TOG ratings and layering charts to help parents dress their babies appropriately for different temperatures‚ ensuring optimal comfort and safety․

Caring for Love to Dream Clothing

Proper care extends the life of Love to Dream clothing․ Wash inside out‚ avoid fabric softeners‚ and reshape while wet․ Gentle cycles and air-drying maintain quality․

Washing and Maintenance Tips

Extend the life of your Love to Dream clothing by washing them inside out to protect the fabric․ Use a gentle detergent without softeners to maintain breathability․ Avoid bleach or harsh chemicals‚ as they may damage materials․ Opt for a gentle washing cycle‚ and reshape garments while wet to prevent shrinking․ Air-drying is recommended to preserve the quality and texture of the fabrics․ Regularly cleaning and storing properly ensures your baby’s sleepwear remains soft and comfortable for longer․

Extending the Life of Your Baby’s Sleepwear

To extend the life of your Love to Dream sleepwear‚ store items in a cool‚ dry place away from direct sunlight․ Avoid over-drying‚ as it can cause fabrics to degrade․ Repair small tears or snags promptly to prevent them from growing․ Rotate sleepwear regularly to ensure even wear and prevent overuse of favorite items․ By following these care practices‚ you can keep your baby’s sleepwear soft‚ comfortable‚ and durable for months to come․

With the Love to Dream Clothing Guide‚ you’re equipped to dress your baby for safe‚ comfortable sleep․ Follow these tips for better rest and happy mornings․

Final Thoughts on the Love to Dream Clothing Guide

Mastering the Love to Dream Clothing Guide ensures your baby’s comfort and safety․ By understanding room temperature‚ TOG ratings‚ and seasonal layering‚ you can create a sleep-friendly environment․ This guide is tailored to empower parents‚ offering practical solutions for every season․ Trust Love to Dream’s expertise to help your baby sleep soundly‚ promoting healthy development and peaceful nights for the whole family․

Encouragement to Follow the Guide for Better Sleep

By following the Love to Dream Clothing Guide‚ you’ll empower your baby with a comfortable and safe sleep environment․ Consistency and attention to detail ensure your little one rests soundly‚ promoting healthy development․ Trust the guide to help you navigate seasonal changes‚ TOG ratings‚ and layering․ With Love to Dream‚ you’re giving your baby the best chance for restful sleep‚ leading to a happier‚ well-rested family․ Start your journey to better sleep today!

fox float x service manual

This manual provides detailed instructions for servicing, maintaining, and optimizing the FOX FLOAT X shock absorber, ensuring peak performance and durability for off-road vehicles.

Overview of the Fox Float X Shock Absorber

The FOX FLOAT X shock absorber is a high-performance suspension component designed for off-road vehicles, offering exceptional durability and reliability. It features advanced internal components, including the EVOL air sleeve, which enhances responsiveness and control. The shock is optimized for a wide range of terrain and driving conditions, providing smooth damping and consistent performance. Its nitrogen-charged design ensures thermal stability, while the adjustable valving allows for personalized tuning. Regular maintenance, as outlined in the service manual, is essential to maintain its performance and extend its lifespan. This manual provides detailed guidance for servicing and optimizing the FLOAT X.

Importance of Proper Maintenance and Servicing

Proper maintenance and servicing of the FOX FLOAT X are crucial for ensuring optimal performance, reliability, and longevity. Regular inspections and replacements of seals and O-rings prevent leaks and maintain damping consistency. Cleaning and lubricating moving parts reduce friction and wear. Following recommended service intervals and using genuine FOX parts guarantees safety and performance. Neglecting maintenance can lead to reduced control, increased wear, and potential system failure. This manual provides clear, step-by-step instructions to guide users through essential maintenance procedures, ensuring their suspension system operates at its best in all conditions.

Key Components of the Fox Float X

The FOX FLOAT X features a robust shock body, internal damping components, and the innovative EVOL air sleeve, designed to enhance performance and durability in off-road conditions.

Understanding the Shock Body and Internal Parts

The FOX FLOAT X shock body houses critical components like the damping piston and valve assemblies, which regulate fluid flow for precise control. The EVOL air sleeve enhances responsiveness by increasing air volume, improving small-bump sensitivity. Internal parts, including seals and O-rings, ensure proper pressure and fluid containment. Regular inspection and maintenance of these components are essential to prevent leaks and maintain optimal performance. Proper lubrication and alignment of internal parts are vital for smooth operation and longevity of the shock absorber.

Role of the EVOL Air Sleeve and Its Benefits

The EVOL (Extra Volume) air sleeve in the FOX FLOAT X increases air volume, enhancing small-bump sensitivity and responsiveness. This design improves traction and control on varied terrain, particularly in off-road conditions. The EVOL technology allows for better damping performance, providing a smoother ride and increased confidence. Its larger volume also reduces the risk of bottoming out, making it ideal for aggressive riding. The EVOL sleeve is a key innovation that sets the FLOAT X apart, delivering exceptional performance and reliability for demanding off-road applications.

Safety Precautions and Recommendations

Always wear protective gear and ensure the shock is neutral. Use correct tools to avoid damage or injury during servicing.

Essential Safety Measures Before Servicing

Safety is paramount when servicing the Fox Float X. Always wear protective gear, including gloves and goggles, and ensure the workspace is clean and well-lit. Before starting, inspect the shock for damage or leaks. Never attempt servicing if the shock is stuck or under pressure. Use only Fox-approved tools to avoid damaging components. Ensure the shock is in a neutral state, free from external forces. If unsure, consult the manual or seek professional assistance. Proper preparation prevents accidents and ensures a successful service. Always follow Fox’s guidelines for safe handling and maintenance.

WARNING: Avoiding Common Mistakes During Service

  • Never attempt to service a FOX Float X shock absorber if it is stuck or under pressure, as this can lead to serious injury or damage.
  • Incorrect placement of O-rings or seals can result in leaks and poor performance, emphasizing the need for precise installation.
  • Avoid using unauthorized tools or methods, as they may void the warranty or compromise the shock’s integrity.
  • Always follow the manual’s instructions and use genuine FOX parts to ensure safety and optimal functionality.
  • Improper handling or disregard of safety measures can lead to system failure and potential accidents.

Installation and Removal Guidelines

Always follow vehicle-specific instructions for installing or removing the FOX Float X shock absorber. Ensure proper preparation and inspection of components before and after servicing.

Step-by-Step Instructions for Removing the Shock

  • Wash and dry the vehicle to ensure a clean working environment.
  • Inspect the shock absorber for any visible damage or leaks.
  • Locate the mounting points and prepare the necessary tools.
  • Release the air pressure if applicable, ensuring the shock is not under tension.
  • Gently remove the shock absorber from the vehicle’s suspension system.
  • Store the shock in a safe, upright position to prevent oil migration.
  • Avoid pulling or forcing the shock, as this may cause internal damage.
  • Refer to your vehicle’s service manual for specific torque and alignment specifications.

Always wear protective gear and ensure the shock is not in a stuck or pressurized state before servicing. Improper removal can lead to damage or safety risks.

Vehicle-Specific Installation Instructions

Installation of the FOX FLOAT X shock absorber varies depending on your vehicle’s make and model. Always consult your vehicle’s service manual for precise mounting points and torque specifications.

  • Ensure the shock is properly aligned with the suspension components.
  • Tighten all bolts and nuts to the recommended torque values.
  • Re-check the installation for any misalignment or loose connections.
  • Test the suspension by applying gentle pressure to ensure smooth operation.

Incorrect installation can lead to poor performance or damage. If unsure, consult a professional mechanic or FOX-certified technician for assistance.

Maintenance and Inspection Procedures

Regular maintenance is crucial for optimal performance. Clean the shock absorber, inspect seals, and check for leaks. Replace worn parts promptly. Follow FOX’s recommended service intervals. Ensure reliability and peak performance.

Recommended Service Intervals for Optimal Performance

Regular servicing is essential to maintain the FOX FLOAT X’s performance and durability. Shock absorbers should be serviced every 50-100 hours of riding or annually, whichever comes first. Clean the shock body and inspect seals for wear or damage. Replace seals and O-rings as needed to prevent leaks. Always follow FOX’s recommended service intervals and guidelines to ensure reliability. Refer to your vehicle’s service manual for specific instructions tailored to your setup. Proper maintenance ensures consistent damping and optimal suspension function over time.

How to Inspect and Replace Shock Seals and O-Rings

Inspect the shock seals and O-rings for signs of wear, damage, or leaks. Clean the area thoroughly before servicing. Use specialized tools to remove the seal head and access the internal components. Replace worn or damaged seals and O-rings with genuine FOX parts. Properly lubricate and align the new components during reassembly. Ensure all parts are securely tightened to prevent leaks. If unsure, consult the FOX service manual or a certified technician for assistance. Regular replacement ensures optimal performance and longevity of the shock absorber.

Troubleshooting Common Issues

Identify and address issues like leaks, reduced performance, or sticking shocks. Consult the manual for diagnostic steps and solutions to restore optimal function and reliability.

Identifying and Resolving Leaks or Performance Problems

Leaks or performance issues with the FOX FLOAT X often stem from damaged seals or incorrect nitrogen charging. Regularly inspect the shock seals and o-rings for wear or damage. If a leak is detected, clean the area with soapy water to identify the source. Performance problems may arise from improper valving adjustments or insufficient nitrogen pressure. Refer to the service manual for detailed diagnostic steps and repair procedures. Always replace worn components with genuine FOX parts to ensure reliability and optimal performance. Proper maintenance and timely repairs are critical to extending the lifespan of the shock absorber.

Diagnosing Stuck or Malfunctioning Shocks

A stuck or malfunctioning FOX FLOAT X shock absorber can significantly impair vehicle performance. Always begin by visually inspecting for external damage or debris. If the shock fails to move freely, it may indicate internal component failure or excessive dirt accumulation. NEVER attempt to disassemble a stuck shock, as this can cause further damage. Instead, contact a certified FOX service technician for professional diagnosis and repair; Regular maintenance, including seal inspections and nitrogen charging, can prevent such issues. Proper servicing ensures the shock operates smoothly and reliably under various conditions;

Advanced Rebuild and Tuning

This section provides a comprehensive guide for advanced users, detailing the FOX FLOAT X rebuild process, including precise instructions for disassembly, inspection, and reassembly, ensuring optimal performance and reliability with genuine parts and specialized tools.

Detailed Rebuild Instructions for the Fox Float X

This section outlines a step-by-step guide for rebuilding the FOX FLOAT X shock absorber, including disassembly, inspection, and reassembly. Start by removing the air sleeve and shock shaft, then clean and inspect all components for wear or damage. Replace seals, O-rings, and bushings with genuine FOX parts to ensure optimal performance. Reassemble the shock carefully, following torque specifications and lubrication recommendations. Charge the shock with nitrogen to the recommended pressure and test for proper function. Always use specialized tools and follow safety protocols to avoid damage or injury. Proper rebuilding ensures improved damping performance and reliability, while incorrect procedures may lead to malfunction or leaks. Consult a professional technician if unsure about any step of the process.

Adjusting Valving and Charging with Nitrogen

Adjusting the valving on the FOX FLOAT X requires precise tuning to match your riding style and terrain. Begin by setting the rebound and compression dials to the middle position. Fine-tune the valving by turning the adjusters clockwise for firmer damping or counterclockwise for softer damping. After adjustments, charge the shock with nitrogen to the recommended pressure using a high-pressure pump. Ensure the valve is properly seated and the system is leak-free. Always use a nitrogen charging kit and follow safety guidelines to avoid over-pressurization, which can damage the shock. Proper valving and nitrogen charging ensure optimal performance and consistency. Always refer to FOX specifications for accurate settings.

dr gundry diet plan pdf

The Dr․ Gundry Diet Plan introduces a revolutionary approach to eating‚ focusing on lectin-free foods and gut health to transform your overall well-being and weight management․

Overview of Dr․ Steven Gundry and His Approach

Dr․ Steven Gundry‚ a renowned heart surgeon‚ developed the Gundry Diet Plan based on his groundbreaking research into lectins‚ a protein found in certain plants․ His approach focuses on eliminating harmful lectins to improve gut health and reduce inflammation․ Gundry’s program emphasizes a lectin-free diet‚ highlighting foods that promote weight loss and overall well-being․ His work challenges conventional dietary wisdom‚ advocating for a personalized eating plan to address individual health needs․ The Gundry Diet Plan PDF guide provides detailed strategies for implementing this approach‚ making it accessible for those seeking transformative health benefits․

The Concept of Lectins and Their Impact on Health

Lectins are a type of protein found in certain plants‚ particularly in grains‚ legumes‚ and nightshades․ According to Dr․ Gundry‚ these compounds can cause inflammation and damage to the gut lining‚ leading to various chronic health issues․ Lectins are often referred to as “anti-nutrients” because they can interfere with nutrient absorption and disrupt the body’s natural balance․ By eliminating high-lectin foods‚ the diet aims to reduce inflammation‚ improve digestion‚ and promote overall well-being․ This approach is central to the Gundry Diet Plan‚ which emphasizes lectin-free eating as a key strategy for long-term health benefits․

Why the Dr․ Gundry Diet Plan is Popular

The Dr․ Gundry Diet Plan has gained popularity due to its unique focus on lectin-free eating and gut health‚ offering a fresh perspective on weight loss and overall wellness․ By eliminating potentially harmful lectins‚ the diet claims to reduce inflammation and improve digestion‚ which resonates with those seeking natural health solutions․ Its clear “yes” and “no” food lists provide simplicity‚ making it easier for individuals to adhere to the plan․ Additionally‚ the diet’s emphasis on reducing chronic disease risks and promoting long-term health benefits attracts those looking for sustainable lifestyle changes․ Dr․ Gundry’s credibility as a renowned expert further enhances its appeal‚ making it a trusted choice for many seeking transformative health outcomes;

Core Principles of the Dr․ Gundry Diet

The diet focuses on eliminating lectins‚ enhancing gut health‚ and personalizing nutrition based on BMI․ It emphasizes a “yes” and “no” food list to guide lectin-free eating and weight management․

Lectin-Free Eating: What It Means

Lectin-free eating involves eliminating foods containing harmful lectins‚ such as grains‚ legumes‚ and certain fruits and vegetables․ These proteins can cause inflammation and gut damage․ Dr; Gundry identifies lectins as key contributors to chronic health issues․ By avoiding them‚ the diet aims to improve digestion‚ reduce inflammation‚ and promote weight loss․ It also emphasizes choosing lectin-free alternatives‚ like pressure-cooked foods‚ to minimize lectin intake․ This approach requires careful food selection but promises improved overall health and well-being․ The focus is on nutrient-dense‚ lectin-free options to support gut health and long-term wellness․

The “Yes” and “No” Food Lists

Dr․ Gundry’s diet plan provides clear “yes” and “no” food lists to guide lectin-free eating․ Foods like olive oil‚ avocado‚ and leafy greens are encouraged‚ while lectin-rich foods such as grains‚ legumes‚ and nightshades are avoided․ The “no” list includes goji berries‚ corn‚ and certain vegetables like tomatoes and peppers․ The “yes” list emphasizes nutrient-dense options like grass-fed meats‚ wild-caught fish‚ and low-sugar fruits․ These lists help users make informed choices‚ ensuring they avoid harmful lectins while enjoying flavorful‚ nutritious meals that support gut health and weight loss․ Adhering to these lists is key to the diet’s success and benefits․

The Role of Gut Health in Weight Management

Gut health plays a central role in weight management‚ as it directly influences digestion‚ nutrient absorption‚ and metabolism․ Dr․ Gundry’s diet emphasizes the importance of healing the gut lining‚ which can be damaged by lectins․ By eliminating harmful lectins and fostering a balanced microbiome‚ the gut functions more efficiently‚ reducing inflammation and promoting sustainable weight loss․ A healthy gut also enhances energy levels and reduces cravings for unhealthy foods‚ making it easier to maintain a lectin-free diet long-term․ This approach not only supports weight management but also overall well-being and immune function․

Benefits of the Dr․ Gundry Diet Plan

The Dr․ Gundry Diet Plan offers improved energy levels‚ better digestion‚ and reduced bloating by eliminating lectins‚ promoting a balanced gut microbiome and overall well-being․

Weight Loss and Improved Body Composition

The Dr․ Gundry Diet Plan aids in shedding excess weight and achieving a leaner physique by eliminating lectins‚ which can disrupt gut health and promote fat storage․ By focusing on lectin-free foods‚ the diet helps restore balance to the gut microbiome‚ enhancing metabolism and reducing inflammation․ Many followers report significant weight loss and improved body composition‚ as the plan targets fat accumulation and promotes a more efficient digestive system․ This approach not only supports weight management but also fosters overall well-being‚ making it a popular choice for those seeking sustainable health benefits․

Enhanced Digestive Health

The Dr․ Gundry Diet Plan emphasizes the importance of gut health by eliminating lectins‚ which can cause inflammation and digestive discomfort․ By focusing on lectin-free foods‚ the diet helps restore balance to the gut microbiome‚ reducing symptoms like bloating and indigestion․ Foods such as olive oil‚ avocados‚ and pressure-cooked legumes are encouraged to promote healing and improve nutrient absorption․ This approach not only alleviates digestive issues but also supports long-term gastrointestinal well-being‚ making it a cornerstone of the diet’s health benefits․

Reduced Inflammation and Chronic Disease Risk

The Dr․ Gundry Diet Plan aims to minimize inflammation by eliminating lectins‚ which are known to trigger inflammatory responses in the body․ By avoiding problematic foods like grains and legumes‚ the diet helps reduce inflammation‚ a key contributor to chronic diseases such as heart disease‚ diabetes‚ and arthritis․ The focus on gut health further supports the immune system‚ lowering overall disease risk․ This approach not only addresses immediate symptoms but also promotes long-term well-being by targeting the root causes of inflammation and metabolic dysfunction․

Implementing the Dr․ Gundry Diet Plan

Implementing the Dr․ Gundry Diet involves calculating your BMI‚ setting realistic goals‚ and adhering to a lectin-free eating plan with guided meal strategies for success․

How to Calculate Your BMI and Set Goals

Calculating your BMI is a straightforward process using the formula: BMI = weight (kg) / height (m)²․ Once calculated‚ refer to the Dr․ Gundry Diet Plan guide (page 50) to interpret your results․ Setting realistic goals is crucial for success․ Aim for gradual weight loss and improved body composition․ Discuss your BMI and goals with a healthcare provider to create a personalized plan․ Tracking progress and celebrating milestones will help maintain motivation․ Dr․ Gundry emphasizes the importance of realistic expectations and steady progress for long-term success on the lectin-free diet․

Sample Meal Plans and Recipes

The Dr․ Gundry Diet Plan offers detailed sample meal plans‚ making it easy to incorporate lectin-free eating into your daily routine․ Recipes focus on approved foods‚ such as leafy greens‚ avocado‚ olive oil‚ and grass-fed meats‚ while avoiding lectin-rich foods like grains and legumes․ Breakfast options include recipes like spinach omelets‚ while lunches and dinners feature dishes like grilled salmon with roasted vegetables․ Snacks are simple‚ such as celery sticks with almond butter․ These meal plans are structured to keep you satisfied and on track‚ ensuring a seamless transition to a lectin-free lifestyle․ The guide also provides creative ways to reinvent favorite meals․

Foods to Eat and Avoid: A Comprehensive Guide

Foods to Eat and Avoid: A Comprehensive Guide

The Dr․ Gundry Diet Plan provides a clear list of foods to eat and avoid‚ focusing on eliminating lectins․ Foods to eat include leafy greens‚ cruciferous vegetables‚ avocados‚ olive oil‚ and grass-fed meats․ Pressure-cooked legumes‚ like lentils‚ are also allowed in moderation․ Foods to avoid include high-lectin foods such as grains‚ beans‚ nightshades (e․g․‚ tomatoes‚ peppers)‚ and seed oils․ The guide emphasizes avoiding processed foods and sugary snacks to reduce inflammation and improve gut health․ By following this structured list‚ dieters can make informed choices‚ ensuring a lectin-free diet that supports weight loss and overall well-being․ This comprehensive guide simplifies meal planning․

The Dr․ Gundry Diet Plan PDF Guide

The Dr․ Gundry Diet Plan PDF Guide is a comprehensive resource offering detailed food lists‚ meal plans‚ and tips for adhering to a lectin-free lifestyle․ It helps users identify harmful foods‚ optimize gut health‚ and achieve sustainable weight loss through structured guidelines and expert advice from Dr․ Gundry․

What’s Included in the PDF?

The Dr․ Gundry Diet Plan PDF Guide provides a detailed roadmap for adopting a lectin-free lifestyle․ It includes comprehensive food lists‚ separating “yes” and “no” foods‚ along with sample meal plans and recipes to simplify daily eating․ The guide also offers tips for long-term adherence‚ strategies to enhance gut health‚ and methods to calculate BMI for setting realistic weight-loss goals․ Additionally‚ it highlights the importance of avoiding harmful lectins and introduces superfoods that support overall well-being․ This resource is designed to make the diet accessible and sustainable for everyone․

Tips for Adhering to the Diet Long-Term

For long-term success on the Dr․ Gundry Diet‚ focus on meal planning and prepping to avoid impulsive choices․ Incorporate lectin-free alternatives into favorite recipes to maintain variety․ Stay hydrated and listen to your body’s hunger cues to prevent overeating․ Build a support system‚ such as joining a community group‚ to share challenges and successes․ Celebrate small victories to stay motivated‚ and consult with a healthcare provider to tailor the plan to your needs․ Consistency and patience are key to achieving lasting benefits from this diet․

Criticisms and Misconceptions

Some critics argue that the Dr․ Gundry Diet oversimplifies health issues by blaming lectins‚ lacking robust scientific evidence․ Others question its restrictive nature and potential nutritional gaps․

Addressing Skepticism About Lectin-Free Diets

While some critics question the scientific basis of lectin-free diets‚ Dr․ Gundry argues that lectins can cause inflammation and gut damage‚ contributing to chronic diseases․ Skeptics point out that lectins are naturally occurring and not entirely harmful‚ as some foods with lectins‚ like beans‚ are traditionally considered healthy․ However‚ Dr․ Gundry counters by emphasizing that proper preparation‚ such as soaking and cooking‚ can reduce lectin content․ He also highlights success stories from followers who report improved health and weight loss․ The diet remains controversial‚ but its focus on gut health and inflammation aligns with emerging research on digestive well-being․

Debunking Common Myths

One common myth is that the Dr․ Gundry Diet is overly restrictive‚ but it actually emphasizes a balanced approach with plenty of delicious options․ Critics also claim it lacks scientific backing‚ yet Dr․ Gundry cites research linking lectins to inflammation․ Another misconception is that the diet is only for weight loss‚ but its focus on gut health and chronic disease prevention makes it a holistic choice․ While skepticism exists‚ many followers report improved energy and reduced symptoms of autoimmune conditions․ The diet’s flexibility and emphasis on whole foods make it a sustainable option for long-term health․

hong kong travel guide map

Hong Kong, a vibrant global city, blends East and West, offering stunning skylines, diverse cultural experiences, and world-class attractions. A must-visit destination for travelers seeking unique adventures.

Overview of Hong Kong as a Global City

Hong Kong, a global financial hub, seamlessly blends East and West, offering a dynamic cityscape and vibrant culture. Its strategic location makes it a gateway to China, attracting international business and tourism. The city’s skyline, dominated by skyscrapers, reflects its economic prowess. With excellent connectivity, Hong Kong is a melting pot of diverse experiences, from bustling streets to serene natural landscapes, making it a unique destination for travelers and professionals alike.

  • A global financial and cultural hub.
  • Strategic location as China’s gateway.
  • Blend of modernity and tradition.

Historical and Cultural Significance

Hong Kong’s rich history as a British colony and its handover to China in 1997 have shaped its unique cultural identity. The city seamlessly blends ancient traditions with modernity, offering a fascinating mix of East and West. From traditional temples like Che Kung and Wong Tai Sin to vibrant festivals, Hong Kong’s cultural heritage is a testament to its diverse influences. Its history as a gateway between East and West has created a dynamic, cosmopolitan society.

Regions of Hong Kong

Hong Kong is divided into four main regions: Kowloon, Hong Kong Island, New Territories, and Lantau Island. Each offers unique cultural, historical, and natural experiences for travelers to explore.

Kowloon Peninsula

Kowloon Peninsula is a vibrant region known for its bustling streets, shopping districts, and cultural landmarks. Located across Victoria Harbour from Hong Kong Island, it offers stunning skyline views and diverse attractions. Tsimshatsui is a popular area for shopping and dining, while Wong Tai Sin Temple provides a glimpse into traditional culture. The Salisbury ౼ YMCA of Hong Kong, situated on Salisbury Road, is a notable accommodation option. Kowloon’s dynamic energy makes it a must-visit destination.

Hong Kong Island

Hong Kong Island is the heart of the city, renowned for its iconic skyline and vibrant neighborhoods. Central is the financial hub, while Causeway Bay and Wan Chai offer shopping and dining. The island is also home to Victoria Peak, offering panoramic views. Lan Kwai Fong and SoHo are popular for nightlife. The Central and Western Heritage Trail highlights historical sites, showcasing the island’s rich cultural heritage; A must-explore destination for any traveler.

New Territories

The New Territories offer a mix of history, nature, and culture. Home to traditional walled villages, temples like Che Kung Temple, and scenic hiking trails, it’s a gateway to Hong Kong’s heritage. The region also features modern developments and the Hong Kong International Airport, making it a blend of old and new. Explore the great outdoors and rich history, with accessible transportation links connecting it to the rest of the city.

Lantau Island

Lantau Island is a gateway to Hong Kong’s natural beauty and iconic attractions. Home to the Hong Kong International Airport, it also features the Big Buddha statue at Po Lin Monastery and Hong Kong Disneyland. The island offers scenic hiking trails, such as the Lantau Trail, and stunning beaches. Visitors can explore traditional villages or enjoy family-friendly entertainment. Accessible by MTR and ferry, Lantau Island blends spirituality, adventure, and leisure, making it a must-visit destination.

Transportation in Hong Kong

Hong Kong’s transportation network is efficient, with the MTR metro, extensive bus services, ferries, and taxis providing seamless connectivity. A well-connected city for travelers.

MTR Metro System

The MTR metro system is Hong Kong’s primary public transportation network, offering efficient and reliable service. It covers extensive routes, including the Airport Express and Disneyland Resort lines. The MTR map is color-coded for easy navigation, with clear signs in English and Chinese. Tourists can use the MTR tourist map to plan routes, ensuring seamless travel across the city. It is a convenient and affordable way to explore Hong Kong’s attractions.

Bus Network

Hong Kong’s bus network is extensive, covering all regions with routes like A21 connecting major hubs. It complements the MTR, serving areas the metro doesn’t reach. Clear route maps and stops make it user-friendly for tourists. The network is an affordable and efficient way to explore the city, including remote areas, ensuring comprehensive coverage for travelers.

Ferry Services

Hong Kong’s ferry services are a vital transportation link, connecting the city center with outlying islands. Key routes include the Central to Tsim Sha Tsui Star Ferry and services to Lantau and Lamma Islands. Ferries offer a scenic way to travel, with options ranging from standard to premium classes. Schedules and maps are widely available, making it easy for tourists to navigate. Ferries are an essential and picturesque part of exploring Hong Kong’s diverse regions.

Taxis and Ride-Hailing

Taxis are a convenient and widely available transport option in Hong Kong, with clear fare meters and English-speaking drivers. Ride-hailing services like Uber also operate, offering an alternative with user-friendly apps. Both options provide door-to-door convenience, ideal for navigating the city. Detailed maps and guides help travelers plan routes efficiently, ensuring a seamless experience. Taxis and ride-hailing services are essential for exploring Hong Kong’s diverse neighborhoods and attractions with ease and flexibility.

Main Attractions and Landmarks

Hong Kong boasts iconic landmarks like Victoria Peak, offering breathtaking city views, and Wong Tai Sin Temple, a vibrant cultural site. Disneyland and bustling streets captivate visitors.

Victoria Peak

Victoria Peak, the highest point on Hong Kong Island at 552 meters, offers breathtaking panoramic views of the city skyline and harbor. A popular tourist attraction, it features a historic funicular tram ride to the summit. Visitors can enjoy stunning vistas, lush greenery, and a relaxing escape from the city’s hustle. The peak is perfect for photography enthusiasts and those seeking unforgettable views of Hong Kong’s iconic landscape.

Wong Tai Sin Temple

Wong Tai Sin Temple, a renowned Taoist shrine in Kowloon, is famous for its ornate architecture and lush gardens. Dedicated to the god of healing, it attracts millions seeking divine guidance. The temple complex includes fortune-telling booths and traditional ceremonies. Visitors can explore its vibrant halls, watch rituals, and enjoy the serene atmosphere. A must-visit cultural site, it offers insights into Hong Kong’s spiritual heritage and daily life, blending tradition with modernity seamlessly.

Hong Kong Disneyland

Hong Kong Disneyland, located on Lantau Island, is a magical theme park offering immersive Disney experiences. With themed lands like Adventureland and Fantasyland, it features attractions such as Big Thunder Mountain and It’s a Small World. The park also hosts spectacular evening shows like Disneyland Illuminations. A must-visit for families and Disney fans, it combines thrilling rides, live performances, and unique Disney storytelling, making it a highlight of any Hong Kong itinerary.

Practical Maps for Travelers

Essential maps like the Hong Kong Tourist Map, Street Map, and MTR Map help navigate the city. They highlight key attractions, streets, and transport routes efficiently.

Hong Kong Tourist Map

A comprehensive guide for visitors, the Hong Kong Tourist Map highlights major attractions, streets, and transport features. It includes detailed information on popular destinations, cultural landmarks, and scenic spots, ensuring travelers can explore the city with ease. The map is available in both digital and print formats, making it a convenient tool for planning itineraries and navigating Hong Kong’s vibrant neighborhoods effectively.

Hong Kong Street Map

The Hong Kong Street Map provides a detailed layout of the city’s roads, streets, and neighborhoods. It helps travelers navigate the intricate network of urban pathways, from bustling districts like Central and Causeway Bay to quieter areas. The map is essential for pedestrians and drivers alike, offering a clear view of key landmarks, bus routes, and MTR stations, ensuring efficient exploration of Hong Kong’s diverse regions and hidden gems.

Hong Kong MTR Map

The Hong Kong MTR Map is an essential tool for navigating the city’s efficient metro system. It details all MTR lines, including the Tsuen Wan, Tung Chung, and Island lines, along with station locations and transfer points. The map is color-coded for easy readability, helping travelers plan routes and explore destinations like Victoria Peak and Hong Kong Disneyland. It also highlights key stations near major attractions, ensuring seamless travel across the city.

Cultural Experiences

Hong Kong offers a rich cultural blend, featuring traditional temples, vibrant markets, and festivals that showcase its unique heritage and modern influences.

Festivals and Celebrations

Hong Kong’s vibrant festivals showcase its rich cultural heritage. The Lunar New Year features dazzling parades and fireworks, while the Dragon Boat Festival highlights thrilling races. Mid-Autumn Festival brings lantern-filled streets, and the Hong Kong Book Fair attracts literature lovers. These events offer unforgettable experiences, blending tradition with modern flair, making Hong Kong a captivating destination year-round.

Markets and Shopping

Hong Kong is a shopper’s paradise, offering a mix of bustling street markets and upscale malls. Visit Ladies’ Market for affordable fashion and souvenirs, while Temple Street Market delights with antiques and street food. For luxury, Victoria Dockside and IFC Mall feature high-end brands. Explore local crafts at PMQ and discover unique gems in Cat Street. Hong Kong’s diverse shopping scene caters to all tastes and budgets, making it a retail haven.

Museums and Galleries

Hong Kong’s museums and galleries showcase its rich cultural heritage and artistic vibrancy. The Hong Kong Museum of History offers insights into the city’s past, while M+ Museum features contemporary art. The Hong Kong Art Gallery highlights local and international works. These cultural spaces provide a deeper understanding of Hong Kong’s identity, blending tradition and modernity. Visitors can explore interactive exhibits, historical artifacts, and innovative installations, making them a must-visit for art and history enthusiasts.

Dining in Hong Kong

Hong Kong offers a culinary paradise, blending Cantonese cuisine, street food, and international flavors. Iconic dishes like dim sum and roast goose delight food enthusiasts, while vibrant markets and seafood restaurants showcase the city’s gastronomic diversity.

Popular Restaurants

Hong Kong’s dining scene offers iconic spots like The Salisbury ⎯ YMCA of Hong Kong and Mini Hotel Causeway Bay, known for their central locations and diverse menus. These restaurants cater to both locals and tourists, serving a mix of Cantonese cuisine, fresh seafood, and international dishes. Whether you’re exploring Tsimshatsui or Causeway Bay, these eateries provide a taste of Hong Kong’s culinary excellence, blending tradition with modern flavors in a vibrant setting.

Street Food and Markets

Hong Kong’s street food and markets offer a vibrant culinary experience. Explore Temple Street Night Market and Ladies’ Market for authentic local delicacies like roast goose and congee. These bustling spots provide a taste of traditional Cantonese flavors and modern fusion dishes. With easy access via public transport, they are must-visit destinations for food enthusiasts, offering a unique blend of culture, cuisine, and lively atmosphere in the heart of the city.

Day Trips from Hong Kong

Discover nearby destinations like Macau and Shenzhen, offering unique cultural experiences, theme parks, and shopping. Perfect for exploring beyond Hong Kong’s vibrant city life.

Macau

Macau, a historic and vibrant destination, offers a blend of Portuguese heritage and Chinese culture. Explore iconic landmarks like the Ruins of St. Paul’s and Senado Square. Enjoy the glitz of casinos, savor Macanese cuisine, and visit the Macau Tower for thrilling views. A short ferry ride from Hong Kong, Macau is perfect for a day trip, combining history, entertainment, and cultural experiences in one unforgettable journey.

Shenzhen

Shenzhen, a bustling metropolis just across the border, offers a mix of modernity and culture. Visit the iconic Shenzhen Tower for panoramic views, explore the vibrant Dafen Village for art, and enjoy the city’s theme parks. As a tech hub, Shenzhen showcases China’s innovation. Easily accessible by train or ferry from Hong Kong, it’s a great day trip for shopping, dining, and experiencing China’s rapid development firsthand.