The Honeywell Vision Pro 8000 is a cutting-edge thermostat designed for precise temperature control and energy efficiency. This user-friendly device offers advanced features and a comprehensive installation guide to ensure seamless setup and operation.
1.1 Overview of the Honeywell Vision Pro 8000 Thermostat
The Honeywell Vision Pro 8000 is a state-of-the-art thermostat designed for energy efficiency and precise temperature control. It features a user-friendly interface, advanced scheduling options, and compatibility with various HVAC systems. The device is equipped with smart home integration capabilities, allowing for remote monitoring and control. Its sleek design and intuitive navigation make it a popular choice for modern homes. The thermostat also includes energy-saving settings to optimize heating and cooling performance, ensuring comfort while reducing energy consumption.
1.2 Importance of Proper Installation
Proper installation of the Honeywell Vision Pro 8000 thermostat is crucial for optimal performance and energy efficiency. Incorrect wiring or setup can lead to mechanical failures, safety hazards, or reduced system efficiency. Ensuring all connections are secure and following the installation manual carefully guarantees reliable operation. Proper installation also prevents potential issues like inaccurate temperature control or malfunctioning features. It is essential to adhere to the guidelines provided in the manual to maximize the thermostat’s capabilities and ensure a safe, efficient, and comfortable heating and cooling experience.
System Requirements and Compatibility
The Honeywell Vision Pro 8000 requires compatibility with compatible HVAC systems, electrical specifications, and software versions. Ensure your system meets these requirements for optimal performance.

2.1 Compatible HVAC Systems
The Honeywell Vision Pro 8000 is designed to work with a variety of HVAC systems, including forced air, heat pumps, and radiant floor systems. It is also compatible with dual-fuel systems, ensuring versatile performance across different heating and cooling configurations. Proper compatibility ensures efficient temperature control and energy savings. Always verify your HVAC system’s specifications to confirm compatibility before installation. This ensures optimal performance and avoids potential operational issues.
2.2 Electrical Requirements
The Honeywell Vision Pro 8000 requires a 24V AC power supply, ensuring compatibility with most standard HVAC systems. A common wire (C-wire) is necessary for continuous power, especially for smart features. Proper wiring connections are critical to avoid electrical issues. Always disconnect power before installation to prevent hazards. Verify your system’s electrical specifications to ensure compatibility. If unsure, consult a licensed electrician to guarantee safe and proper installation. Adhering to these requirements ensures optimal performance and prevents potential malfunctions.
2.3 Software and Firmware Compatibility
The Honeywell Vision Pro 8000 is compatible with the latest Honeywell Home software and firmware versions. Regular firmware updates ensure enhanced performance and new features. The thermostat integrates seamlessly with smart home systems like Amazon Alexa and Google Home. Compatibility with mobile apps allows remote control and scheduling. Ensure your system runs the most recent firmware for optimal functionality. Updates are typically automatic but can be manually triggered if needed. Always verify software compatibility before installation to avoid operational issues.
Pre-Installation Steps
Pre-installation steps are essential for a successful Honeywell Vision Pro 8000 setup. Proper preparation ensures a seamless installation process and optimal system performance always.
3.1 Gathering Necessary Tools and Materials
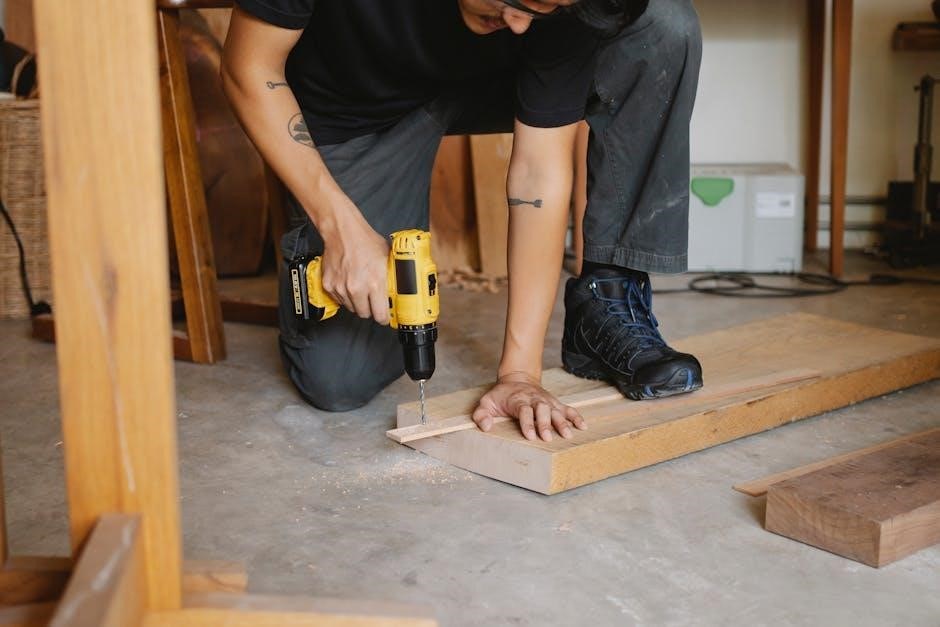
To ensure a smooth installation, gather all required tools and materials beforehand. Essential items include a screwdriver, wire strippers, voltage tester, and drill. Additionally, collect mounting hardware, wires, and any specific components outlined in the Honeywell Vision Pro 8000 manual. Having everything prepared will streamline the process and prevent delays. Always refer to the wiring diagram for specific parts needed for your system configuration.
3.2 Understanding the Wiring Diagram
Understanding the wiring diagram is crucial for a successful installation. The diagram provides a visual representation of the thermostat’s connections, ensuring wires are linked correctly to your HVAC system. Familiarize yourself with the labels and symbols, as they indicate specific terminals and their functions. Misinterpreting the diagram can lead to improper connections, potentially causing system malfunctions. Always cross-reference the diagram with your HVAC system’s configuration to ensure compatibility and safety during the installation process.
3.3 Preparing the Installation Site
Before installing the Honeywell Vision Pro 8000, ensure the installation site is clean and free from obstructions. Turn off the power to your HVAC system at the circuit breaker to avoid electrical hazards. Inspect the area for any existing damage or wear on wires or the wall where the thermostat will be mounted. Gather all necessary tools and materials nearby to streamline the process. A well-prepared site ensures a smooth and efficient installation, reducing the risk of errors or safety issues.
Installation Process
The Honeywell Vision Pro 8000 installation involves mounting the thermostat, connecting wires, and securing components. Follow the step-by-step guide for a smooth and safe setup process.
4.1 Mounting the Thermostat
Begin by turning off the power to your HVAC system. Remove the old thermostat and clean the area. Use the provided mounting bracket to align the Honeywell Vision Pro 8000 with the wall studs. Gently press the thermostat onto the bracket, ensuring it is level. Secure it with screws, making sure not to overtighten. If necessary, use the included spacers for proper alignment. Double-check the thermostat’s position before proceeding to the wiring step. This ensures a stable and accurate installation.
4.2 Connecting the Wires
Start by matching the wires from your old thermostat to the Honeywell Vision Pro 8000. Typically, wires are labeled R, W, Y, G, C, and sometimes O or B. Ensure the power to your HVAC system is off. Connect the R wire to the R terminal, W to W for heating, Y to Y for cooling, G to G for the fan, and C to the common terminal. If present, connect O or B wires for heat pump or reversing valve functionality. Secure all connections firmly to avoid loose wires, which can cause malfunctions. After wiring, restore power and test the system to confirm proper operation.
4.3 Securing the Wiring and Components
Once all wires are connected, secure them using cable ties or clips to keep them organized and prevent damage. Ensure all components are firmly attached to the thermostat and wall to avoid any movement that could disrupt the system. Double-check that no wires are pinched or bent, as this can lead to malfunctions. Properly securing the wiring is essential for the reliable performance and longevity of your Honeywell Vision Pro 8000 thermostat.
Configuration and Setup
The Honeywell Vision Pro 8000 offers a user-friendly configuration process. After installation, power on the device and follow on-screen instructions to set up your preferences, including temperature schedules and system settings. This ensures optimal performance and energy efficiency tailored to your needs.
5.1 Initial Power-On and System Recognition
After installation, power on the Honeywell Vision Pro 8000. The thermostat will perform a self-test, recognizing connected HVAC components. It detects system type (heat, cool, or both) and additional features like humidifiers. Follow on-screen prompts to confirm settings. Ensure all wiring connections are secure for accurate system recognition. Proper initialization is crucial for optimal performance. If issues arise, refer to the wiring diagram or troubleshooting guide. Once recognized, the system is ready for configuration and operation.
5.2 Setting Up the User Interface
After system recognition, navigate the Honeywell Vision Pro 8000’s touchscreen interface to customize settings. Select menu options to adjust temperature units, time format, and display brightness. Choose language preferences and enable features like energy-saving modes. Use the intuitive interface to set up daily schedules or override default settings. Ensure all preferences are reviewed and saved to maintain personalized comfort. The user-friendly design simplifies configuration, making it easy to tailor the thermostat to your needs. Refer to the manual for detailed guidance on interface customization.
5.3 Configuring Heating and Cooling Schedules
Configure heating and cooling schedules by accessing the menu and selecting the scheduling option. Choose between weekday and weekend settings or create custom schedules. Set desired temperatures for specific times to optimize energy use and comfort. Enable energy-saving modes to reduce consumption during off-peak hours. Review and adjust schedules as needed to ensure they align with your daily routine. Save preferences to activate the programmed settings. This feature ensures efficient temperature management while maintaining personalized comfort levels throughout the day.
Wiring Diagrams and Connections
Refer to the Honeywell Vision Pro 8000 wiring diagram for precise connections. Ensure correct wire coloring matches the terminal connections for proper system functionality and safety.
6.1 Standard Wiring Configuration
The Honeywell Vision Pro 8000 requires a specific wiring setup to ensure proper functionality. Refer to the provided wiring diagram for detailed connections. Typically, the thermostat uses color-coded wires, such as R (red) for 24V power, W (white) for heating, and Y (yellow) for cooling. Ensure all wires are securely connected to the corresponding terminals. Follow the diagram carefully to avoid mismatches, as incorrect wiring can lead to system malfunctions. Double-check connections before powering on the system to guarantee safe and efficient operation.
6.2 Optional Wiring for Advanced Features
For enhanced functionality, the Honeywell Vision Pro 8000 supports optional wiring configurations. These include connections for humidification, dehumidification, and remote sensors. The C (common) wire may be required for certain advanced features. Refer to the wiring diagram for specific instructions. Optional wiring allows for integration with smart home systems and additional temperature sensors. Ensure all connections are secure and compatible with your HVAC system. Properly configuring these optional wires can optimize system performance and expand functionality, but incorrect connections may lead to malfunctions. Always follow the manual’s guidelines for advanced setups.
6.3 Troubleshooting Common Wiring Issues
Common wiring issues with the Honeywell Vision Pro 8000 include loose connections, incorrect wire types, and short circuits. Always verify connections match the wiring diagram. If the display shows an error, check for open circuits or reversed polarity. Use a multimeter to test wire continuity. Ensure all wires are securely fastened to avoid malfunctions. If issues persist, consult the manual or contact a professional. Proper troubleshooting ensures reliable performance and prevents potential damage to the system. Always turn off power before inspecting or repairing wiring.
Advanced Features and Customization
The Honeywell Vision Pro 8000 offers advanced customization options, enabling users to tailor temperature settings, energy-saving modes, and smart home integrations for enhanced comfort and efficiency.
7.1 Smart Home Integration
The Honeywell Vision Pro 8000 seamlessly integrates with popular smart home systems, including Amazon Alexa and Google Home. This allows for voice control and centralized management of your HVAC system. Users can also access advanced features through smartphone apps, enabling remote temperature adjustments and energy monitoring. The thermostat’s compatibility with smart home hubs enhances its functionality, offering a unified platform for all smart devices. This integration not only improves convenience but also optimizes energy efficiency, making it a versatile solution for modern homes.
7.2 Remote Access and Control
The Honeywell Vision Pro 8000 offers remote access and control through the Honeywell Home app, allowing users to adjust settings, monitor system performance, and receive notifications from their smartphone. This feature provides unparalleled convenience, enabling users to manage their HVAC system from anywhere. Remote control is particularly useful for optimizing energy usage, as users can adjust temperatures or schedules even when they’re not at home. This functionality enhances comfort and efficiency, making it a key feature for modern smart home solutions.
7.3 Energy-Saving Settings

The Honeywell Vision Pro 8000 offers advanced energy-saving settings to optimize your HVAC system’s efficiency. Features like programmable schedules, energy usage reports, and geofencing allow you to tailor your system’s operation to your lifestyle. The thermostat also includes smart algorithms that learn your preferences and adjust temperatures accordingly. These settings help reduce energy waste and lower utility bills. By enabling features like auto-away mode and smart recovery, you can ensure your system runs efficiently without compromising comfort. Regular updates and insights from the Honeywell Home app further enhance energy-saving capabilities.
Maintenance and Upkeep
Regular maintenance ensures optimal performance of the Honeywell Vision Pro 8000. Clean the thermostat, check for firmware updates, and verify system functionality to maintain efficiency and accuracy.
8.1 Cleaning the Thermostat
Regular cleaning ensures the Honeywell Vision Pro 8000 operates efficiently. Use a soft, dry cloth to gently wipe the display and exterior. Avoid harsh chemicals or liquids, as they may damage the device. Turn off power before cleaning to prevent electrical issues. For stubborn marks, lightly dampen the cloth with water, but ensure no moisture enters the thermostat. Cleaning helps maintain accuracy and extends the product’s lifespan. Always refer to the manual for specific cleaning instructions to avoid voiding the warranty or causing damage.
8.2 Updating Firmware
Regular firmware updates are essential for optimal performance of the Honeywell Vision Pro 8000. To update, ensure the thermostat is connected to Wi-Fi. Access the settings menu, select “Firmware Update,” and follow on-screen instructions. The device will automatically download and install the latest version. During the update, avoid turning off the power. Once complete, the thermostat will restart. Firmware updates enhance functionality, fix bugs, and improve compatibility. Always refer to the installation manual for detailed steps to ensure a smooth update process and maintain system efficiency.
8.3 Regular System Checks
Regular system checks ensure the Honeywell Vision Pro 8000 operates efficiently. Inspect the thermostat’s display for clarity and responsiveness. Verify all wiring connections are secure and free from damage. Check the HVAC system’s performance to ensure proper heating and cooling. Review the thermostat’s settings to confirm they align with your preferences. Additionally, monitor the system’s energy consumption and adjust settings if necessary. Regular checks help maintain optimal performance and prevent potential issues. Always refer to the installation manual for guidance on performing these checks effectively.
Troubleshooting Common Issues
Troubleshooting the Honeywell Vision Pro 8000 involves identifying and resolving issues like display errors, connectivity problems, or temperature control malfunctions. Refer to the manual for step-by-step solutions.
9.1 Display Issues and Error Codes
Display issues on the Honeywell Vision Pro 8000, such as a blank screen or frozen interface, can often be resolved by restarting the device. Error codes like “E1” or “E2” indicate specific problems, such as sensor malfunctions or communication errors. Refer to the manual for a list of error codes and their meanings. If the display remains unresponsive, check wiring connections or perform a factory reset. Ensure the thermostat is properly powered and update firmware if necessary. Consulting the troubleshooting section of the manual is recommended for detailed solutions.
9.2 Temperature Control Problems

Temperature control issues with the Honeywell Vision Pro 8000 may arise from incorrect thermostat settings or sensor malfunctions. Ensure the setpoint is accurately configured and the system is properly calibrated. If the thermostat isn’t reaching the desired temperature, check for drafts or incorrect sensor placement. Verify wiring connections and ensure the HVAC system is functioning correctly. Restarting the thermostat or resetting the schedule may resolve minor glitches. For persistent issues, consult the manual or contact a professional to diagnose and repair any underlying system problems.
9.3 Connectivity and Network Issues
Connectivity problems with the Honeywell Vision Pro 8000 may occur due to unstable Wi-Fi connections or incorrect network configurations. Ensure the thermostat is connected to the correct network and the signal strength is adequate. Restart the thermostat and router to resolve temporary glitches. If issues persist, check for firmware updates or reset the thermostat to factory settings. Verify that the device is properly linked to your smart home system and that all credentials are accurate. Consult the manual for detailed troubleshooting steps to restore connectivity and remote access functionality.
Safety Precautions and Compliance
Ensure electrical safety by disconnecting power before installation. Handle the thermostat carefully to prevent damage. Comply with local regulations and safety standards for proper installation and operation.
10.1 Electrical Safety Guidelines
Always disconnect the power supply before starting installation to avoid electrical shock. Verify the system voltage matches the thermostat’s requirements. Use properly rated tools and avoid touching live wires. Ensure all connections are secure to prevent short circuits. Follow local electrical codes and manufacturer instructions. Keep the area dry to prevent electrical hazards. If unsure, consult a licensed electrician. Proper grounding is essential for safe operation. Never bypass safety features or ignore warning labels. Adhere to these guidelines to ensure a safe and reliable installation process.
10.2 Compliance with Local Regulations
Ensure the Honeywell Vision Pro 8000 installation complies with local electrical and building codes. Verify all applicable regulations and obtain necessary permits. The system must meet regional safety and energy standards. Refer to the manual for specific requirements. Compliance ensures proper functionality and avoids legal issues. Always check for updates to local regulations before proceeding. Proper adherence guarantees a safe and legally compliant installation, aligning with both manufacturer guidelines and local authority standards.
10.3 Emergency Shutdown Procedures
In case of an emergency, immediately switch off the Honeywell Vision Pro 8000 thermostat. Disconnect power at the circuit breaker or fuse box. Ensure the system is completely powered down before attempting any repairs. Refer to the manual for specific shutdown instructions. If issues persist, contact a certified technician. Always prioritize safety and follow proper procedures to avoid potential hazards. Regular maintenance can help prevent emergencies, but knowing shutdown steps is crucial for unexpected situations.
Conclusion and Final Checks
With proper installation complete, ensure the Honeywell Vision Pro 8000 operates efficiently. Verify all settings and perform final checks to confirm system performance and comfort.
11.1 Verifying Proper Installation
After completing the installation, verify that the Honeywell Vision Pro 8000 is correctly mounted and all wires are securely connected. Ensure the thermostat powers on and recognizes the HVAC system. Check for proper display functionality and confirm that all buttons and controls respond correctly. Review the wiring diagram to ensure connections match the manual’s instructions. Verify that the thermostat is level and firmly attached to the wall. Consult the user manual for any specific verification steps to ensure optimal performance and safety.
11.2 Testing System Performance
After installation, test the Honeywell Vision Pro 8000 by running a full system cycle. Check heating, cooling, and fan modes to ensure smooth operation. Verify temperature accuracy by comparing the display with a reliable thermometer. Test transitions between modes to confirm seamless operation. Ensure the user interface responds correctly to input and adjust settings as needed. Check for any error messages or unusual behavior. Perform these tests under normal operating conditions to validate system performance and ensure reliability.
11.3 Finalizing the Setup
Once all tests are successful, save your settings and enable any advanced features. Program your desired heating and cooling schedules for optimal energy use. Review the system configuration to ensure all settings align with your preferences. Perform a final check to confirm that the thermostat is functioning correctly and all features are enabled. Address any minor issues promptly to ensure smooth operation. This completes the setup process, and your Honeywell Vision Pro 8000 is now ready for daily use.